Video Live streaming apps have become a necessity these days. Among the various platforms available, EnableX stands out as a reliable choice for developers to choose for video streaming apps. However, This blog delves deep into the process of building a Video Streaming App using the EnableX Android SDK.
The EnableX Android SDK allows developers to create 1-to-1 or 1-to-many real-time communication (RTC) with the behaviour of Audio/Video applications for Android devices. Therefore, this guide will help developers get started with the EnableX Server APIs and the Android SDK to build an Android video streaming app.
Why Choose EnableX for Best Android Video Live Streaming Apps
EnableX is a versatile platform that offers not one, but two powerful solutions for building Android video streaming applications.
EnableX Android SDK: This SDK simplifies the development of 1-to-1 or 1-to-many RTC (Real-Time Communication) apps for Android. However, It provides Server APIs and tools for creating virtual rooms where users can conduct RTC sessions.
EnableX Android UI Kit: For a streamlined development process, the Android UI Kit offers prebuilt user interface components. Also, it minimizes coding efforts, making integration of EnableX video capabilities efficient and user-friendly.
Experience the best Android SDK for Video Live Streaming Apps
The EnableX Android SDK is your all-in-one solution for Real-Time Communication (RTC) app development on Android. So, whether you’re a novice or an experienced developer, this SDK simplifies RTC app creation.
Why Opt for the EnableX Android SDK for Building Video Live Streaming App?
- Comprehensive Solution: Access Server APIs and tools needed to build RTC apps.
- Seamless Integration: Effortlessly create virtual rooms for RTC sessions.
- User-Friendly: Suited for all skill levels, ensuring a smooth development experience.
- Efficiency: Focus on core functionality without RTC complexities.
- Scalability: Scales from small to large projects.
Getting Started with EnableX Android SDK
Develop your application using the chosen language and according to your specific development requirements.
To develop native Android applications, you must have the related Android SDK Android Studio IDE, and Java SE Development Kit (JDK). Furthermore, Detailed setup instructions can be found in the official documentation for Android development.
Requirements for Android Development
Before beginning the integration of the Android SDK, these steps must be followed.
- Create an account on the EnableX Platform
- Now, Create a video project
- Get App ID and App Key
- Create rooms and generate token
- Download EnableX Android SDK
- Download WebRTC library
- Therefore, Android Studio installed on your development machine
Create an account on the EnableX Platform
- Visit the EnableX portal https://portal.enablex.io.
- Now, Click on Try For Free.
- Fill in the required details: Name, Phone number, Company, email address and check the box for Terms of Service and Privacy Policy.
- Click on Create Your Account.
- A verification email will be sent to the given address. Moreover, verify your account by clicking on the link in this email.
Setting Up Your Video Project for Live Streaming App
To begin developing a video application with EnableX Video Server APIs, the first step is to create a project on the platform. Now, follow these steps to create a project:
- Login to the EnableX Portal.
- After successfully logging in, users are redirected to My Dashboard.
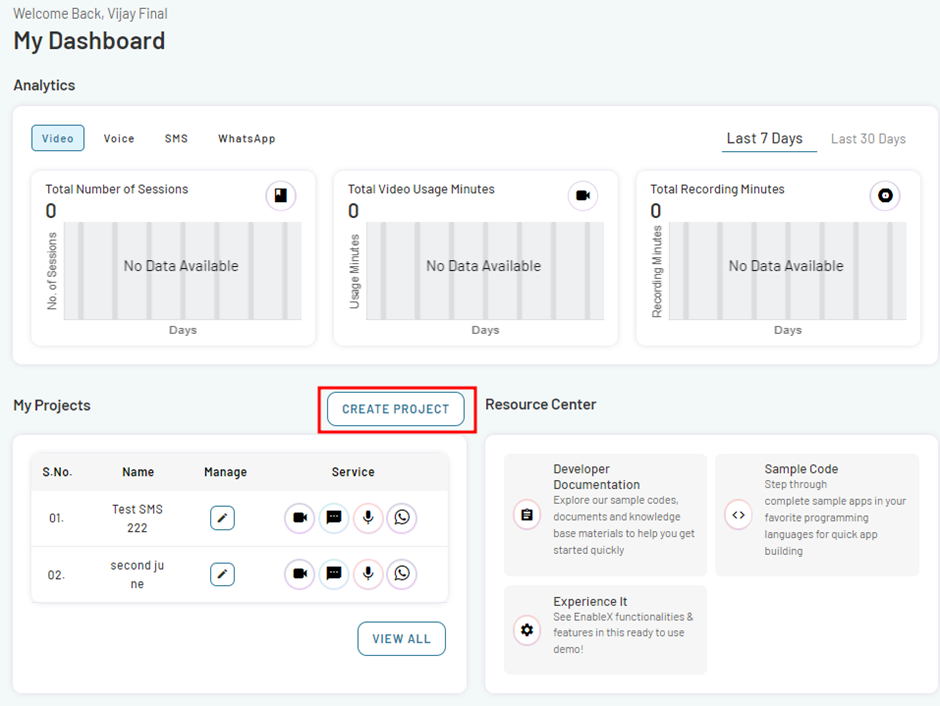
From there, follow these steps to create a new project:
- Navigate My Projects section on the page.
- Click on CREATE PROJECT button. This opens Create Project page.
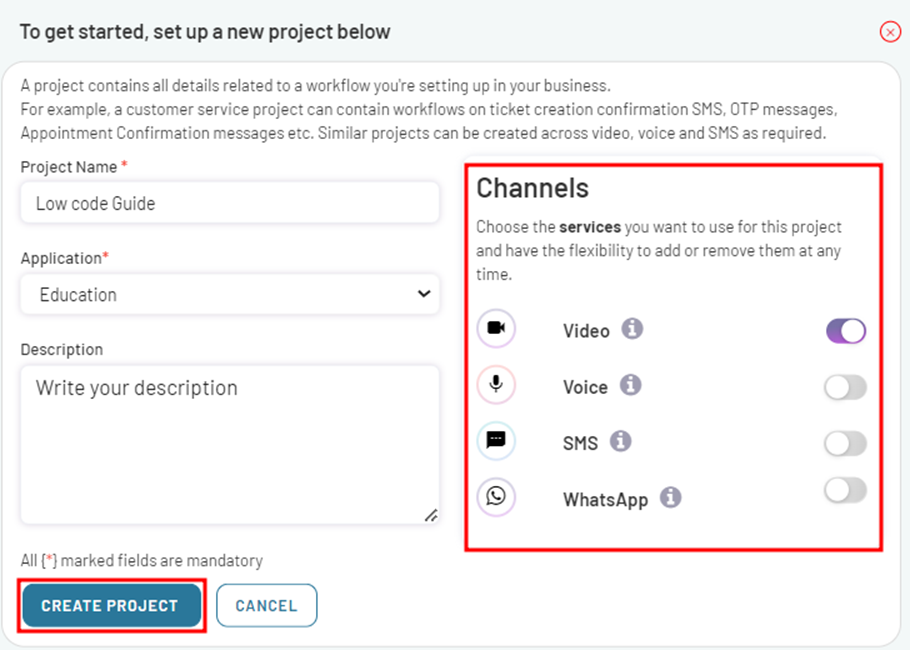
- Provide the necessary information for your project, including the Project Name, Application, and Project Description.
- Also, navigate the Channels section and enable video services for your project.
- Now, Click on CREATE PROJECT button to create your project.
- Therefore, the project has been successfully created and a confirmation popup will appear.
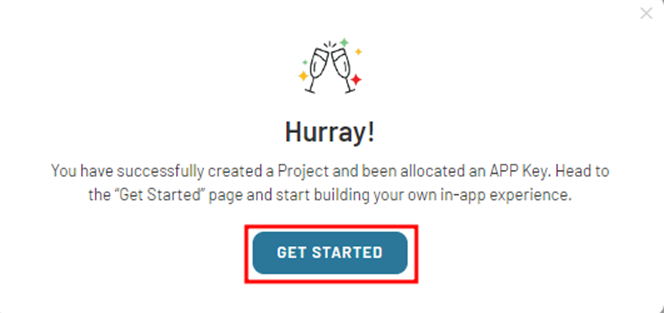
- In the pop-up dialog, click on GET STARTED button.
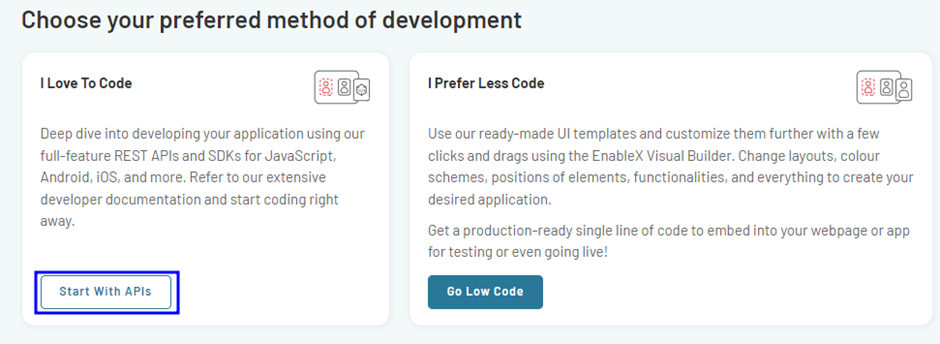
- Select the development method that best fits your preferences and requirements
- Select <I Love To Code> option from the available choices and click on Start With APIs.
Furthermore, this will give you access to the necessary APIs and SDKs for your project, enabling you to begin coding and developing your application with EnableX’s extensive tools and resources.
Get App ID and App Key
Before you embark on your application development journey with the EnableX platform, it is essential to obtain an API Credential. However, this credential includes an App ID and App Key, which serve as the username and password, in the HTTP Base Authentication Request Header of our Video Server API Call.
Therefore, when you create a project, the API Access Credentials are emailed to you.
Note: However, make sure that you use the App ID as the username and the App Key as the password in the HTTP Base Authentication Request Header.
Integrate Android Archive Files for Native Mobile Video Applications
Process-1: Add. aar Files to Your Project
- Get Android SDK: Download the Android SDK and extract it to obtain the necessary .aar file for Android SDK.
- Get WebRTC SDK: Download the WebRTC SDK and extract it to obtain the .aar file for WebRTC SDK.
- Add to lib: Place both downloaded .aar files under the lib folder of your project.
- Edit App’s gradle: However, Open your application’s build.gradle file and add the following code in the dependencies section:
implementation fileTree(dir: "libs", include: ["*.aar"])

implementation('io.socket:socket.io-client:1.0.0') {

        // Exclude org.json provided by Android

    exclude group: 'org.json', module: 'json'

}

implementation 'android.arch.lifecycle:extensions:1.1.1'Process-2: An Alternative Approach to add. aar Files to Your Project
This alternative method involves creating a new directory within your project and organizing the .aar files differently. So, this approach creates a module specifically for adding .aar files, enhancing project organization.
- Create a New Directory: Go to the project root and create a new directory.
- Modify build.gradle File: Add the following code into the build.gradle file within the new directory:
configurations.maybeCreate("default")

artifacts.add("default", file('[nameOfTheAar].aar'))- Place .aar Files: Place both downloaded .aar files into this new directory, next to the build.gradle file.
- Update settings.gradle: Add the newly created directory to the settings.gradle file:
include(":path/new-directory") - Include the Library: Now, include the newly created library into your application:
implementation project(":path/new-directory", configuration = "default")Now, once you integrate the Android archive file, it’s time to define Your required device permissions as per your need and features in your AndroidManifest.xml:
<uses-permission android:name="android.permission.CAMERA"/>

<uses-permission android:name="android.permission.CHANGE_NETWORK_STATE"/>

<uses-permission android:name="android.permission.RECORD_AUDIO"/>

<uses-permission android:name="android.permission.INTERNET" />

<uses-permission android:name="android.permission.ACCESS_WIFI_STATE"/>

<uses-permission android:name="android.permission.ACCESS_NETWORK_STATE"/>

<uses-permission android:name="android.permission.WRITE_EXTERNAL_STORAGE"/>

<uses-permission android:name="android.permission.READ_EXTERNAL_STORAGE"/>

<uses-permission android:name="android.permission.MODIFY_AUDIO_SETTINGS"/>

<uses-permission android:name="android.permission.BLUETOOTH"/>

<uses-permission android:name="android.permission.BLUETOOTH_ADMIN"/>

<uses-feature android:name="android.hardware.camera"/>

<uses-feature android:name="android.hardware.camera.autofocus"/>

<uses-feature android:glEsVersion="0x00020000" android:required="true"/>
Create Virtual rooms and Generate Token
Before diving into the RTC (Real-Time Communication) session, we need to create a token for a specific Room ID. Therefore, this token is crucial for connecting to the EnableX Platform and gaining access to the virtual room where the RTC session will take place.
Create Virtual Room
To create a room, make an HTTP POST request to the following API route: https://api.enablex.io/video/v2/rooms. However, you need to include the necessary parameters and values in the request body, which should be in JSON format. So,for example:
{

  "name": "Topic or Room Title",

  "owner_ref": "xyz",

  "settings": {

    "description": "Descriptive text",

    "mode": "group",

    "scheduled": false,

    "adhoc": false,

    "duration": 30,

    ……….

    ……..


    "role_based_recording": {

      "moderator": "audiovideo",

      "participant": "audio"

    },

    "live_recording": {

      "auto_recording": true,

      "url": "https://your-custom-view-url"

    }

  },

  "sip": {

    "enabled": false

  },

  "data": {

    "custom_key": ""

  }

}
To know more about Create Rooms, please read Create Room to carry out RTC Session .
Generate Token
To create a token for joining an RTC session on the EnableX platform, make a POST request to the API route: https://api.enablex.io/v2/rooms/{room-id}/tokens where {room-id} is the ID of the room you want to join. Therefore, for example:
POST https://api.enablex.io/video/v2/rooms/{room_id}/tokens

Authorization: Basic XXXXXXX

Content-Type: application/json


{

     "name": "User Name",

     "role": "participant",

     "user_ref": "XXX",

     "data": {

        "custom_key": "String",

    "any_key": "String"

     }

}
Upon successful creation, the API will respond with a JSON object containing the result and the generated token (JWT_WEB_TOKEN).
{

     "result": 0,

     "token": "JWT_WEB_TOKEN"

 }
To know more about Token, please read Create Token to join a Room.
Connect to a Room, Initiate & Publish Stream
With the token in hand, you can now connect to the virtual room. Once connected, initiate a local stream and publish it into the virtual room. However, this process involves several steps, and you can follow the detailed documentation on how to connect to a room and initiate the stream.
Play Stream
After successfully connecting and publishing the local stream, we need to display the stream within the app. To achieve this, we use the EnxPlayerView object. However, here’s how you can set up and render the stream:
// Create an EnxPlayerView

private var enxPlayerView: EnxPlayerView? = null

enxPlayerView = EnxPlayerView(this, EnxPlayerView.ScalingType.SCALE_ASPECT_BALANCED, true)

// Attach and render the stream to the player view

localStream!!.attachRenderer(enxPlayerView)

// Add the player view to your desired layout

yourView?.addView(enxPlayerView)
However, for more information on handling player views, refer to the documentation provided- Play Stream.
Handle Server Events
During the RTC session, the EnableX Platform may emit various events related to the ongoing session, triggered by user interactions or other factors. Therefore, to handle these events effectively, we utilize callback methods.
/* Example of Call Back Methods */

/* Call Back Method: onRoomConnected

Handles successful connection to the Virtual Room */

override fun onRoomConnected(enxRoom: EnxRoom?, jsonObject: JSONObject) {

    /* You may initiate and publish stream */

}

/* Call Back Method: onRoomError

 Error handler when room connection fails */

override fun onRoomError(jsonObject: JSONObject) {

}

/* Call Back Method: onStreamAdded

 To handle any new stream added to the Virtual Room */

override fun onStreamAdded(enxStream: EnxStream?) {

    /* Subscribe Remote Stream */

}

/* Call Back Method: onActiveTalkerList

 To handle any time Active Talker list is updated */


 override fun onActiveTalkerList(jsonObject: JSONObject) {

    /* Handle Stream Players */

}
Building a video streaming app for Android using the EnableX Android SDK, coupled with WebRTC library, is a winning combination that empowers developers to create cutting-edge real-time communication applications.
FAQs
What are the prerequisites to build a 1-to-1 RTC Android application using EnableX?
- Your App ID and App Key.
- The Sample Android Client.
- An Application Server set up to provision Web Service API for the Android app.
How can I obtain the App ID and App Key from EnableX for my Android application?
After registering on the EnableX portal, create your application. However, your App ID and App Key will be delivered to your email.
Is there a sample Android client available for testing the video streaming feature?
Yes, you can find the sample Android client on GitHub.
How do I configure my Android client to use the EnableX platform?
Navigate to WebConstants in the app and modify the given settings as per your requirements. Make sure to use your App ID and App Key for authentication.
Can I test the EnableX video streaming on an emulator or simulator?
While you can run the app on an emulator, note that the local stream will not be created. So, It’s recommended to test on a real device.
How do I set up my own application server for the EnableX video streaming feature?
For those wanting to set up their own servers, refer to the sample code provided for NodeJS and PHP. Ensure your Android Client endpoint connects to this server for virtual room creation and token generation.
What is the purpose of the EnableX Android SDK, and where can I get it?
The EnableX Android SDK facilitates communication between Android apps and EnableX servers. You can download the latest version from the EnableX website.
How can I play a video stream in my Android application using EnableX?
To play a video stream, you need to use the EnxPlayerView object within the app. Therefore, this object will render the video stream, providing a seamless user experience.
How do I handle various server events during a video streaming session in my Android app?
The EnableX platform emits numerous events related to the ongoing RTC session. Using callback methods, developers can handle these events. Therefore, for instance, the onRoomConnected method is called when successfully connecting to a virtual room.