Build Native Mobile Video Applications with Ringer UI
Navigating the world of app creation? Want to enhance your user experience with seamless video call notifications? Let’s dive into how the EnableX tool makes it easier than ever. Today, let’s learn how you can build a video calling application with EnableX Video API and our UI Kit.
Why Use EnableX for Video Call Notifications?
EnableX offers an effortless solution for Mobile developers. With the EnableX Calling UI Framework, adding in-app calling becomes a breeze. Whether it’s voice or video calling, you can integrate this feature without breaking a sweat, all thanks to the EnableX UI Kit Framework.
Prerequisites
Before embarking on this journey of video call notification integration, there are a few prerequisites to ensure a seamless experience:
- EnableX developer account: To harness the power of EnableX’s video solutions, you will need a developer account, which you can create for free at enablex.io.
- Background Mode VoIP Feature: Your iOS application must have the VoIP (Voice over Internet Protocol) feature enabled in background mode. This is pivotal for creating a seamless and uninterrupted user experience.
- Custom Notification Service: You need to integrate your very own Notification Service. This step is necessary as EnableX doesn’t provide a built-in notification service.
- Fundamentals of Tech: A basic understanding of mobile development either native or hybrid Typescript, Native Wind and Node.js will be your allies in this endeavour.
- External library: Firebase or any third-party library for push notification Service.
- IDE Familiarity:An integrated development environment (IDE) that supports your development environment like Android Studio/Xcode is recommended.
Native Video Calling App Setup
Develop your application using the chosen language and according to your specific development requirements.
To develop the native applications (Android or IOS), you must have the related SDK (Android SDK or iOS SDK), Android Studio IDE, and Java SE Development Kit (JDK). Detailed setup instructions can be found in the official documentation for Android development and iOS Development.
Create an account on the EnableX Platform
- Visit the EnableX portal https://portal.enablex.io.
EnableX Landing
- Click on Try For Free.
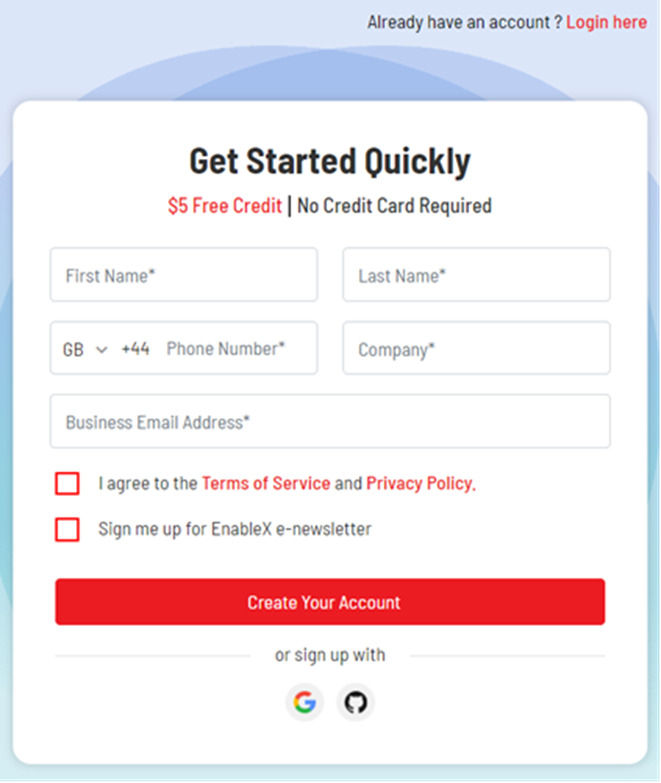
EnableX Signup page
- Fill in the required details: Name, Phone number, Company, email address and check the box for Terms of Service and Privacy Policy.
- Click on Create Your Account.
- A verification email will be sent to the given address. Verify your account by clicking on the link in this email.
Create a video project
To begin developing a video application with EnableX Video Server APIs, the first step is to create a project on the platform. Follow these steps to create a project:
- Login to the EnableX Portal.
- After successfully logging in, users are redirected to My Dashboard. From there, follow these steps to create a new project:
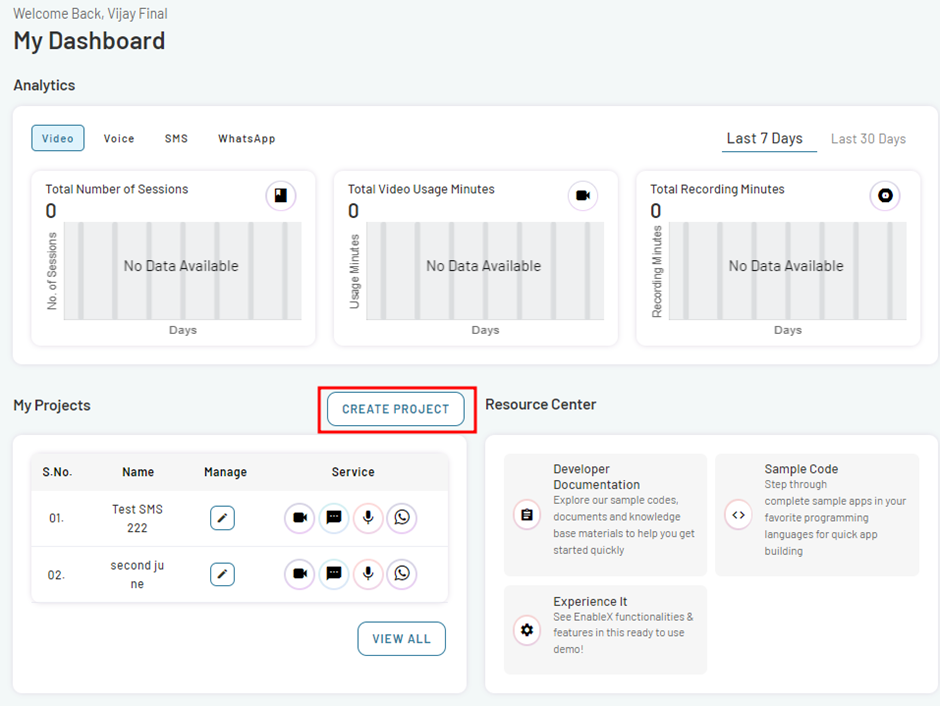
EnableX My Dashboard
- Navigate My Projects section on the page.
- Click on CREATE PROJECT button. This opens Create Project page.
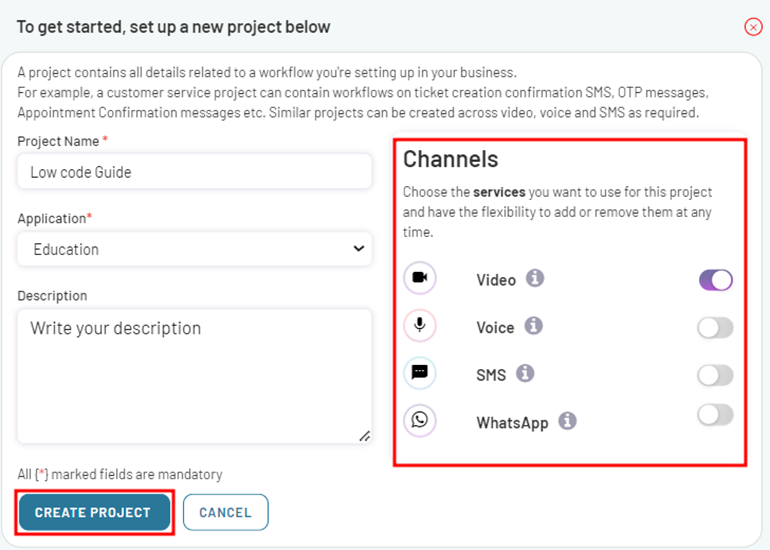
EnableX Create new Project
- Provide the necessary information for your project, including the Project Name, Application, and Project Description.
- Navigate the Channels section and enable video services for your project.
- Click on CREATE PROJECT button to create your project.
- The project has been successfully created and a confirmation popup will appear.
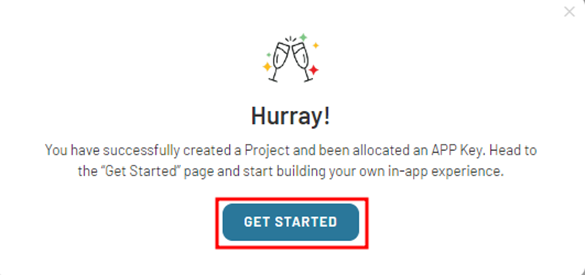
Project creation Confirmation
- In the pop-up dialog, click on GET STARTED button.
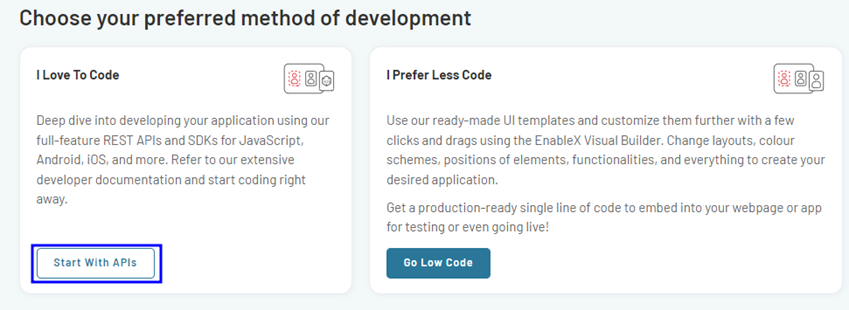
Methods of Video Development
- Select the development method that best fits your preferences and requirements
- Select <I Love To Code> option from the available choices and click on Start With APIs.
This will give you access to the necessary APIs and SDKs for your project, enabling you to begin coding and developing your application with EnableX’s extensive tools and resources.
Get App ID and App Key
Before you embark on your application development journey with the EnableX platform, it is essential to obtain an API Credential. This credential includes an App ID and App Key, which serve as the username and password, respectively, in the HTTP Base Authentication Request Header of our Video Server API Call.
When you create a project, the API Access Credentials are sent to you via email.
Note: Make sure that you use the App ID as the username and the App Key as the password in the HTTP Base Authentication Request Header.
Create Virtual rooms and Generate Token
Create Room
To create a room, make an HTTP POST request to the following API route: https://api.enablex.io/video/v2/rooms. You need to include the necessary parameters and values in the request body, which should be in JSON format. For example:
{

  "name": "Topic or Room Title",

  "owner_ref": "xyz",

  "settings": {

    "description": "Descriptive text",

    "mode": "group",

    "scheduled": false,

    "adhoc": false,

    "duration": 30,

    ……….

    ……..


    "role_based_recording": {

      "moderator": "audiovideo",

      "participant": "audio"

    },

    "live_recording": {

      "auto_recording": true,

      "url": "https://your-custom-view-url"

    }

  },

  "sip": {

    "enabled": false

  },

  "data": {

    "custom_key": ""

  }

}
To know more about Create Rooms, please read Create Room to carry out RTC Session .
Generate Token
To create a token for joining an RTC session on the EnableX platform, make a POST request to the API route: https://api.enablex.io/v2/rooms/{room-id}/tokens where {room-id} is the ID of the room you want to join. For example:
POST https://api.enablex.io/video/v2/rooms/{room_id}/tokens

Authorization: Basic XXXXXXX

Content-Type: application/json

{

     "name": "User Name",

     "role": "participant",

     "user_ref": "XXX",

     "data": {

        "custom_key": "String",

    "any_key": "String"

     }

}
Upon successful creation, the API will respond with a JSON object containing the result and the generated token (JWT_WEB_TOKEN).
{

     "result": 0,

     "token": "JWT_WEB_TOKEN"

 }
To know more about Token, please read Create Token to join a Room.
Creating a Firebase Project
To make the most of cloud messaging in our app, let’s begin by setting up a new project on Firebase. Visit console.firebase.google.com, use your Google details to log in, and kick off the project creation. Choose a unique name for your project, follow the step-by-step instructions, and wrap up the setup phase.
With this done, we are all set to delve into crafting our application.
Develop Your Application in the Chosen Language to Meet Your Requirements
Once you have created a video project with the EnableX Platform and established a virtual video meeting room, the next step is to download and integrate the required SDKs and dependencies into your project.
Download SDK and Install dependencies and third-party libraries in the project
- Android SDK and iOS SDK- (As per development needs)
- Android UI Kit and IOS UI Kit- (As per development needs)
- Android/iOS native- here users need to integrate push notification service either through firebase or APNS (for iOS) – (To receive VOIP (Voice Over Internet Protocol) notification service as per development needs)
- Android native-call kit – for using Android’s native Caller UI
- iOS native-call kit – for using iOS’s native Caller UI
- Users need to initiate the iOS /Android call kit (based on service) after receiving the notifications.
Create Android APP and Install Depended call kit
Once you have created a video project with the EnableX Platform and established a virtual video meeting room, the next step is to integrate the Android UI Kit into your project. Following are the steps:
- Download the latest Android SDK (AAR file)
- Download the Latest Android UI Kit (AAR file)
- Add downloaded AAR files to the project’s lib folder
- Modify Your Project-Level Build.gradle File. Follow these steps:
- Navigate to your project’s root directory.
- Locate and open the build.gradle file.
- Find the allprojects.repositories section in the file.
- Insert the following block of code:
allprojects{

  repositories {

      flatDir {

        dirs 'libs'

      }

    }

  }
Add dependencies to your project
- Navigate to your App directory.
- Locate your application-level build.gradle file.
- Open the build.gradle file.
- Navigate to the dependencies section of the file.
- Append the following code:
implementation fileTree(dir: 'libs', include: ['*.aar', '*.jar'], exclude: [])

implementation('io.socket:socket.io-client:1.0.1') {

  exclude group: 'org.json', module: 'json'

}
Define Device Permissions
Your app needs certain permissions to use features on the user’s phone. You tell Android about these permissions in your AndroidManifest.xml file.
<uses-permission android:name="android.permission.CAMERA" />

<uses-permission android:name="android.permission.RECORD_AUDIO" />

<uses-permission android:name="android.permission.INTERNET" />

<uses-permission android:name="android.permission.WRITE_EXTERNAL_STORAGE" />

<uses-permission android:name="android.permission.READ_EXTERNAL_STORAGE" />

<uses-permission android:name="android.permission.ACCESS_NETWORK_STATE" />

<uses-permission android:name="android.permission.BLUETOOTH" android:maxSdkVersion="30"/>

<uses-permission android:name="android.permission.BLUETOOTH_ADMIN" android:maxSdkVersion="30"/>

<uses-permission android:name="android.permission.WAKE_LOCK" />

<uses-permission android:name="android.permission.BLUETOOTH_SCAN"android:usesPermissionFlags="neverForLocation"/>

<uses-permission android:name="android.permission.BLUETOOTH_ADVERTISE" />

<uses-permission android:name="android.permission.BLUETOOTH_CONNECT" />
Implement Android Video UI Kit
Import the packages
Open your activity file. At the top of the file, add the given packages:
import com.enablex.enxuikit_android.observer.EnxVideoStateObserver
import com.enablex.enxuikit_android.view.EnxVideoView
Initialize the EnxVideoView Class
This step involves adding the reference of EnxVideoView to your layout.
- Initialize EnxVideoView.
- Set layout parameters.
- Add VideoView to your layout.
// Initialize EnxVideoView

enxVideoView = EnxVideoView(this,token,this, "Low Code Embed URL")

// Low Code Embed URL is optional, in case you want to import settings.

// Set Layout Parameters

val rlp = RelativeLayout.LayoutParams(RelativeLayout.LayoutParams.MATCH_PARENT, RelativeLayout.LayoutParams.MATCH_PARENT)

// Add VideoView to your Layout

this.addContentView(enxVideoView, rlp)
For more information, read Android UI Kit.
Read this link to learn about how to create an iOS app and install dependencies.
Setting up an HTTP server
The HTTP server functions as an intermediary linking our native app with Firebase Cloud Messaging. Its role is to handle messages from the app and direct them to the right endpoint.
Create your Application Server using your preferred language, be it NodeJS or PHP.
After completing the setup, you need to integrate a notification service into your project, either using Firebase or another third-party library.
We will use firebase-admin to communicate with the FCM service from our server. Read Add Fire base to your iOS Projects and Fire Base to your Android Projects.
The firebase-admin dependency specifically facilitates communication with the FCM service from the server.
Making Device Talks Easier with Firebase
When using Firebase for video calls, there are two main ways to let devices chat with each other:
Device Tokens: Each device gets a special code. It’s like a name tag so the server knows who’s who.
Topics: Instead of using codes, devices join groups called ‘topics’. When the server sends a message to a topic, everyone in that group hears it.
Once your application and server are configured, and your app begins to receive notifications, you will then need to integrate the Ringer SDK based on the notification triggers.
For Android Applications, Call the API:
var callKitView = EnxCallKitView.getInstance(
this@ConferenceActivity,
"name",
com.enxcallkit.R.mipmap.ic_launcher_round,
this)
override fun callAnswer() {
// When you receive incoming call
}
override fun callReject() {
// When you reject incoming call
}
override fun callTimeOut() {
// When you didn't respond to incoming call notification,
// it times out in 45 seconds.
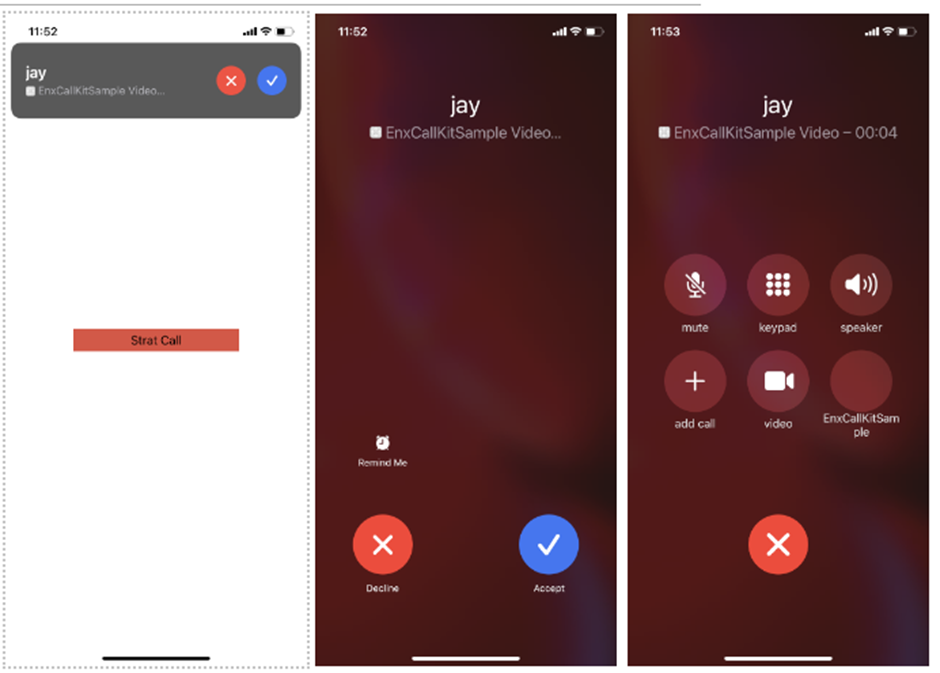
}Preview- Android Call Ringer

For more information, Read Android Calling UI Framework.
For iOS Applications, Call the API:
let backGroundTaskIndet = UIApplication.shared.beginBackgroundTask(expirationHandler: nil)

    callManager.reportIncomingCall(uuid: UUID(), callerName: "Caller Name", hasVideo: true) {

      _in UIApplication.shared.endBackgroundTask(backGroundTaskIndet)

    }
For more information, Read iOS Calling UI Framework.
Recommendation for iOS projects:
- Add background task before loading the Calling UI.
- End the background task once Calling UI is loaded.
- To end call, use the following method. This will close Call-kit UI.
callManager.endCall()Preview- iOS Call Ringer
WebRTC and EnableX for Enhanced Video Experience
WebRTC (Web Real-Time Communication) is an open-source framework that allows real time communication directly in the web browser and mobile applications. It facilitates streaming of audio, video, and data without requiring plugins, downloads, or installations.
While EnableX provides a robust platform for video application development, under the hood, WebRTC plays a pivotal role in enabling real-time communication. So, when you are working with EnableX, you are inherently harnessing the power of WebRTC.
Benefits of WebRTC in EnableX Platform:
Browser-Based Communication: With WebRTC, users can establish direct video and audio communications without needing any additional plugins or downloads.
High-Quality Video and Audio: WebRTC supports HD (High Definition) video and high-fidelity audio, ensuring users get a seamless experience.
Secure and Private: All WebRTC components come with built-in encryption. This means that your data, voice, and video packets are secure.
Interoperability: WebRTC is supported by all major browsers, including Chrome, Firefox, and Safari. This ensures a broader reach and compatibility for your application.
To know more, please read: How to choose the best WebRTC Video call API provider.