The popularity of real-time video calls around the world has exploded big-time. This exponential growth has been sparked by a rising number of use cases of live video streaming.
So, if you’re a developer looking to capitalise on the growing market for real-time video streaming, this post is exactly what you need.
Here’s a detailed step-by-step guide on how to create a video chat app with Low Code iOS Native UI using EnableX UIKit.
After reading this post, you’ll be able to build a powerful real-time video chat app all by yourself.
What You Will Get
- A real time video call app that will allow you to live stream a video call or a virtual event to popular streaming platforms like YouTube, Vimeo or Facebook Live (Meta)
- Smooth sync with all popular devices and compatibility with iOS and Android platforms
- Multiple developer environment support that includes ReactNative / React JS / Flutter / Native Android and IOS etc.
After reading the post, you can add these features:
- Screen sharing
- Annotation on remote video
- Security
- Seamless switch between video and audio under normal network conditions
- Auto – Reconnect in the event of intermediate network loss
Why Are We Using EnableX Low Code Video to Create A Video Chat App?
Creating a real-time multiparty video call app along with the capability to Live Stream the session is not an easy task because it involves several steps along the way that are complex, such as UI/UX coding, mobile development, video stack integration, security, and so on.
Try EnableX Low Code Video Embed
The same functionalities will help you quickly build a native mobile UI.
What Is UIKit Framework?
The UIKit framework is used for developing apps for iPhones and iPads. It provides the window and views architecture for implementing the UI interface, along with the required event-handling infrastructure for delivering the multi-touch feature and other types of inputs for your app. The framework’s main run loop is used for managing interactions between the users, the system and the app.
The framework also offers support on the following fronts:
- Animation
- Document
- Drawing and Printing
- Information about current devices
- Text Management
- Search and Accessibility
- App extension support and resource management
What Is EnableX UIkit Framework?
The EnableX UIkit framework provides fully customizable native UI for mobile devices, with ready-to-go Video APIs and SDK required for integration of video sessions that are powered by the EnableX platform.
The EnableX UIKit framework for mobile platforms, such as phones and tablets, allows developers to easily integrate the video conference UI.
The UIKit framework provides 100% native experience of UI.
How To Use EnableX UIkit – iOS Framework
The EnableX UIKit-iOS framework is easy to use. Before we discuss the steps, let’s take a look at the prerequisites you need.
What You Need:
- EnableX developer account (click Here)
- Xcode 11.0 or a later version
- An iOS device with a minimum 11.0 iOS
- A basic understanding of iOS development
- CocoaPods
- A valid token to join the room
*To create the EnableX Room and generate a token, read this post: How to create the EnableX Room and token)
- Camera permission
- Mic permission
- Getting Camera And Mic Permission In iOS
To get the camera permission, use this sample code:
private func getPrivacyAccess(){
let vStatus = AVCaptureDevice.authorizationStatus(for: .video)
if(vStatus == AVAuthorizationStatus.notDetermined){
AVCaptureDevice.requestAccess(for: .video, completionHandler: { (granted: Bool) in
})
}
let aStatus = AVCaptureDevice.authorizationStatus(for: .audio)
if(aStatus == AVAuthorizationStatus.notDetermined){
AVCaptureDevice.requestAccess(for: .audio, completionHandler: { (granted: Bool) in
})
}
}
Add NSCameraUsageDescription and NSMicrophoneUsageDescription in your app-> info.plist
2. Adding EnableX UIKit – iOS Framework
To add the UIKit framework, go to your project directory.
Now, you need to configure the pod library.
To initiate the pod library, use the following command in the terminal:
‘Pod init’
Next, open your pod file and add the required library as stated below:
pod ‘EnxRTCiOS’
pod ‘Socket.IO-Client-Swift’, ‘~> 15.0.0’
Next, install the pod file through the command ‘Pod install’.
The pod file installation is over your required dependency library has been installed.

Open your project.xcworkspace, drag and drop Enx_UIKit_iOS.framework to your project.
Now, download Enx_UIKit_iOTS.framework.
After manually adding the Enx_UIKit_iOS.framework, go to -> Target -> Framework, Library and Embedded Content and select Embed & Sign Up for your Enx_UIKit_iOS.framework.
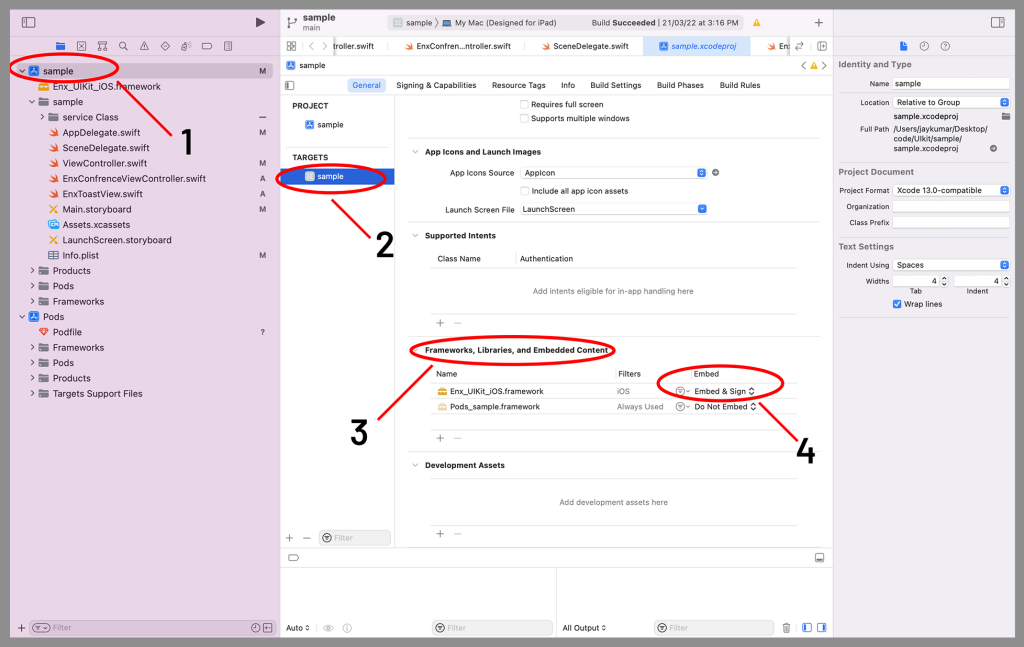
You are done with the manual setup.
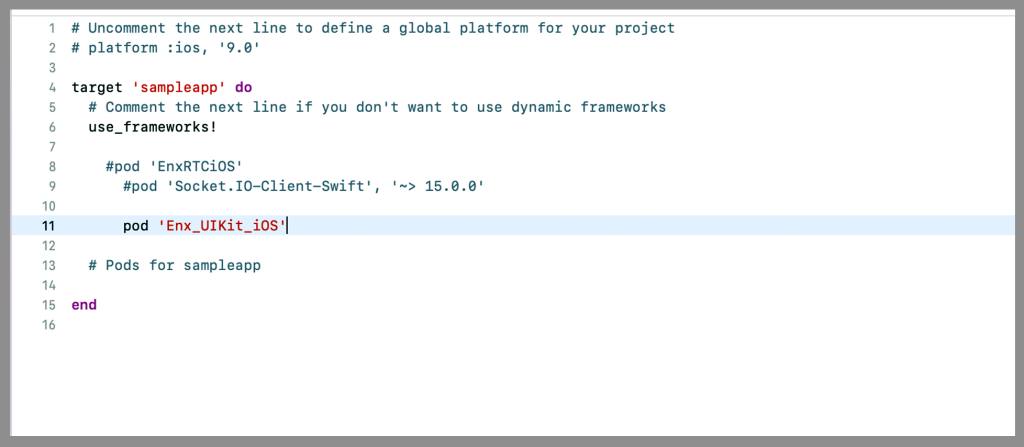
Next, to install the pod Enx_UIKit_iOS.framework, follow the first two steps as mentioned above.
After that, open your pod file and add the required library as given below:
‘pod Enx_UIKit_iOS’
*After adding the Enx_UIKit_iOS.framework through the pod, you’re not required to add the following dependencies:
- pod ‘EnxRTCiOS’
- pod ‘Socket.IO-Client-Swift’, ‘~> 15.0.0’
To install your pod file, here is the sample code shown below:
How To Install Pod
Go to your project directory through the terminal and hit the below-given command:
‘Pod install’
Your setup is done the setup either manually or direct through POD.
*Note: The Enx_UIKit_iOS framework don’t work on simulator.
Next, go to your class and import the Enx_UIKit_iOS framework.
For example:
Swift
import Enx_UIKit_iOS
Objective- c
@import Enx_UIKit_iOS;
@class Enx_UIKit_iOS;
@interface yourmainclass: UIViewController
Now, your library has been imported to your project.
Here is how you can initiate and use:
Swift
//Initiate the EnxVideoViewClass
let enxViewer = EnxVideoViewClass(token: token, delegate: self)
//Add this to your view
view.addSubview(enxViewer)
//Set the frame
enxViewer.frame = self.view.bounds
//Set the constraint to auto manage UI if the orientation changes
enxViewer.autoresizingMask = [.flexibleWidth, .flexibleHeight]
Objective-c
//Initiate the EnxVideoViewClass
EnxVideoViewClass *videoView = [[EnxVideoViewClass alloc] initWithToken:@”token” delegate:self];
//Add it to your view
[self.view addSubview:videoView];
//Set the frame
videoView.frame = self.view.bounds;
//Set the constraint to auto manage UI if the orientation changes
videoView.autoresizingMask = (UIViewAutoresizingFlexibleWidth |UIViewAutoresizingFlexibleHeight);
A user needs to implement Delegate for receiving callback.
Here, we have given two callback options for users to clear instances or for any other purpose.
- Disconnect: Callback Response For Disconnect
func disconnect(response: [ If Any])
The callback response Disconnect carries information about the cause of disconnection. - Error: Callback Response For Connection Error
func connectError(reason: [Any]?)
Here, the reason will carry information about the cause of the error.
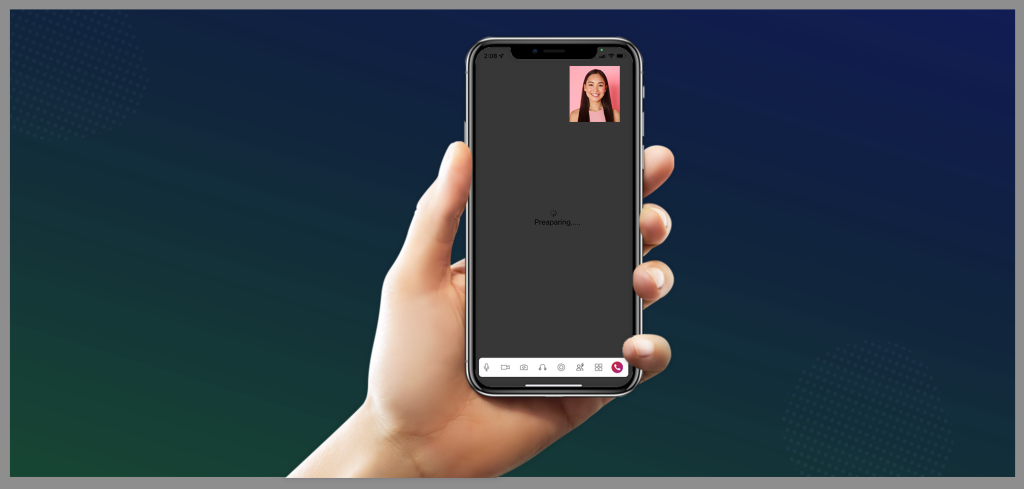
When EnableX UI Kit Framework starts loading:
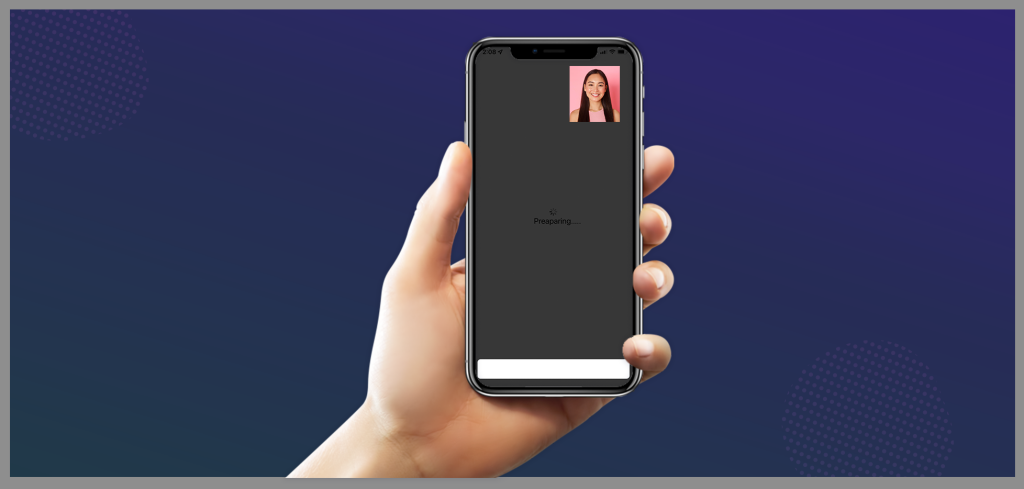
When the UI starts customizing, it will look like the following frame:
When the connection is established between both sides of a call:
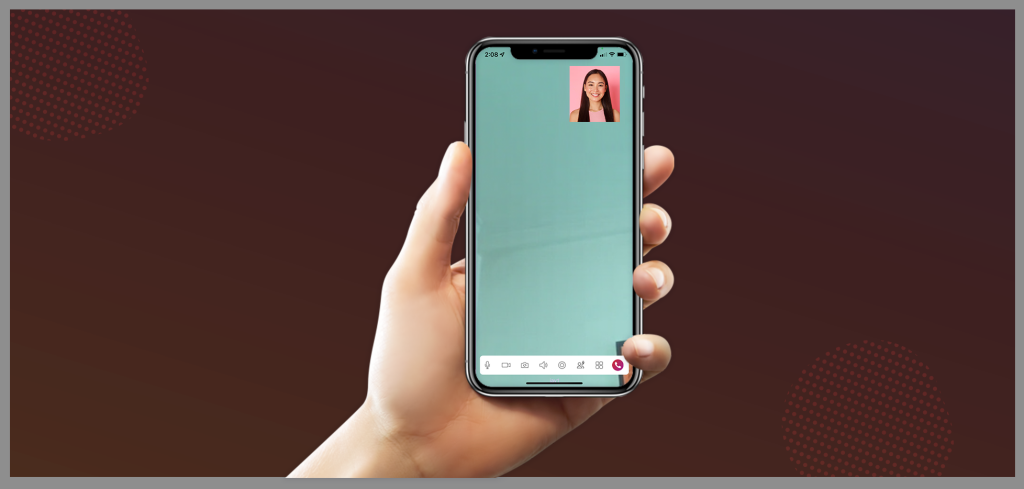
You’re now ready to go live!
So, there you go. Now that you know how to create a video chat app, go ahead and enjoy streaming your feed.
You can also check out other similar resources and surprise everyone around you by building more cool stuff!