WhatsApp Business has become an integral part of businesses’ communication strategy, and they are constantly seeking streamlined ways to reach their audience. EnableX, which integrates seamlessly with WhatsApp Business API, has emerged as one of the most pivotal tools in this landscape.
This guide provides a comprehensive guide to ensure your outreach is both effective and efficient, whether you’re registering a phone number, creating compliant message templates, or broadcasting to a large audience. Find out how EnableX can optimize your business communications.
For businesses using WhatsApp Business, there are two methods to send messages:
– They can use the WhatsApp Business API to configure their messages to be sent automatically on certain events and triggers. For example, every time your website receives a new order, you can configure the WhatsApp API to send an automated message to the customer. Examples can include order confirmations, invoices and customer satisfaction surveys.
– They can send marketing messages using a WhatsApp bulk broadcasting service, which is available with EnableX, and works just like a WhatsApp Marketing Software.
How to use WhatsApp for Marketing?
Using EnableX’s WhatsApp Bulk broadcasting service, you can send bulk messages by uploading an excel sheet containing your contacts. You can upload a CSV file containing consolidated contact information or data in a structured format, create your message template, and quickly send out messages to your entire list.
Benefits of excel based broadcasting for WhatsApp Business
At its core, CSV broadcasting consists of making use of Comma-Separated Value (CSV) files to enhance your marketing strategy.
- Unmatched Scalability: With CSV files, you can reach thousands, or even millions, at the click of a button. Making mass communication feel as intimate as a one-on-one conversation has never been easier.
- Precision Targeting: Forget the blanket approach. With CSV’s organized columns, you can send personalized messages, ensuring your content resonates with the right audience segments. You can use tags, custom variables and ensure any customer receiving your message sees details personalised to them.
- Effortless Automation: Time is precious. Automating broadcasts using CSV files will remove manual intervention. This will allow you to focus on your business.
What to remember when preparing excel file for WhatsApp Business Broadcast
To optimize your CSV broadcasting efforts, it’s essential to adhere to certain best practices:
- Data Accuracy: Ensure that the information in your CSV files is up-to-date and error-free. Inaccurate data can lead to miscommunication or missed opportunities.
- Organized Structure: Maintain a consistent column structure in your CSV files, making it easier to map data and speeding up the broadcasting process, meaning your message lands faster.
- Secure your Data: Data protection is not just a security measure; it is a commitment. Always store and share your CSV files securely, especially if they contain sensitive or personal information. Encryption and secure sharing methods can protect against unauthorized access.
- Refresh and Revise: Markets change and interests shift. Periodically review and clean your CSV files to remove outdated information or to update any changes.
How to send bulk messages on WhatsApp Business using Excel file
To run successful WhatsApp campaigns, you must create an account on EnableX and integrate the WhatsApp service into your project. Now, let’s see how to set up a CSV broadcast campaign in detail.
Create an account with EnableX if you are a New User
- Visit the EnableX portal
- Create a Trial Account
- Fill in the required details: Name, Phone number, Company, email address and check the box for Terms of Service and Privacy Policy.
- Click on Create Your Account.
- A verification email will be sent to the given address. Verify your account by clicking on the link in this email.
- Users can also sign up with Google or GitHub.
Your account has been created successfully.
Post these steps, complete your Account registration by completing your profile. Our team will get in touch with you for ensuring all details are completed, and that your account is verified with Meta. The process for completing registration with WhatsApp and Meta is available here.
How to Set up WhatsApp Business Services
Submit Your Request: Navigate to the WhatsApp section in the left menu bar, select Request in the subsequent menu and click on I WANT WHATSAPP FOR BUSINESS.
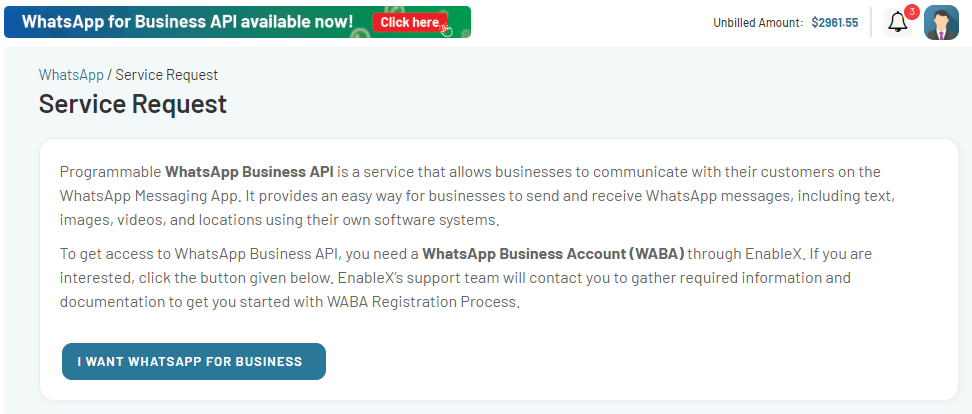
Setup WhatsApp Business Account:
- After submitting the request, EnableX’s team will contact you for the WABA Registration Process, provide setup guidance, and answer any questions.
Create a WhatsApp Project for your CSV Broadcast Campaign
- Either create a new project, and add WhatsApp as a service.
- Or, if you have an existing project, simply add WhatsApp as a service to it.
Create a new WhatsApp Project
- Navigate to My Dashboard>My Projects>CREATE PROJECT button.
- This will take you to Create Project Form.
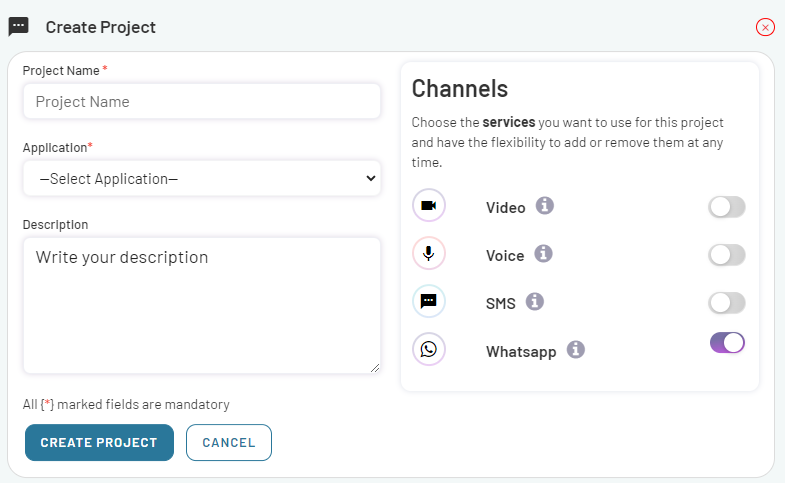
- Enter the project-related information like project name, application and description and Enable WhatsApp in the Channels section.
- Once you have filled in all the necessary information, click on CREATE PROJECT to create your project.
- A popup of successful project creation will appear on your screen. To move further into the process, click on GET STARTED button.
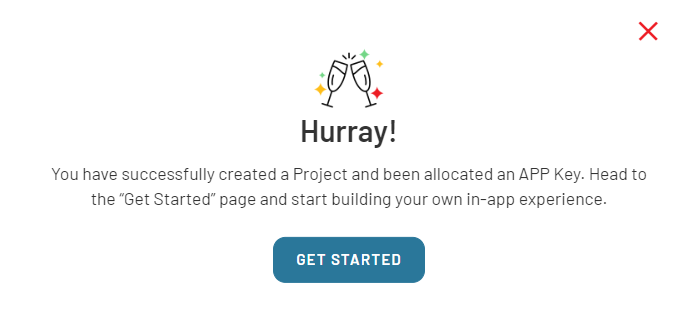
- If the project creation process fails, review the previous page and ensure that all mandatory fields are completed.
Register Phone Number and Display the Name of your WhatsApp Project
Each EnableX WhatsApp Project must have at least one Phone Number registered with WhatsApp Business Platform. You can add multiple phone numbers to a single project. To set up a phone number for your WhatsApp Business account, follow these steps:
- After creating a new project on EnableX, click GET STARTED on the project creation confirmation popup and then click on ADD NUMBER tab.
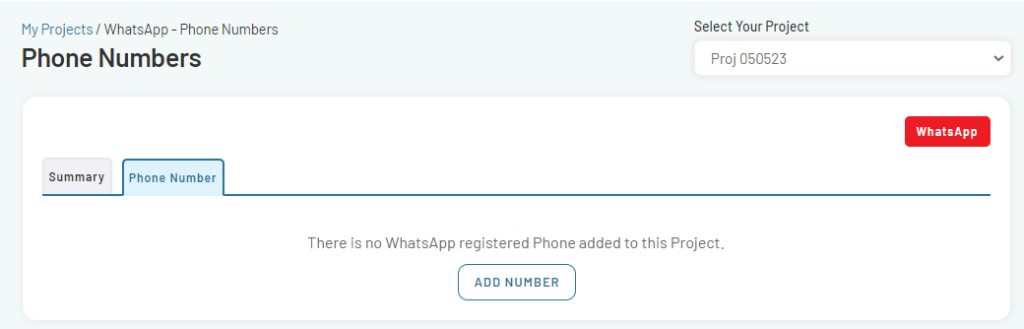
- Alternatively, navigate to My Projects, select <Project Name> and click on the service icon associated with the project and then ADD NUMBER.
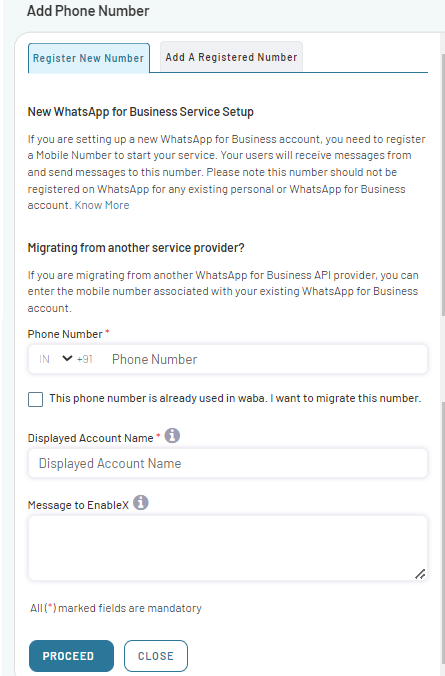
Number Registration
- Navigate to the Register New Number tab.
- Enter your desired Account Name and Phone Number and a Message to Team EnableX regarding your request.
- If your number is currently linked to another WhatsApp Business account elsewhere, mark the relevant checkbox to signal a migration need.
- Click PROCEED to submit.
Post-Submission: The EnableX team may reach out for additional clarification. After the approval process, your number will be affiliated with the WhatsApp Business platform through EnableX.
This procedure ensures your number is properly registered for business communication on WhatsApp via EnableX.
For more information, please read Register Phone Number.
Creating a Message Template
Here, you can create Message Templates for your campaign. It is essential to note that message templates require WhatsApp approval and must comply with relevant terms of use. Please ensure compliance and review guidelines for effective message templates before submission.
- Once your phone number is registered and approved, click the MESSAGE TEMPLATES tab and then Click on ADD TEMPLATE to open the form.
- Follow WhatsApp’s guidelines and enter the required details.
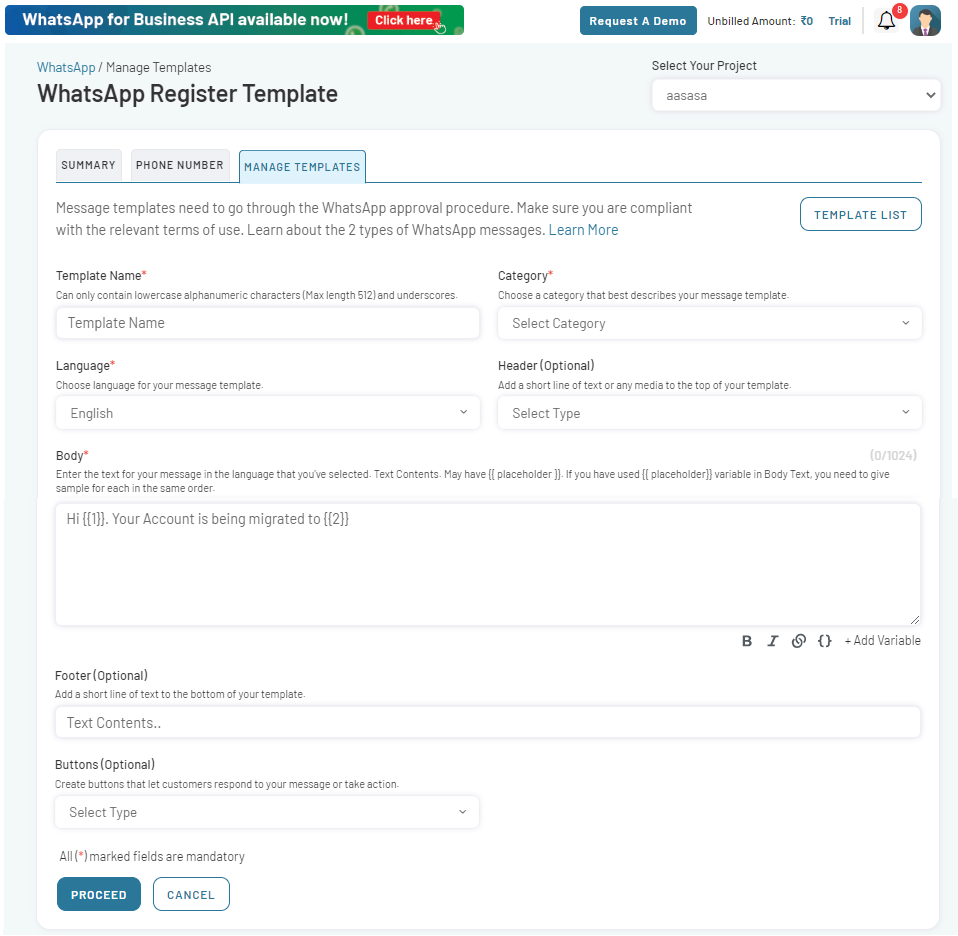
- Once you enter all the necessary details, click on PROCEED to submit.
- Your template will show as PENDING and, upon approval (usually 20-30 seconds but may vary), will be marked APPROVED.
Set Up Your CSV Broadcast Campaign
Once your phone number is registered with the WhatsApp Business platform, you can dive into the Manage Campaign tab on your dashboard.
- Navigate to WhatsApp in the left menu pane and select Dashboard from the drop-down options. This redirects to the WhatsApp dashboard where you can oversee and manage your WhatsApp projects.
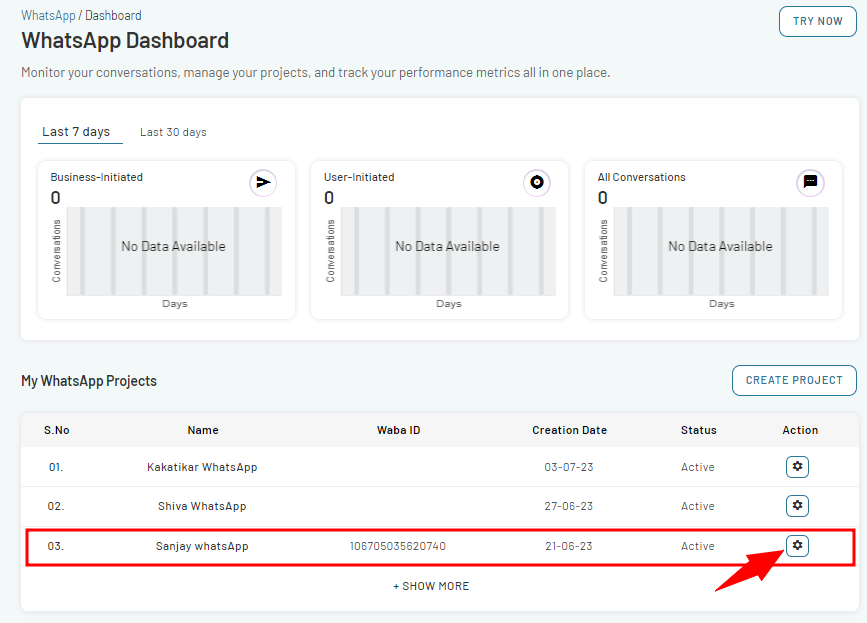
- Select the < WhatsApp project> against which you want to create a campaign and click on the Action icon next to it.
- From the Project Summary page, go to the Manage Campaigns tab.
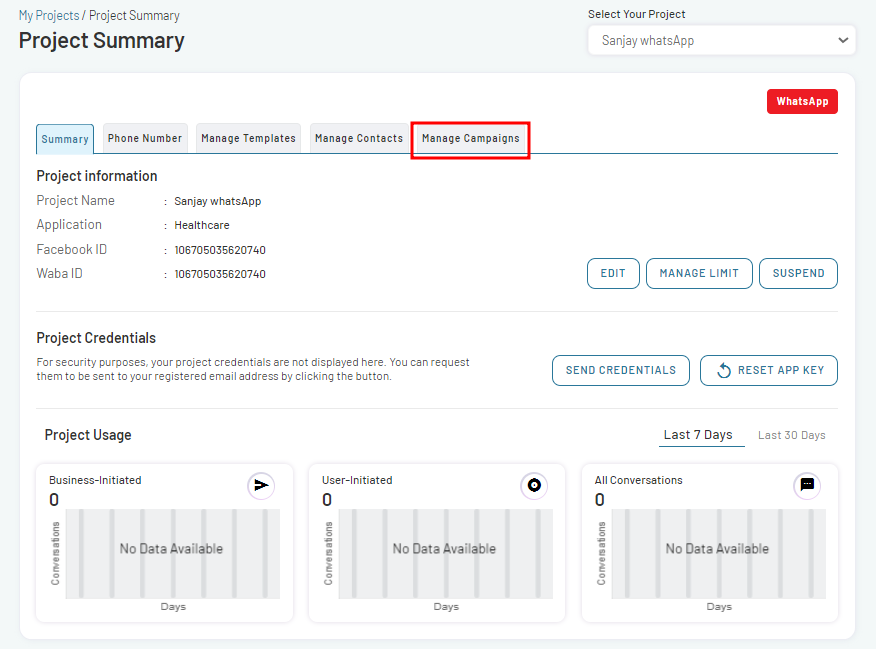
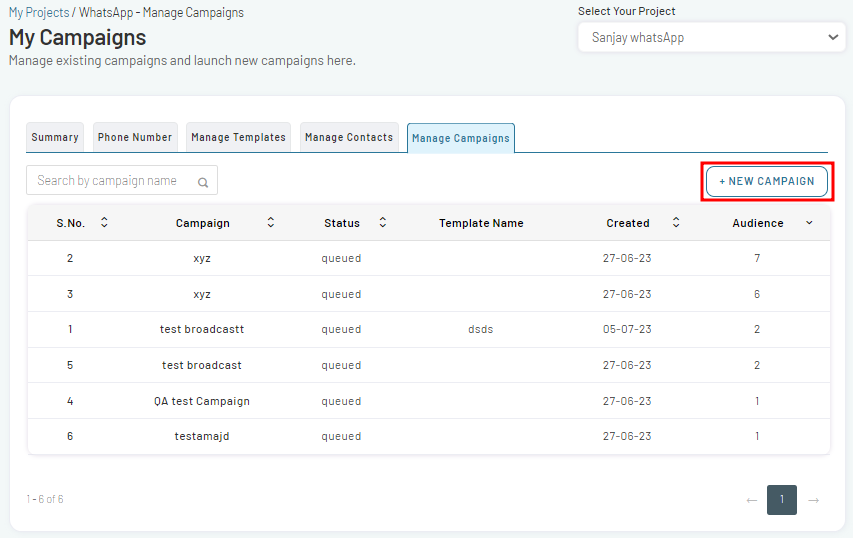
- On the My Campaigns page, Click on NEW CAMPAIGN tabto start.
Select your Campaign Type
When you are setting up a new campaign, you get two main options to broadcast your campaign:
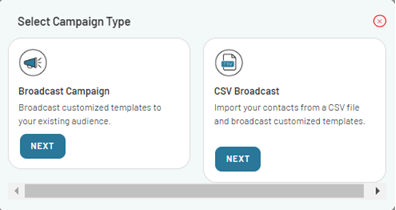
Broadcast Campaign: This option is perfect for reaching your existing customers with customized messages.
CSV Broadcast: Here you can import contacts in bulk directly from a CSV file, enabling you to effectively engage different segments of your audience.
- Select CSV Broadcast and click on NEXT buttonto continue. Create a new campaign using the 5-step wizard.
Step-1: Set Campaign Name and Schedule in advance:
- Name Your Campaign: Choose a descriptive name that reflects your target audience and the goals of your campaign. Note that the Campaign name must be distinctive and meaningful, as it will be the primary identifier for this campaign.
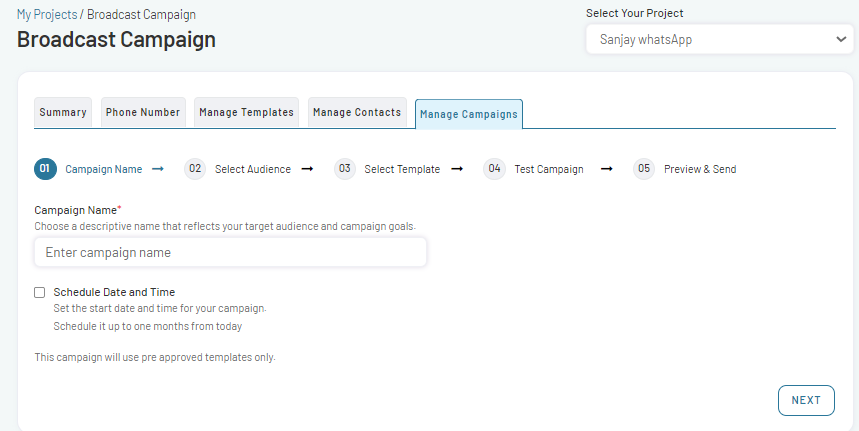
- Schedule Your Campaign: Set the start date and time for your campaign. Note that the campaign can be scheduled up to one month from today’s date. This feature lets you strategically plan your marketing efforts, aligning with specific events, holidays, or product launches.
Step-2:Select Audience
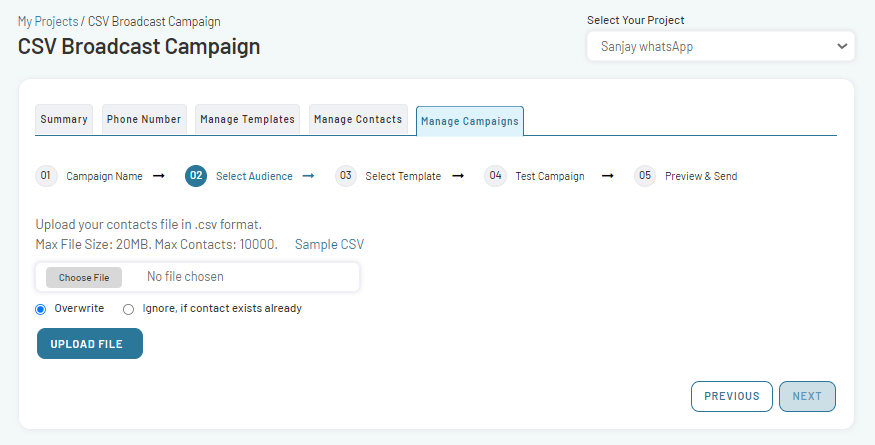
Upload Contacts File:
- Upload your contacts file in .csv format.
- The maximum file size allowed is 20MB.
- You can include up to 10,000 contacts in the file.
- Refer to the Sample CSV file for reference if needed.
- Click on Choose File and select CSV file for upload.
If any contacts already exist, you have the following options:
- Overwrite: Choose this option to replace existing contact information with the new data from the uploaded file.
- Ignore, if contact exists already: Select this option to skip adding contacts that already exist in your system.
- Once select your preference, click on UPLOAD FILE button to upload the selected CSV file.
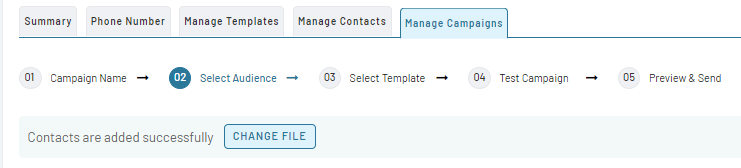
Change File (Optional):
If needed, you can change the selected file by clicking on the Change File button and selecting a different .csv file.
Step-3: Select Template:
- Pick a pre-approved message template that matches your campaign goals. If you need a new one, there is a process to create and get it approved by WhatsApp.
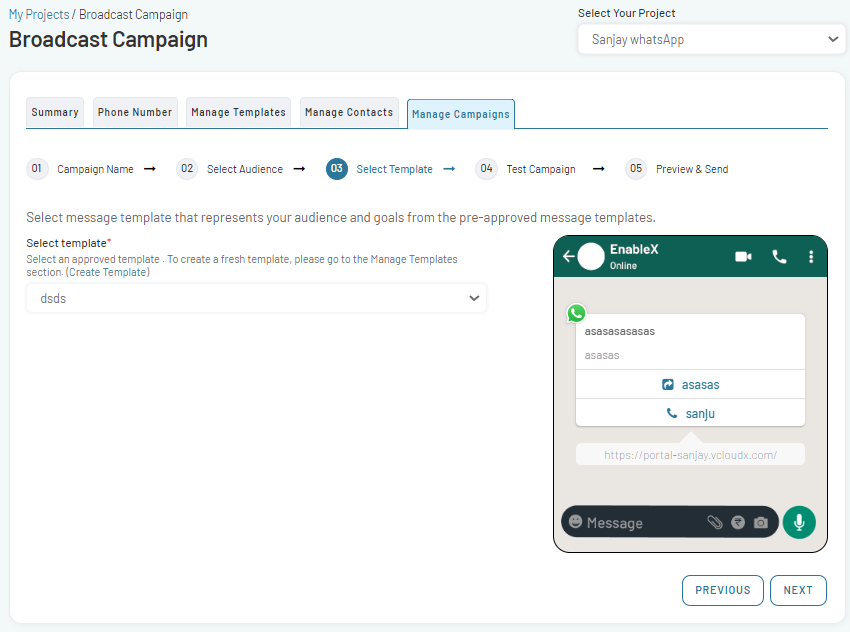
- Choose an approved template from the dropdown menu that fits your campaign’s requirements and click on NEXT button.
If you need to create a new template for your campaign, navigate to the Manage Templates tab. There you can follow the process to create and get it approved from WhatsApp. Once it is approved, it will be added to your list of approved templates.
Read- Create & Manage Message Templates
Step-4: Test Your Campaign
Before going live, test it. This ensures everything is on track and your message looks as intended.
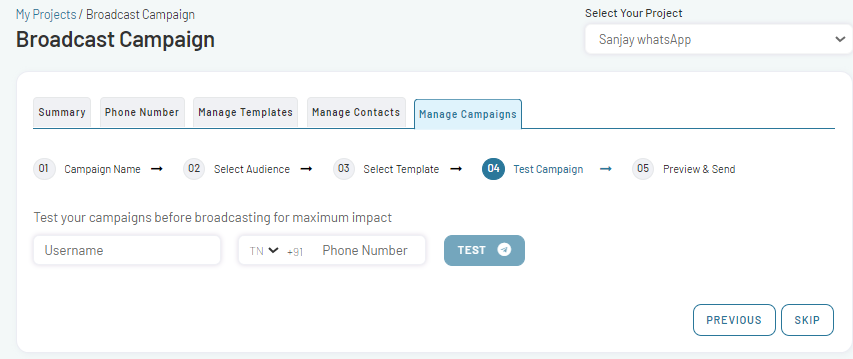
- In the search field, enter the Name and Number of the intended recipient to whom you plan to send the campaign before broadcasting and click on TEST button.
- If you prefer to skip the testing phase, click on SKIP button to proceed without testing.
Step-5: Preview & Send
After reviewing your content, click on SEND NOW.
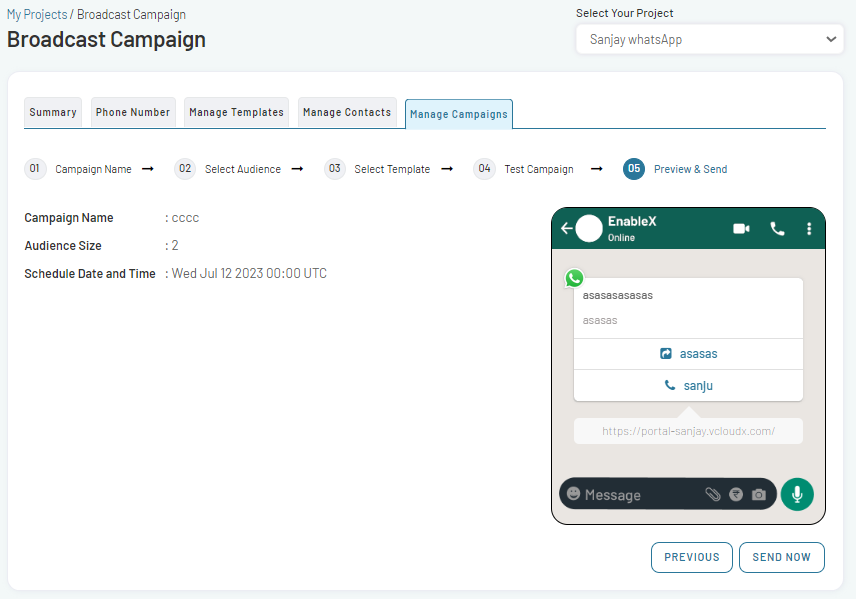
Your campaign is now set to be delivered as per your specified schedule, and it will appear in the campaigns list.
The power of CSV Broadcast campaigns lies in their precision, efficiency, and scalability. The control and customization offered by CSV files has never been more essential for reaching out to a niche audience or broadcasting to a diverse demographic. EnableX transforms your outreach strategies with segmented broadcasting. Don’t let the future wait. Sign Up with EnableX today and make your next campaign more than just another message.