Think reaching the right audience with the right message is a challenge? Think again. With billions of users worldwide, WhatsApp is a massive playground, but how do you stand out and make sure your message doesn’t get lost? The EnableX WhatsApp Campaign Manager makes it easy to target and segment your messages with pinpoint accuracy and relevance, eliminating the need for guesswork. With the EnableX WhatsApp Campaign Manager, you can confidently reach your target audience and deliver your message with precision.
Diving Deep into EnableX’s WhatsApp Campaign Manager
Navigating the vast sea of WhatsApp’s billions of users requires precision. EnableX’s WhatsApp Campaign Manager is the compass guiding businesses to targeted communication, whether it’s through tags, sources, or CSV uploads. This is not just about broadcasting but about ensuring every message finds its mark. In this exploration, we will uncover the true competence of this tool emphasizing the significance of WhatsApp’s template guidelines. Ready to revolutionize your messaging strategy? Dive in.
How to send segmented broadcast using WhatsApp Business API
EnableX’s WhatsApp Campaign Manager offers an advanced approach to digital messaging. Through precise categorization using contacts, tags, and sources, businesses can send laser-focused messages to their intended audience. It’s not just about reaching out—it’s about reaching right. Just five steps and your campaign is ready.
Five steps for Sending Targeted WhatsApp Business API Broadcast
This is a detailed step-by-step process using the WhatsApp Campaign Manager. From managing your campaign to selecting the audience and employing pre-approved templates, these five clear and actionable steps will empower you to set up a successful campaign.
- Step-1: Create an account with the EnableX Platform.
- Step-2: Create a WhatsApp Project.
- Step-3: Get your phone number registered with the WhatsApp Business platform.
- Step-4: Create a message template and get it approved by WhatsApp.
- Step-5: Setup Your Campaign
Let’s discuss these steps in detail.
Step#1- Creating an account with EnableX
- Visit the EnableX portal https://portal.enablex.io.
- For New Users: Click Try For Free, fill in details, and verify via email or use Google/GitHub.
- For Returning Users: Click SIGN IN at the top right, log in with credentials or Google/GitHub, and access My Dashboard.
Step#2-Creating a WhatsApp Project
Request WhatsApp Service with EnableX:
- Go to WhatsApp in the left menu.
- Click on Request then I WANT WHATSAPP FOR BUSINESS.
Setup WhatsApp Business Account:
- After submitting the request, EnableX’s team will contact you for the WABA Registration Process, provide setup guidance, and answer API questions.
Add WhatsApp Service to Your Project:
- Either create a new project and add WhatsApp as a service.
- Or, if you have an existing project, simply add WhatsApp as a service to it.
For more information, please read Get Started with WhatsApp Business Platform.
Step#3- Registering Phone number
Access Number Registration
- After creating a new project on EnableX, click GET STARTED on the project creation confirmation popup and then click on ADD NUMBER tab.
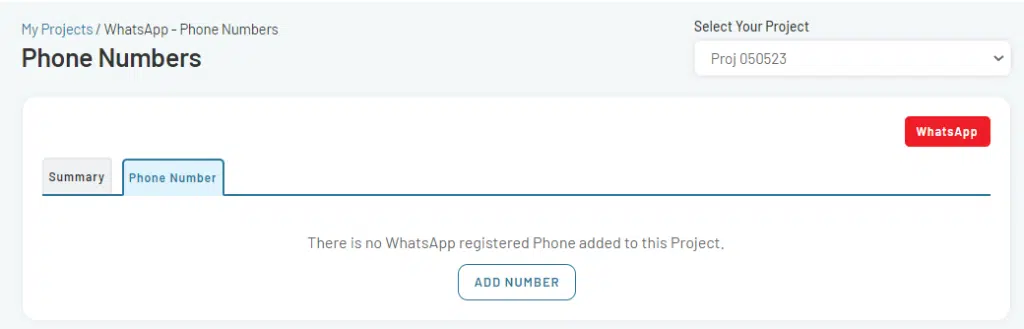
- Alternatively, navigate to My Projects, select <Project Name> and click on service icon associated with the project and then ADD NUMBER.
Number Registration
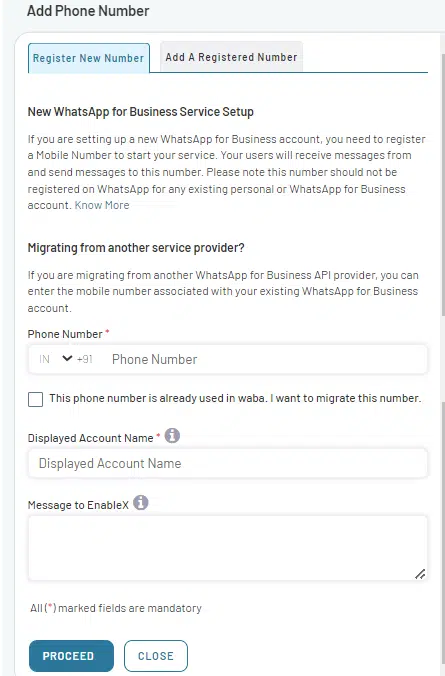
- Navigate to the Register New Number tab.
- Enter your desired Account Name and Phone Number and a Message to Team EnableX regarding your request.
- If your number is currently linked to another WhatsApp Business account elsewhere, mark the relevant checkbox to signal a migration need.
- Click PROCEED to submit.
Post-Submission: The EnableX team may reach out for additional clarification. After the approval process, your number will be affiliated with the WhatsApp Business platform through EnableX.
This procedure ensures your number is properly registered for business communication on WhatsApp via EnableX.
For more information, please read Register Phone Number.
Step#4- Creating a Message Template
Message templates require WhatsApp approval and must comply with relevant terms of use. Please ensure compliance and review guidelines for effective message templates before submission.
- Once your phone number is registered and approved, click the MESSAGE TEMPLATES tab and then Click on ADD TEMPLATE to open the form.
- Follow WhatsApp’s guidelines and enter the required details.
- Know more about Templates
- Guidelines for Template Content
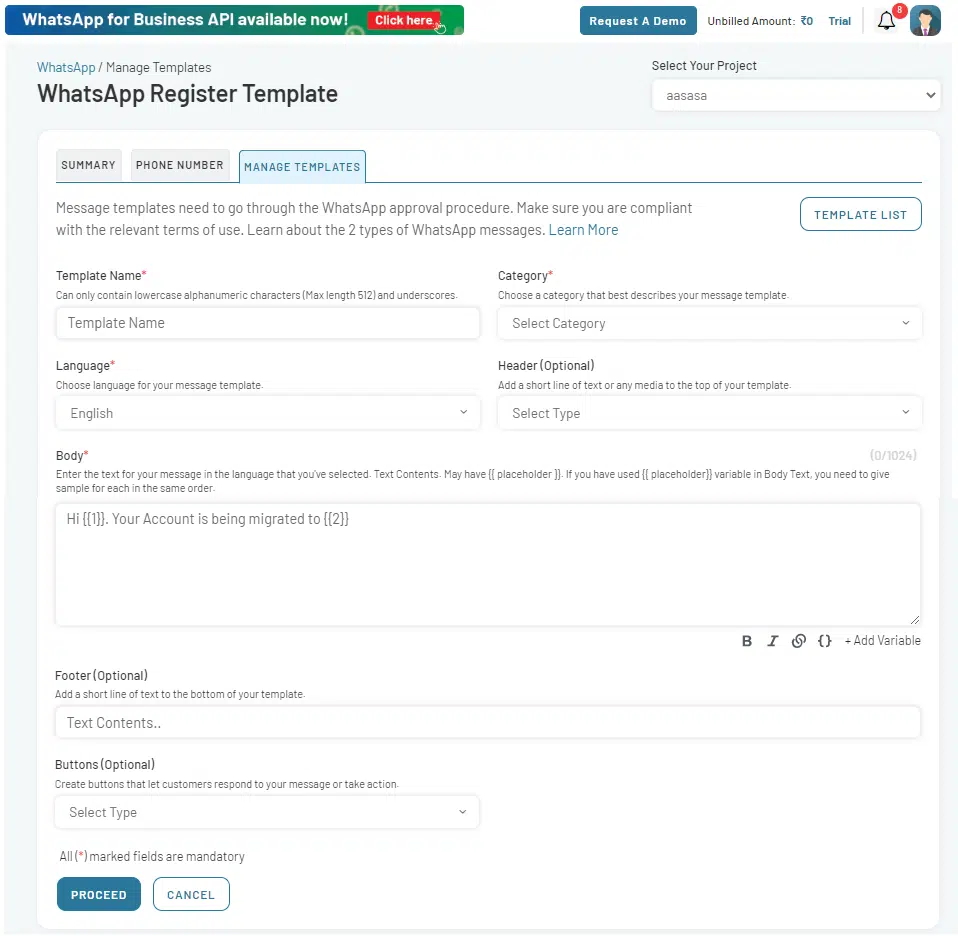
- Click on PROCEED to submit.
- Your template will show as PENDING and, upon approval, (usually 20-30 seconds but may vary), will be marked APPROVED.
Step#5- Setting Up Your Campaign
Once your phone number is registered with the WhatsApp Business platform, you can dive into the Manage Campaign tab on your dashboard.
- Navigate to WhatsApp in the left menu pane and select Dashboard from the drop-down options. This redirects to the WhatsApp dashboard where you can oversee and manage your WhatsApp projects.
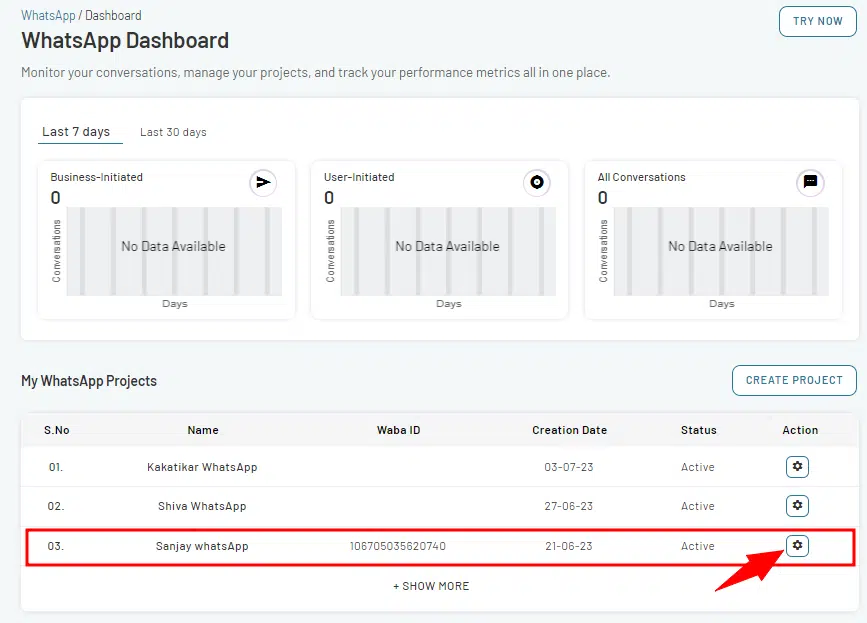
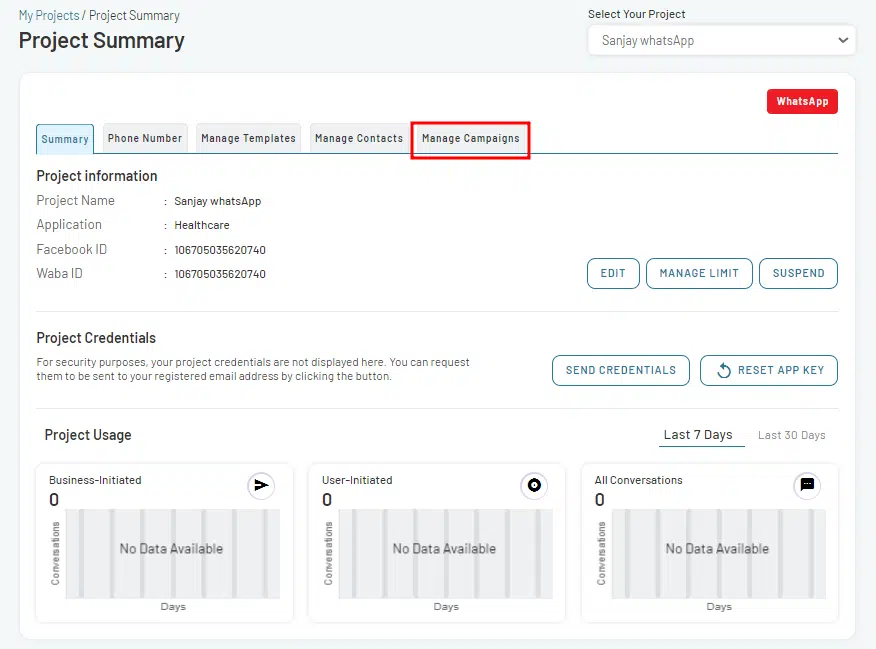
- Select the < WhatsApp project> against which you want to create a campaign and click on the action icon next to it.
- From the Project Summary page, go to the Manage Campaigns tab.
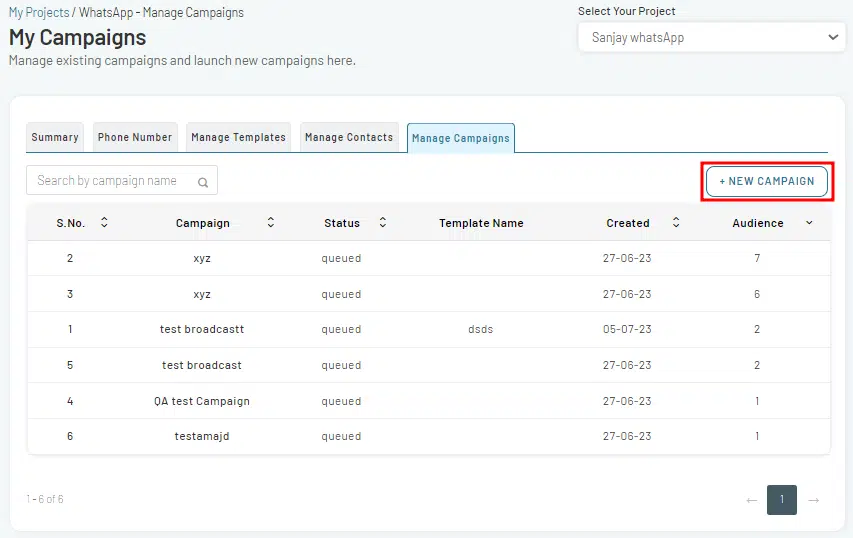
- On the My Campaigns page, Click on NEW CAMPAIGN tab to start.
Select your Campaign Type
When you are setting up a new campaign, you get two main options to broadcast your campaign:
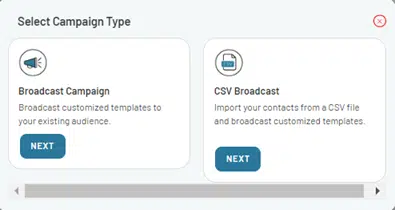
Broadcast Campaign: This option is perfect for reaching your existing customers with customized messages.
CSV Broadcast: Here you can import contacts in bulk directly from a CSV file, enabling you to effectively engage different segments of your audience.
- Choose Broadcast Campaign to continue. Create a new campaign using either the 5-step wizard or a single form.
Campaign Setup Using the 5-Steps Wizard
- Set Campaign Name and Schedule in advance:
- Name Your Campaign: Choose a descriptive name that reflects your target audience and the goals of your campaign. Note that the Campaign name must be distinctive and meaningful, as it will be the primary identifier for this campaign.
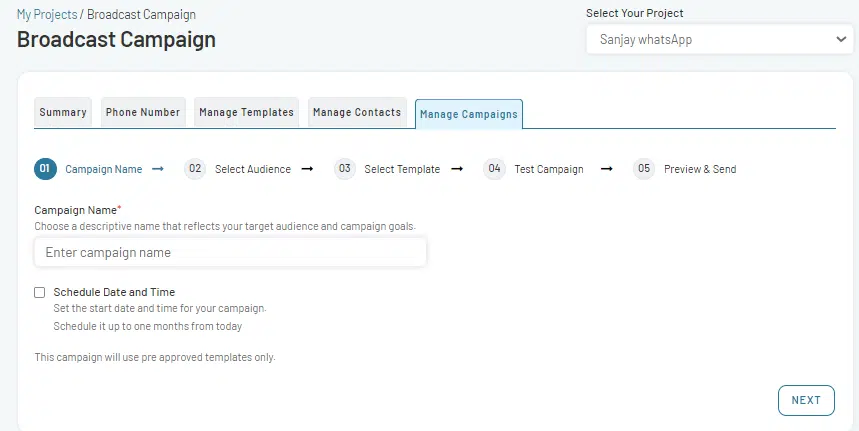
- Schedule Your Campaign: Set the start date and time for your campaign. Note that the campaign can be scheduled up to one month from today’s date. This feature lets you strategically plan your marketing efforts, aligning with specific events, holidays, or product launches.
2. Select Audience: Use the Advanced Search options to determine the audience for your broadcast campaign. You have two main parameters to employ:
Created At: Filter contacts based on the date they were added into your system, using Today, This Week, This Month, or a custom date range as options.
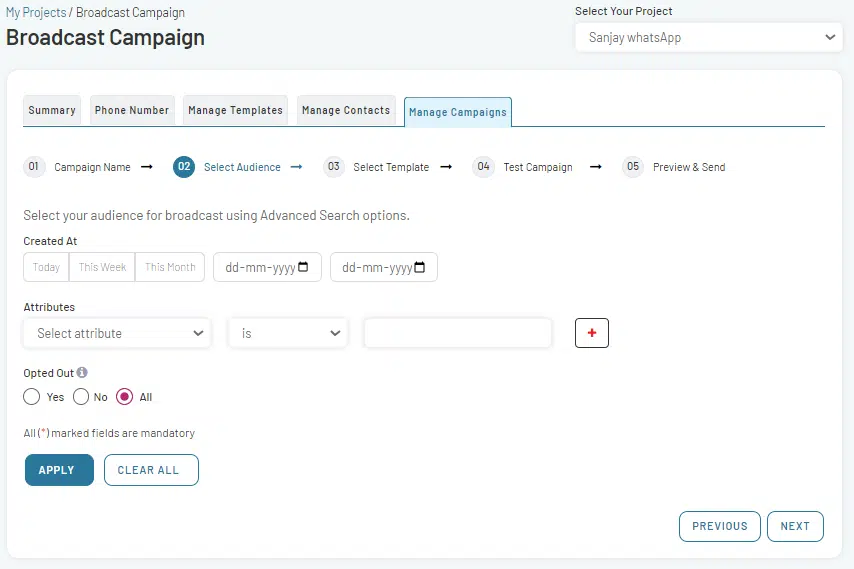
- Attributes: Apply additional criteria using Attributes filters. These attributes are associated with the Name, Phone, Tags, or Source that were designated to your contacts upon creation.
- Opt-out Status: Indicate whether contacts who opted out of communication should be included. Three options are given:
a) All: Include all contacts, irrespective of their opt-out status.
b) Yes: Include only the contacts who have opted out of campaign communications.
c) No: Include only the contacts who have not opted out of campaign communications.
3. Select Template: Pick a pre-approved message template that matches your campaign goals. If you need a new one, there is a process to create and get it approved by WhatsApp.
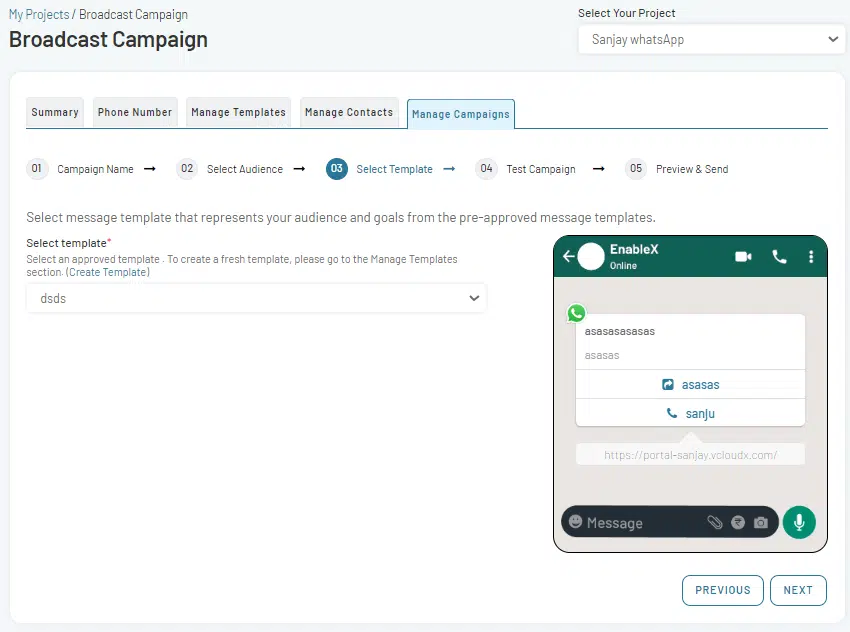
- Select Template: Choose an approved template from the dropdown menu that fits your campaign’s requirements and click on NEXT button.
If you need to create a new template for your campaign, navigate to the Manage Templates section. Here, follow the process to create the template. On submitting a valid template, it will go automatically to Meta for approval. Once approved (usually in a few minutes), it will appear on your list of approved templates. You may also receive an email from Meta once the template is approved.
Read- Create & Manage Message Templates
4. Test Your Campaign: Before going live, test it. This ensures everything is on track and your message looks as intended.
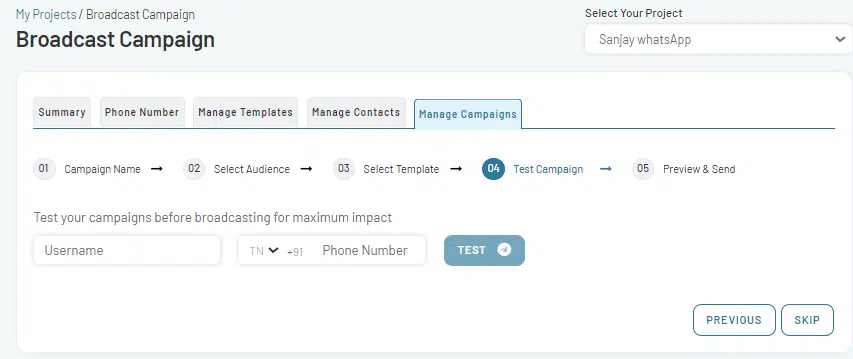
- In the search field, enter the Name and Number of the intended recipient to whom you plan to send the campaign before broadcasting and click on TEST button.
If you prefer to skip the testing phase, click on SKIP button to proceed without testing.
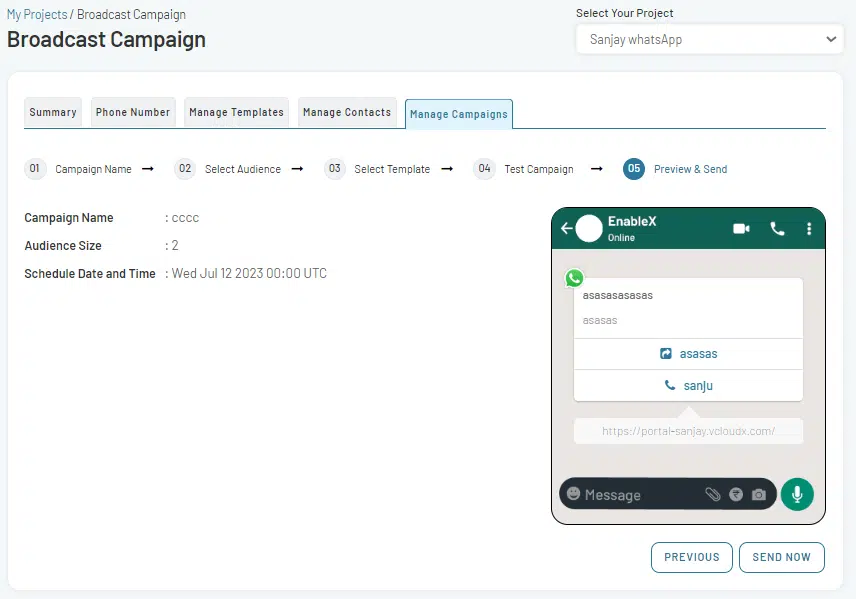
5. Preview & Send: After reviewing your content, click on SEND NOW.
Alternate Campaign Setup Using Single Form
Instead of the 5-Step Wizard, there is a simpler way to get your campaign up:
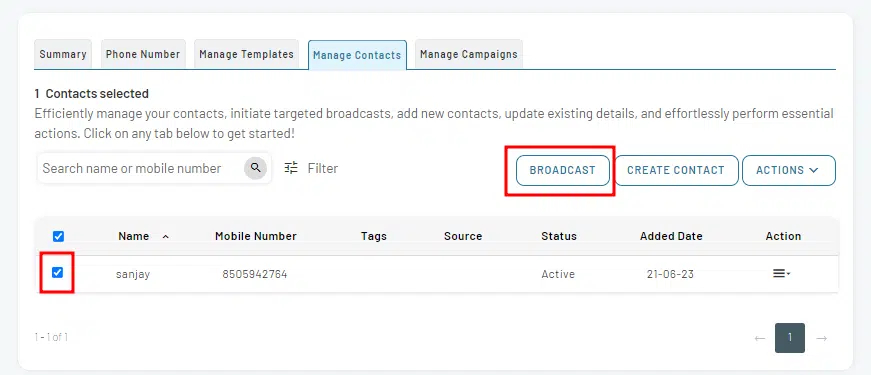
- Manage Contacts: Go to this tab, use search filters to find your target audience, Check the checkbox associated with the contacts and click on BROADCAST tab.
- Campaign Creation: Open the Create Campaign form. Name the campaign, select the preapproved message template, schedule it, decide on including opt-out users and decide if you want to test it.
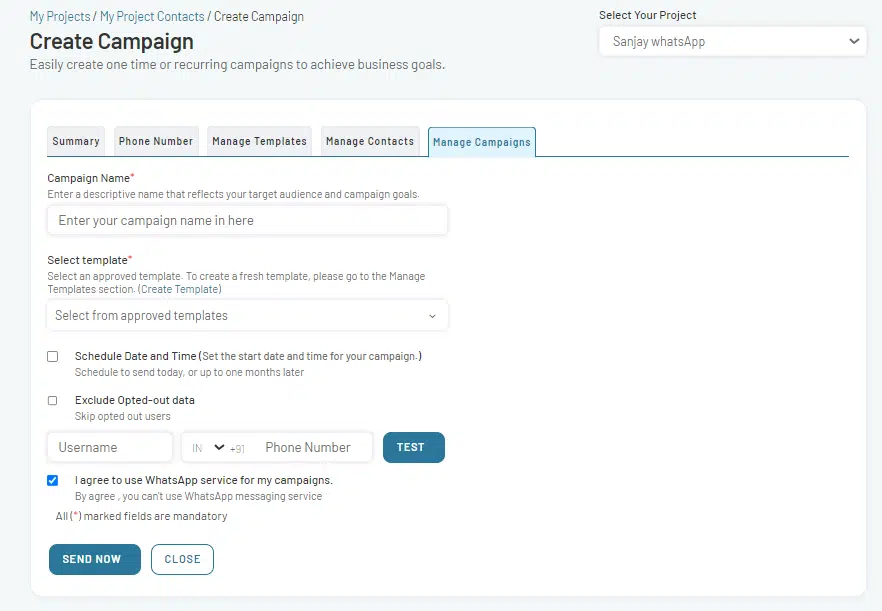
- Execution: Agree to use the WhatsApp service and send your campaign.
Your campaign is now set to deliver as per your specified schedule, and will appear in the campaigns list.
Ready to optimize your WhatsApp campaigns? Dive in with EnableX and see the difference precision targeting can make. Sign Up Now to harness the power of segmented broadcasting!