EnableX Visual Builder offers the easiest way to quickly add video calling to your website using an iFrame code. Once you select the required features, text size, font, colour that you want to see in your video calling, you receive a single line of iFrame code that you need to embed on website and mobile app.
A Step-by-Step Guide
For the sake of simplicity, this tutorial will walk you through the process on how to generate a low code iFrame embed using the EnableX Visual Builder.
Here is how you can do it step by step:
1. Create Project
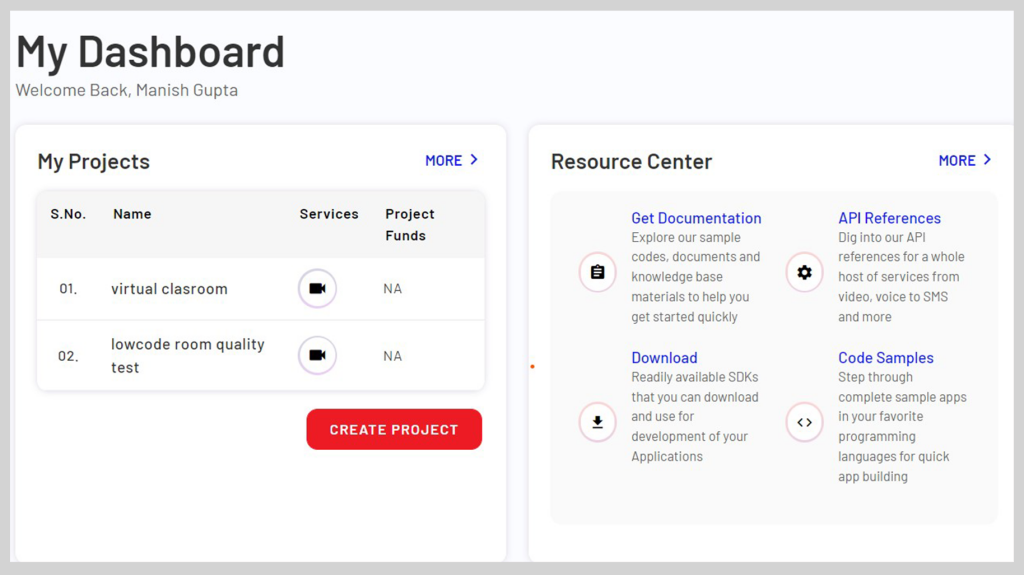
A. Sign Up to create an account on the EnableX Portal. Once you are in the portal dashboard, press Add Project button. You are directed to your Project Dashboard where you can press the Create Project button to start creating a video call project.
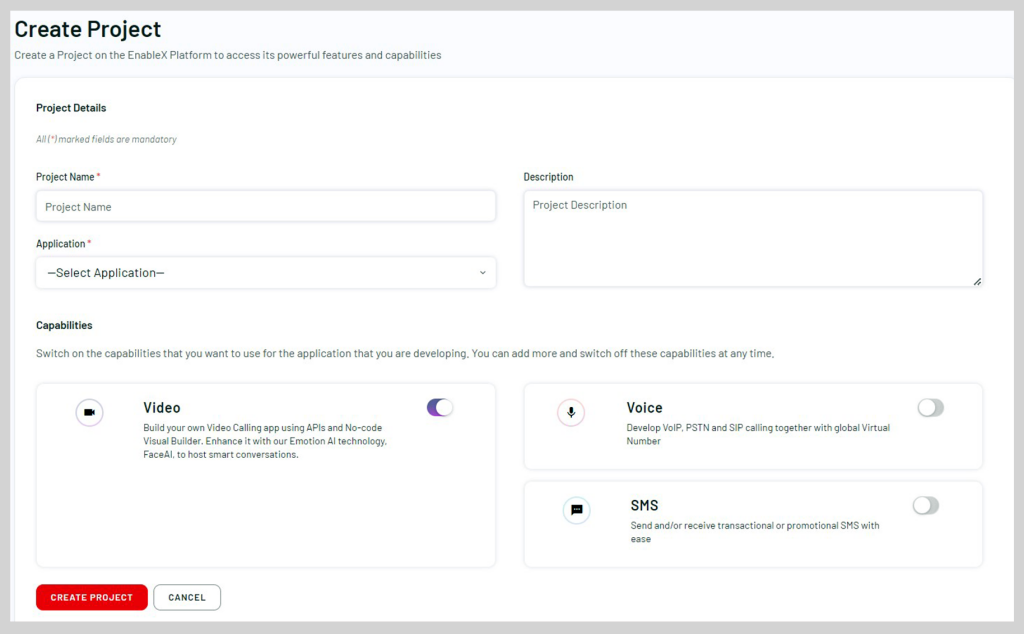
B.Next, fill in the mandatory project details like Project Name, Application and Description fields. Now, enable Video provided under Capabilities, and Press the Create Project button.
Note: Fields marked with (*) are mandatory.
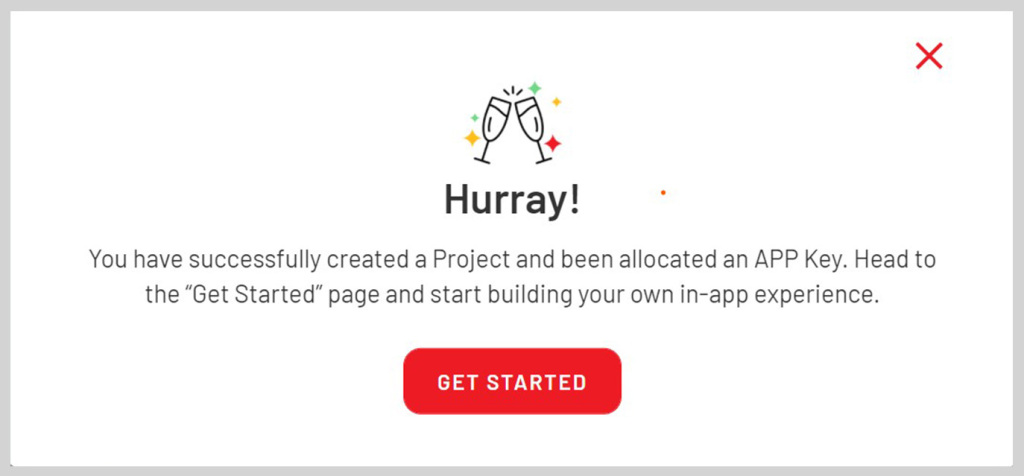
C. It throws a pop-up informing APP KEY and App ID are ready. Now, press the Get Started button on the Pop-Up.
2. Select Pre-built Template
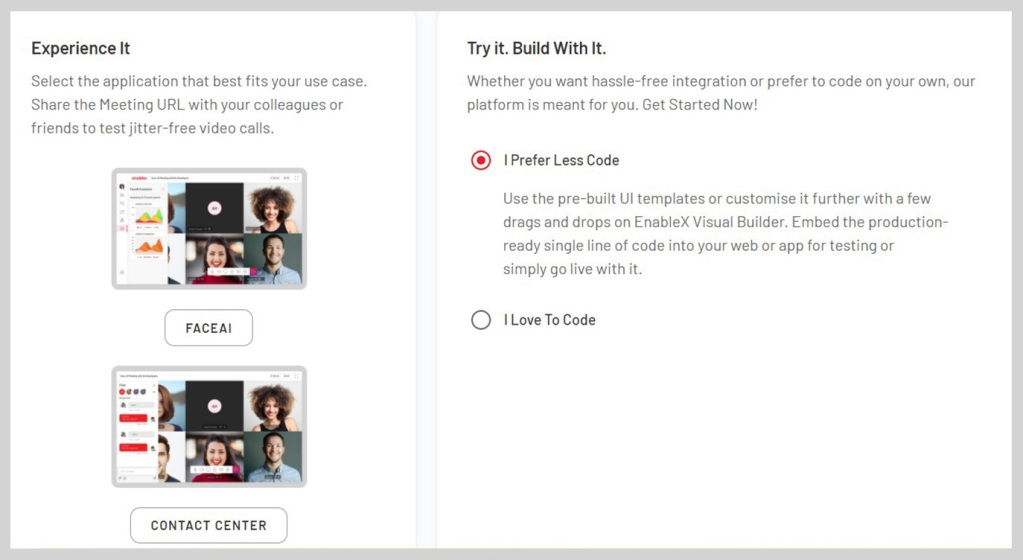
A. Choose the ‘I Prefer Less Code’ option and click the Start Building button. It heads you to Low-Code Video Embed page.
B. Now, choose the relevant template per your use case requirement.
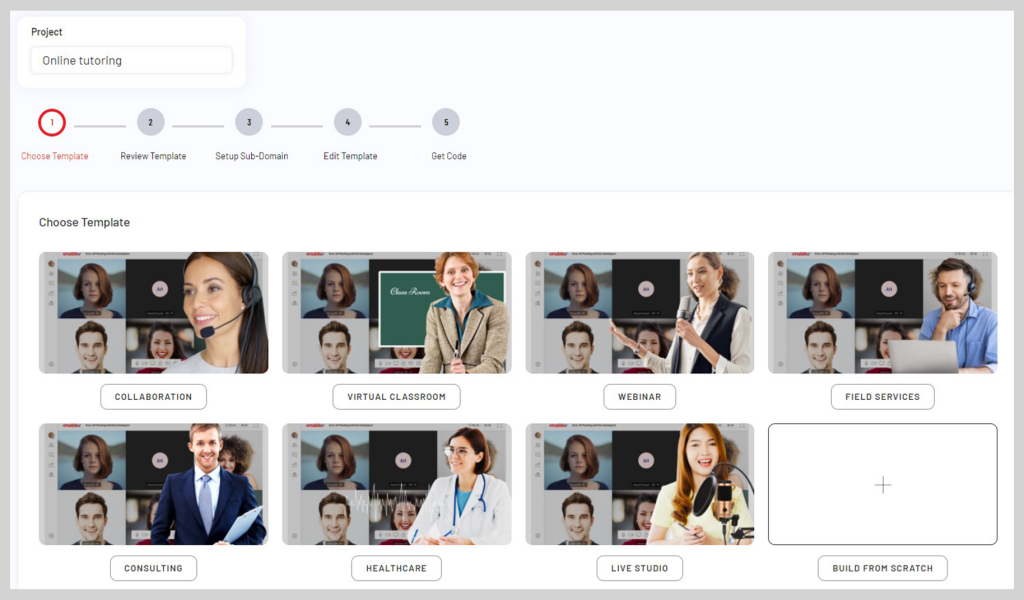
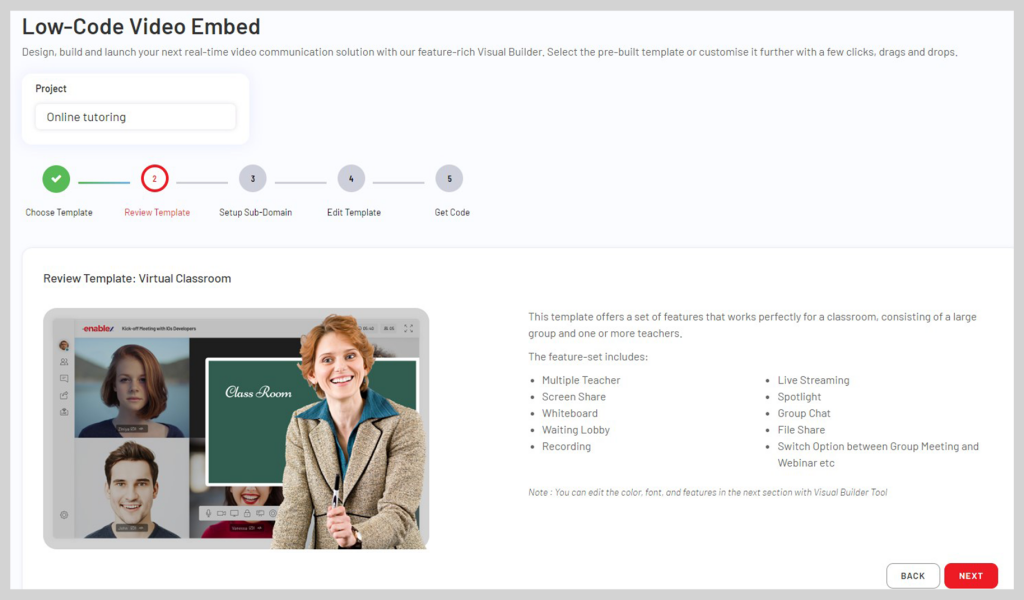
For example, if you select the Virtual Classroom template, you are directed on the page where you can review the Virtual Classroom UI template and features. You can also add or delete any feature if you want using this Visual Builder tool.
Now, click the Next button provided at the bottom right part. It directs you to Setup Sub-domain page.
C. Set subdomain and whitelisted domains
Now, you need to specify your subdomain, which will be hosted on the EnableX domain. You can select a sub-domain in the Set Your Sub–domain field. Once, you select the preferred sub-domain, click the Next button.

* After selecting the sub-domain, press the Check Availability button.
* Whitelisted domains are list of allowed domains that you trust. You can do this later as well
This directs you to the Edit Template page where you can customise it at the granular level of UI, features and capabilities. It has five tabs to perform different functions: On-screen Layout, Toolbar Display Settings, Feature Selection, Moderator Settings, Accessories.
3. Customise Your UI with Visual Builder
These UI templates are preloaded with relevant features based on the use case, but you can easily customise them further. Else, you can skip this step.
A. Go to the On-Screen Layout tab, select your preferred room layout, such as Room Size, Participant’s & Moderator’s View.
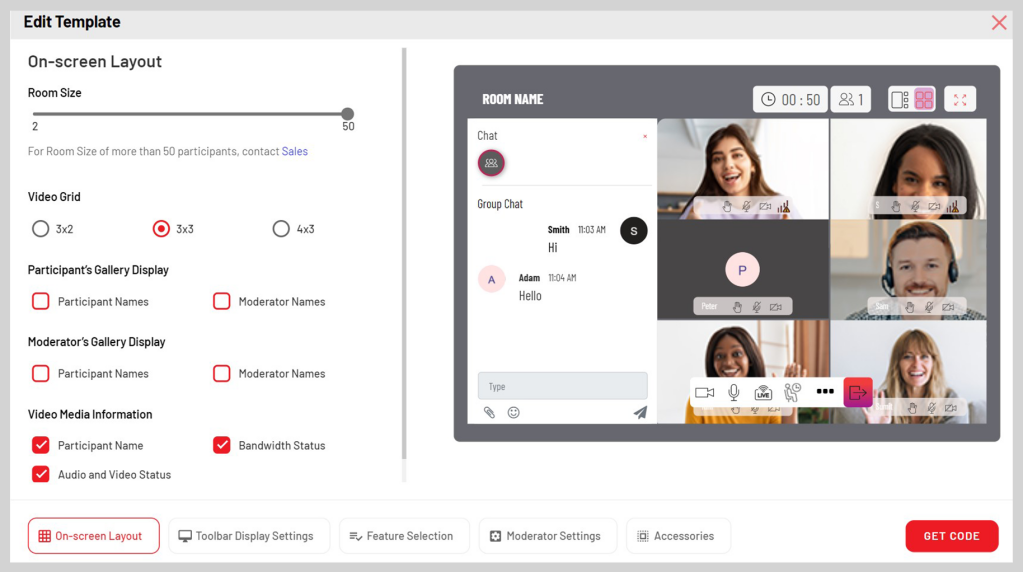
* At EnableX, we can provide up to 100 participants’ room size. However, the Visual Builder gives you the option to choose up to 50 participants. If you need to extend your room size, please contact our sales.
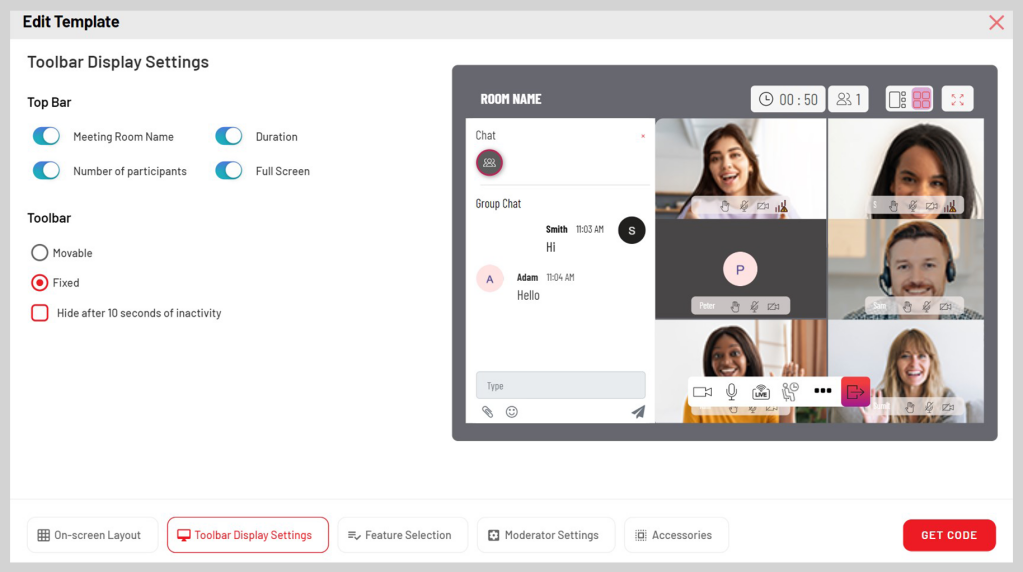
B. Now, come to the Toolbar Display Settings tab and select the features you want to show on your toolbar. You can choose Meeting Room Name, Duration, Participants’ Number, Full-Screen options. It also gives you the option to keep the toolbar either fixed or movable.
C. Next, come to the Feature Selection tab, which provides you with the option to choose basic, collaborative and other advanced features. You can select collaborative features, such as recording, screen share, chat or whiteboard that you need in your video calling.
In addition, you also get many premium features, such as Co-browsing, Live Stream, Virtual Background. You can also select a preferred Video Grid layout like Gallery or Leader view or both.

* Only up to five features can be displayed on the toolbar. You have the option to decide which five features you want to display on the toolbar and which one will be hidden under (…).
D. Head to the Moderator Settings tab, you get plenty of options for moderator controls. It has all the basic features like such as Floor Access Control, Lobby, Breakout Room and Room Lock features. Based on your requirement, you can enable/disable the Administrator setting as shown in the picture given below.
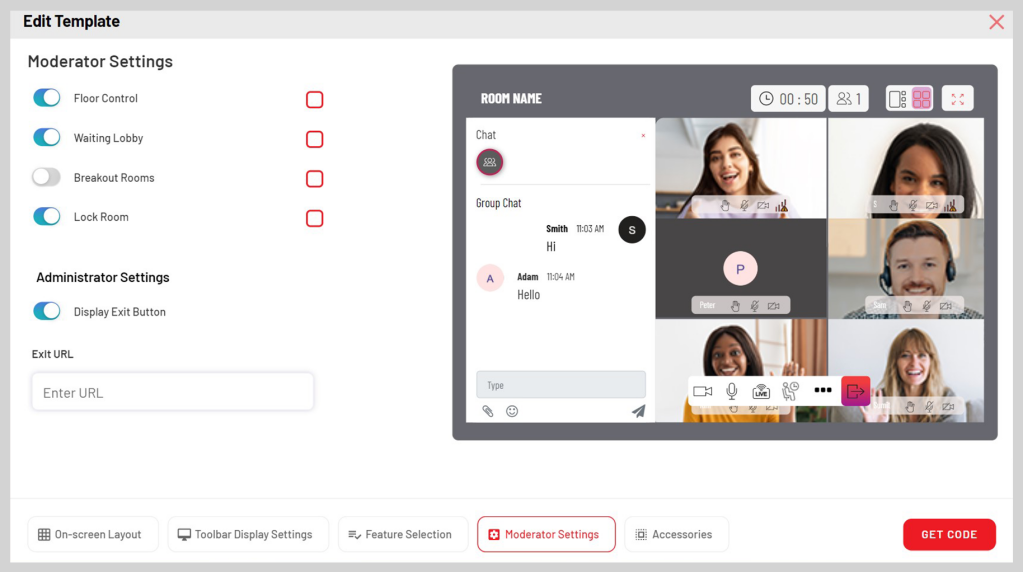
If you don’t want to display Exit button, disable the Display Exit Button.
*Exit/Sign Out URL: State the URL prefixed by “https://” that you want the participants to receive after they Sign out/Exit or disconnect from the session.
*Basic Terminologies:
- Floor Access Control: Temporary permission to be a part of the video meeting.
- Lobby: Allows you to let participants wait.
- Breakout Room: Create a room of different groups where participants can discuss.
- Room lock: Keep uninvited participants away from the meeting room.
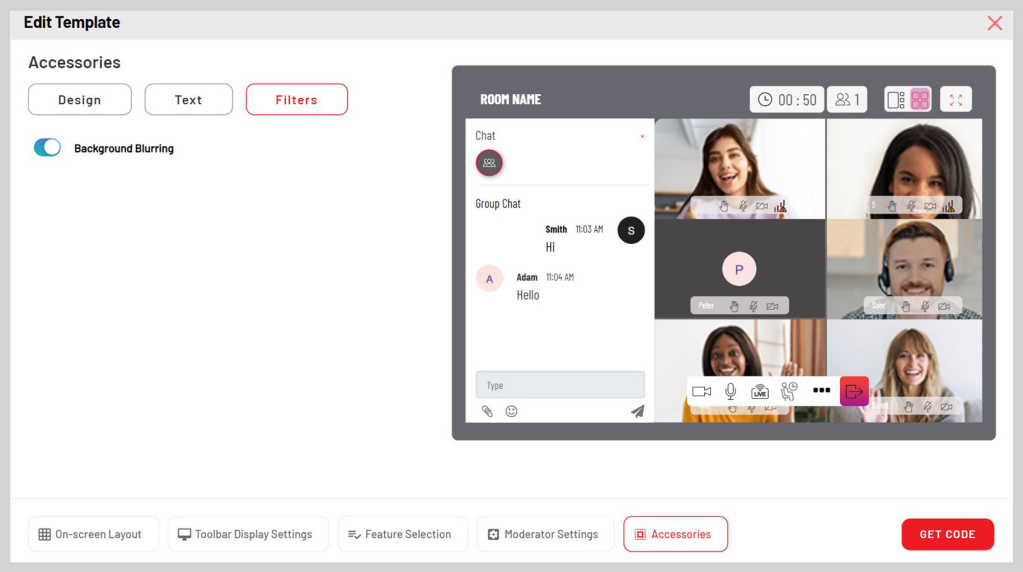
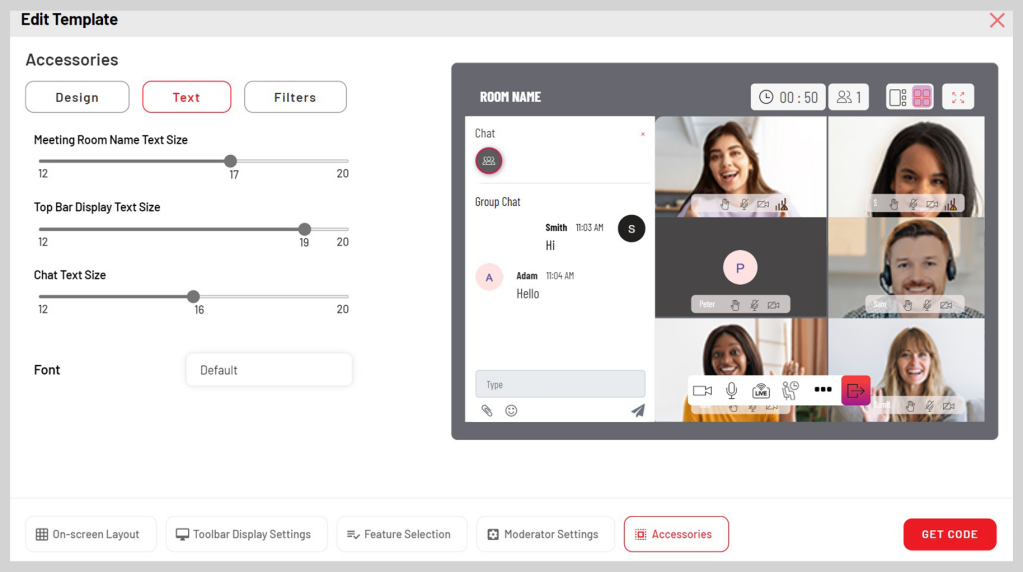
E. Once you’re done with the Moderators Settings, move to the Accessories tab, you reach now closer to being done. This section is all about aesthetics, look and feel. Here, you can select the preferred Design, Text and Filters. You can Play with different features and see how they look.
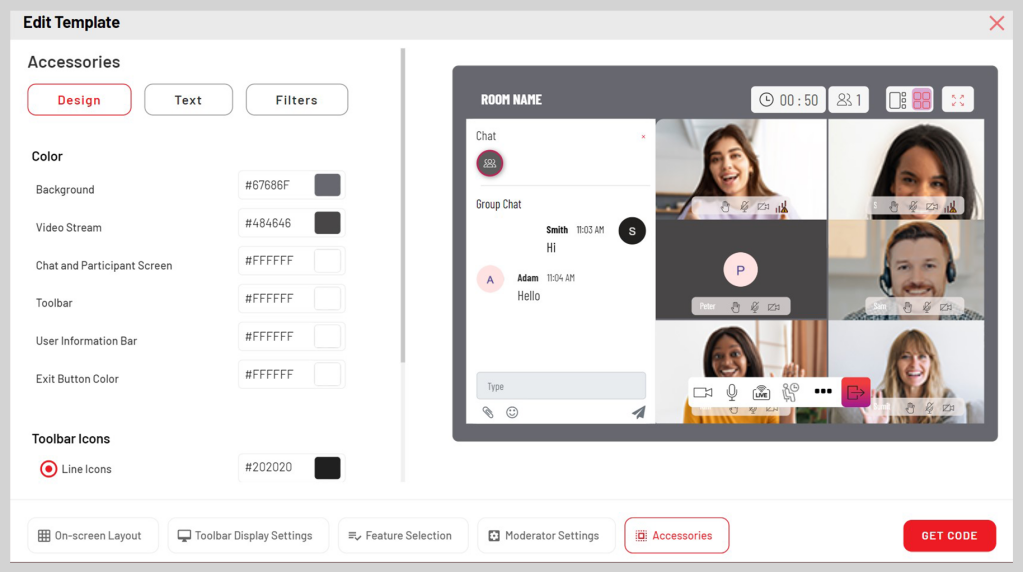
Design tab allows choosing colour, toolbar icons. Play with different options. See the image below. You can customise the background, Toolbar and can even change the Exit Button colour. Toolbar Icons allows you to select Line Icon or Solid Icon.
Whereas, on the Text tab, you can select the font size of chat text, top bar display and Meeting Room name text size.
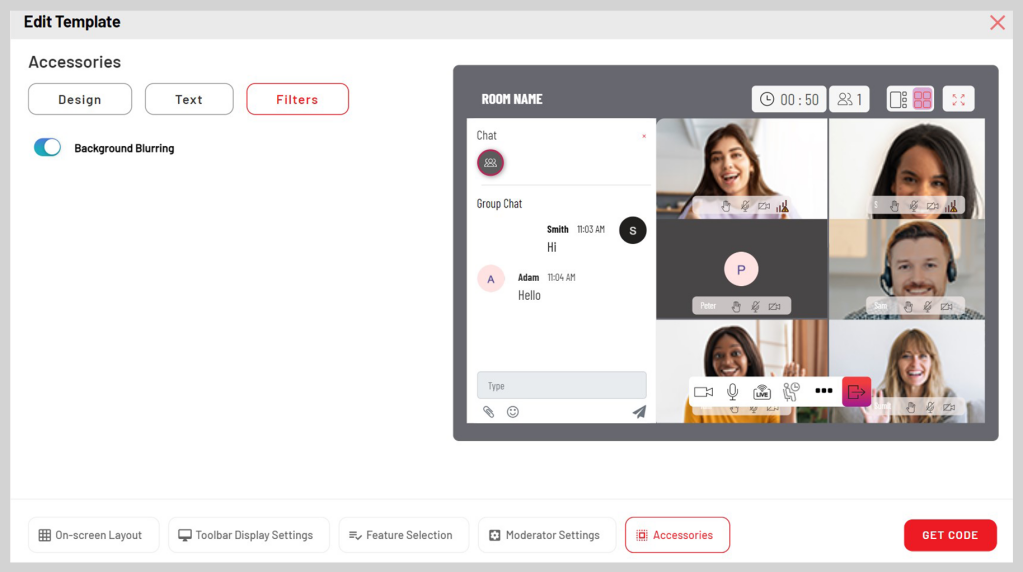
Now, you can go to the Filters tab and enable the Background Blurring option if you want to allow for blurring your video background.
- Get Code and Create Rooms
You are directed to the Low-Code Video Embed page. Now, under the Get Your Code Snippets, you have three options:
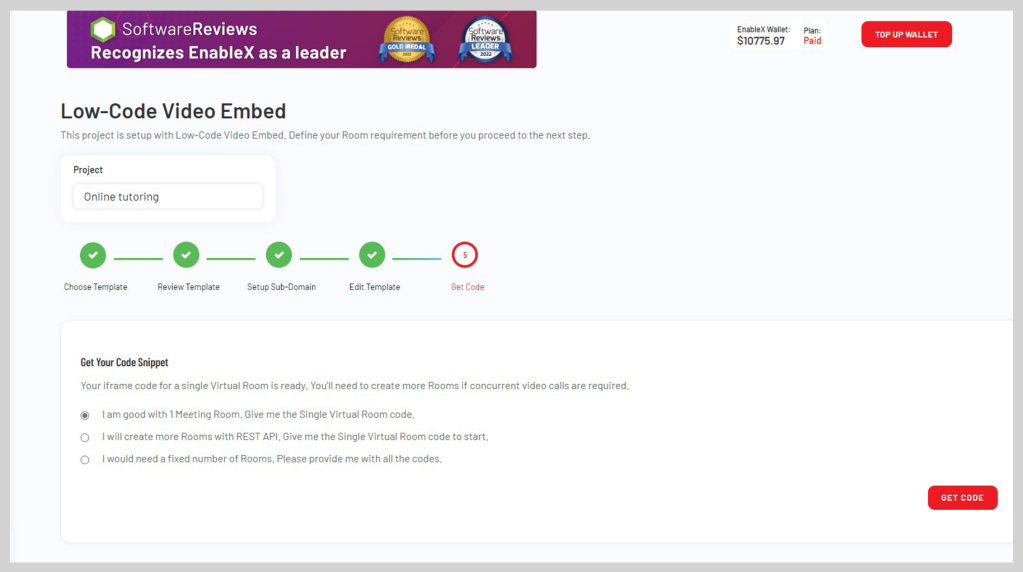
A. The first option is ‘I am good with 1 Meeting Room, Give me single virtual room code”. This is suitable if your requirement is limited to just one meeting room and you are just testing for now.
B. If you are satisfied with the video call, you can start creating more permanent rooms using our APIs. To know more about creating more permanent room, read this blog: https://www.enablex.io/developer/video/low-code-video-embed/create-meeting-room-using-rest-api/
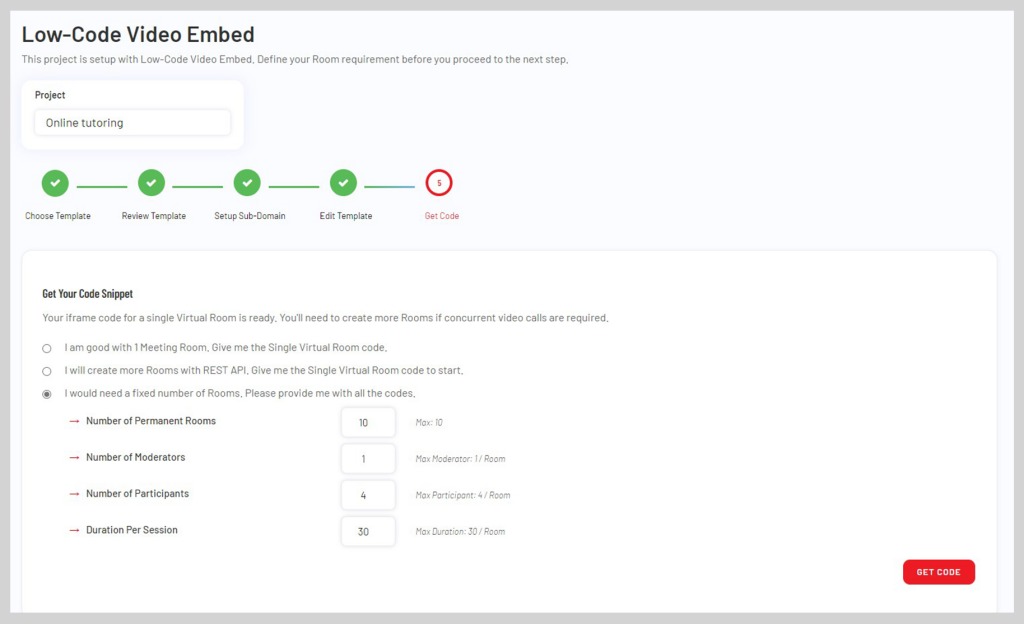
C. In case you know how many concurrent rooms you need to support your use case, you can generate iFrame code for these rooms without coding. Select the third option ‘I would need a fixed number of meeting rooms. Please provide me with all the codes’.Here is how you can do this:
- When you select this option, it opens a new box below where you can enter required inputs.
- Press the Get Code button. A dropdown named ‘Get Your Code Snippets” opens. Next, enter different fields with relevant inputs.
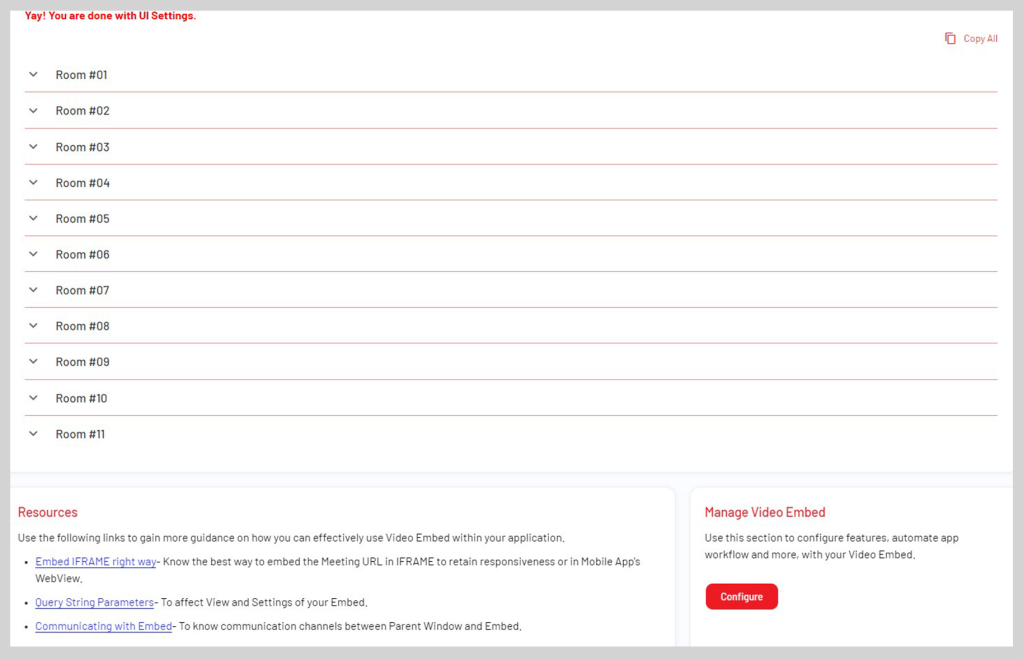
Congrats! Your iFrame code is generated. Copy the iFrame codes to the HTML block of your website. You can now copy individual Rooms code snippets.

Or, you can also copy all Meeting Rooms codes by clicking on the Copy All button provided at the top right part of the page.
Now, your project is setup, and you can go live. However, you can still configure some more advanced features if you want. It’s purely optional.
- Configure Add-on Features (Optional)
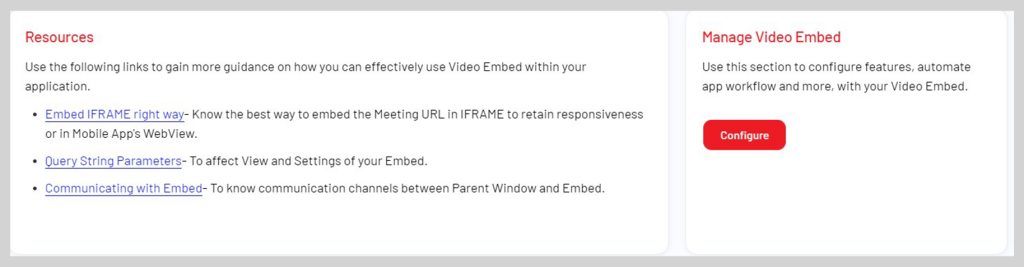
A. Go to Manage Video Embed and click the Configure button. Use this section to configure features, automate app workflow and more.
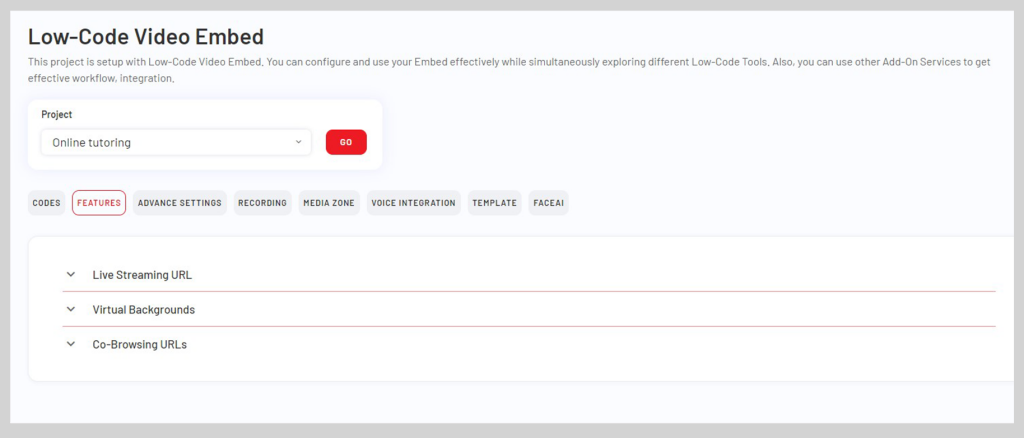
B. Now, you reach the Low Code Video Embed Page. It gives you eight advanced options.

Here it is to be noted that this is purely optional and required only if you are looking for advanced features and capabilities.
You can know more about these different options by separately clicking on each tab.
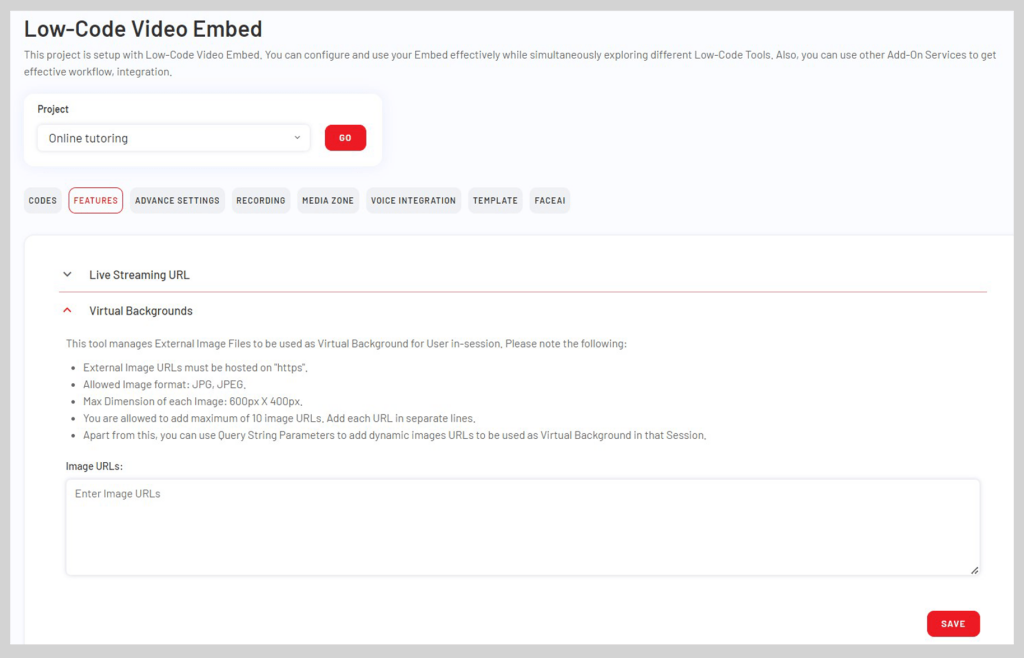
For example, when you click on the Features tab, you get three advanced features: Live Streaming URL, Virtual Backgrounds, Co-Browsing URLs.
C. To know more about each of them, just click the dropdown icon. You can upload an image or image URL as Virtual Background and click the Save button.
Hey, by now you must have realised that it’s super easy to build a meeting app—all it needs is few clicks, drags & drops, and you are done.
You are not required to code at any stage, it’s so easy. Even if you are an absolute beginner, you can learn how to generate an iFrame code using EnableX Visual Builder.
The advantage of EnableX Visual Builder is it doesn’t require the use of a third-party plugin.
If you have any questions, feel free to leave them in the comments below. We’ll be happy to respond.
Build Something Exciting!