The live streaming industry is expected to be valued at $184.3 billion by 202, as per Grand View Research. Enterprises are using live streaming to launch products and offerings.
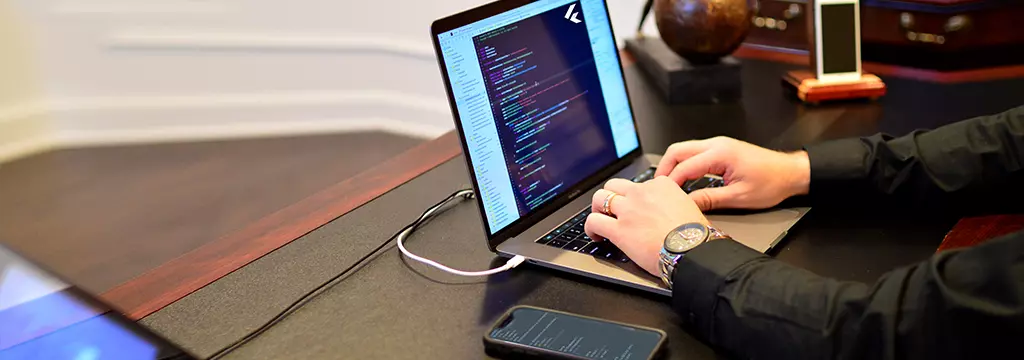
In this post, you’ll learn to build a working Flutter video streaming mobile app using EnableX Low Code Video Embed.
Understanding Low Code
Low-code platforms employ visual, declarative techniques instead of traditional lines of programming. Both developers and non-developers can use these products and they require little coding. Common features include reusable components and process modelling. It allows individuals or small teams can experiment, prototype, and deliver apps quickly using
To gain an understanding of the Low Code Video Embed, readout this blog: EnableX Low Code Video Embed
Prerequisites for Building a Flutter Video Streaming App
Before you start working on this project, having a thorough idea of development and deployment environment is necessary:
A. Development Environment
-
-
Development environment for iOS
-
Requirements for iOS platform:
- Flutter 2.0.0 or later
- macOS
- Xcode (latest version is highly recommended)
-
-
Development environment for Android
-
Here are the requirements for an Android platform:
- Flutter 2.0.0 or later
- macOS or Windows
- Android Studio (the latest version is highly recommended)
B. Deployment environment
- For an iOS platform, iOS device is required.
- For an Android platform, you will need an Android simulator or a real Android device.
Cautions
It is important to run Flutter Doctor to check whether the development and deployment environment are correct.
Getting Started With Project Setup
1. Learn the basic EnableX Low Code Setup
Before starting out, visit Enablex-Low-Code-Video-embed.
2. Create a Video Embed Project
Go to Enablex.io for signup and create a Video Embed project in the EnableX portal. Here is you can do it:
- Log in to the EnableX portal. If you do not have an account, Signup here.
- Now, move to “Create Projects”, enter relevant information.
- Once you’re done with project creation, “APP ID” and “APP Key” are generated. You will need these credentials to gain access in the EnableX Meeting Room. Therefore, save this for further use (see: Embed the Meeting URL).
3. Create a Flutter Project
In this post, we have used Visual Studio Code to create a Flutter project. Before you begin, you need to install the Flutter plugin in Visual Studio Code. See Set up an editor.
A. Launch Visual Studio Code
Select the Flutter: New Project command in View > Command. Then enter the project name and press <Enter>. Next, select the location of the project in the pop-up window. Visual Studio Code automatically generates a simple project.
Alternatively,
This post uses Android Studio to create a Flutter project. Before you begin, you need to install the Flutter plugin in Android Studio. See Set up an editor.
B. Launch Android Studio
Click on file -> New Flutter Project ->Flutter Application.
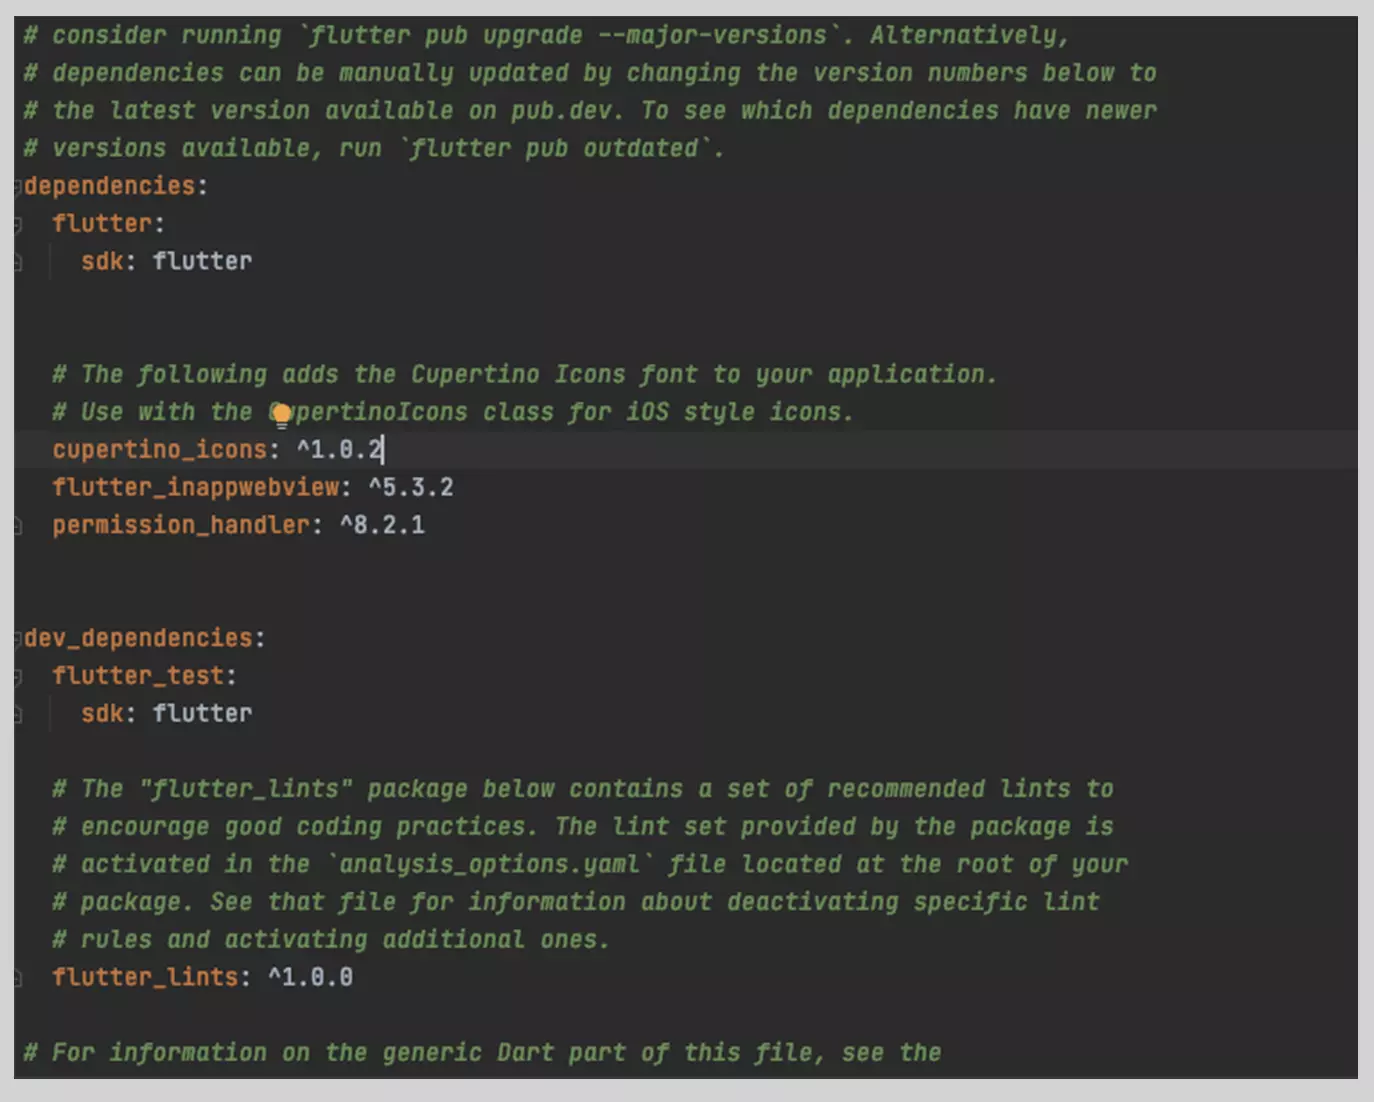
*It is recommended using the flutter_inappwebview and permission_handler modules to manage media permissions in the webview. Therefore, update the Settings in your iOS and Android projects to match the requirements. Also, take care of a known issue to show the keyboard in Android webviews.
C. Add Dependencies
Add the following dependencies in pubspec.yaml:
D. Install Packages
Install packages from the command line with Flutter:
“$ flutter pub get”
Or, your editor might support flutter pub get. Check the docs for your editor to learn more.Is.
E. Need Device Permission
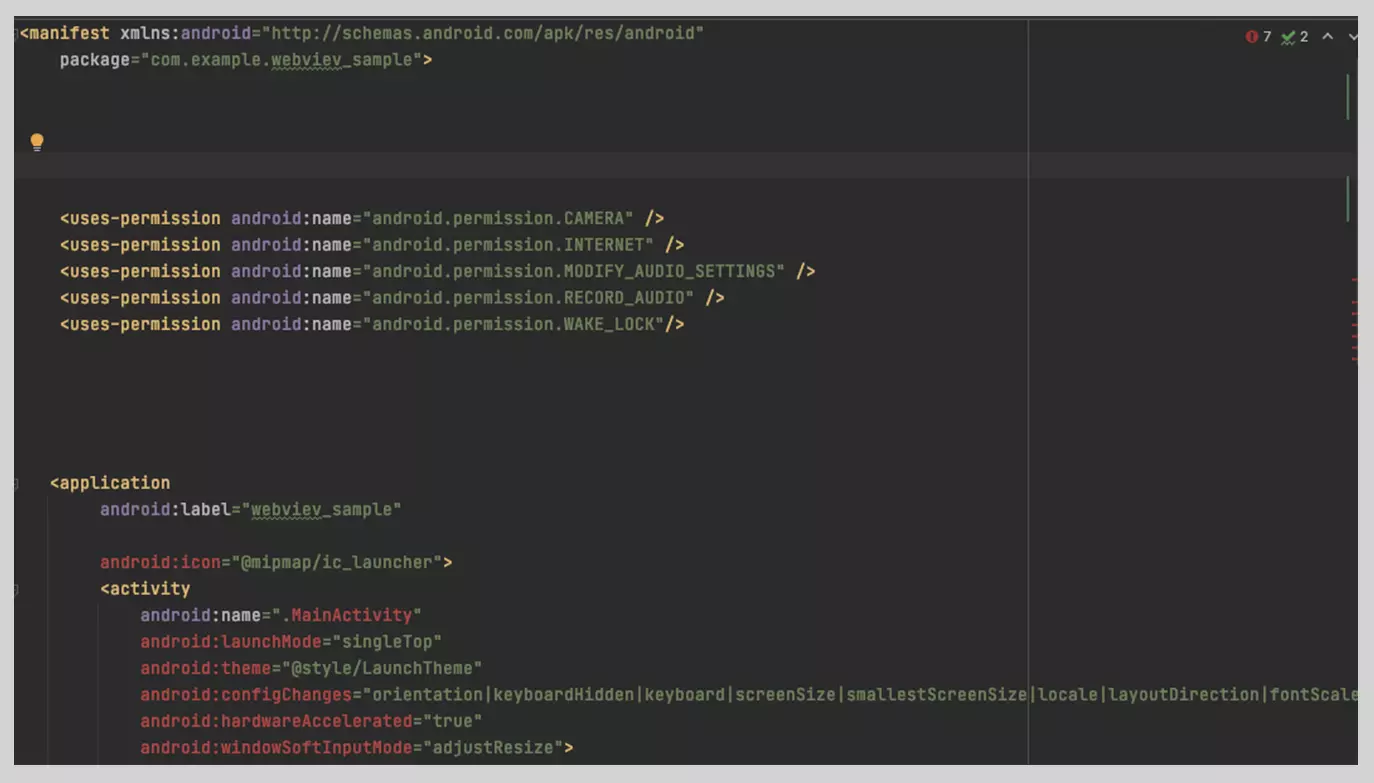
EnableX Video SDK requires camera and microphone permission to start video call.
- For Android
Open the AndroidManifest.xml file and add the required device permissions to the file.
- For iOS
Open the info.plist and add:
- Privacy – Microphone Usage Description, and add a note in the Value column.
*If you want your application to remain active in the background too, enable the Background Mode. Here is how it can be done:
- Open your application in xcode. (Runner.xcworkspace)
- Select your app target.
- Click the Capabilities tab.
- Enable Background Mode, and check in Audio, AirPlay, and Picture in Picture.
*If you see an iOS black screen that means you have not done any of the above steps correctly. Our SDK use PlatformView, you should set io.flutter.embedded_views_preview to YES in your info.plist.
Start the Project
The project setup is over. Now start the project by following the steps given below:
- Add the WebView component to your code
- Setup the properties
- Fill the room URL and parameters
Here is a short example:
import 'dart:io';

import 'package:flutter/material.dart';
import 'package:flutter_inappwebview/flutter_inappwebview.dart';
import 'package:permission_handler/permission_handler.dart';

var _lowCodeUrl = " "; // Replace by your own URL

void main() {
runApp(const MyApp());
}

class MyApp extends StatelessWidget {
const MyApp({Key? key}) : super(key: key);

@override
Widget build(BuildContext context) {
if (Platform.isAndroid) {
_lowCodeUrl += '?skipMediaPermissionPrompt';
}
return const MaterialApp(
debugShowCheckedModeBanner: false,
home: InAppWebViewPage(),
);
}
}
class InAppWebViewPage extends StatefulWidget {
const InAppWebViewPage();

@override
State<InAppWebViewPage> createState() => _InAppWebViewPageState();
}

class _InAppWebViewPageState extends State<InAppWebViewPage> {

@override
Widget build(BuildContext context) {

return Scaffold(
appBar: AppBar(title: const Text("Meeting")),
body: Column(children: <Widget>[
Expanded(
child: InAppWebView(
initialUrlRequest: URLRequest(url: Uri.parse(_lowCodeUrl)),
initialOptions: InAppWebViewGroupOptions(
crossPlatform: InAppWebViewOptions(
mediaPlaybackRequiresUserGesture: false,
),
ios: IOSInAppWebViewOptions(
allowsInlineMediaPlayback: true,
)),
androidOnPermissionRequest: (InAppWebViewController controller,
String origin, List<String> resources) async {
await Permission.camera.request();
await Permission.microphone.request();
return PermissionRequestResponse(
resources: resources,
action: PermissionRequestResponseAction.GRANT);
},
),
),
]));
}
}
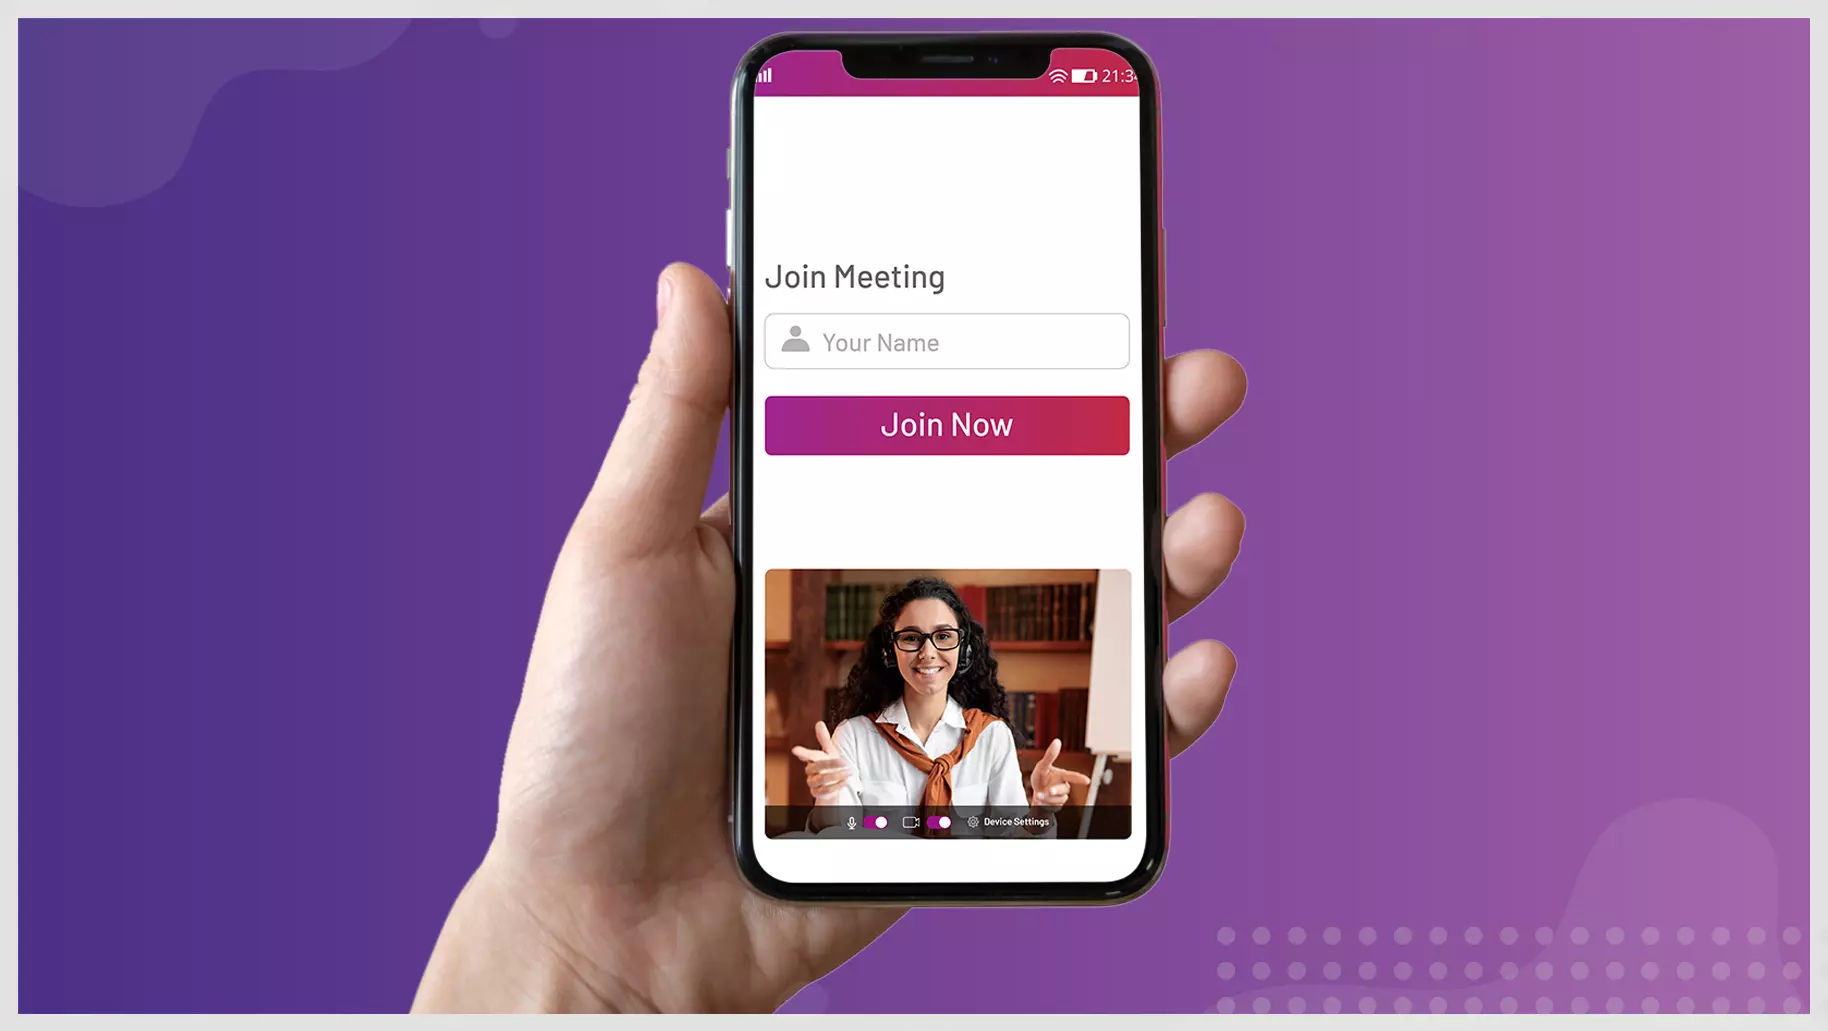
Hey! You’re Done. Now, run this project on real-device and you are ready to start multiparty video calling in Flutter.
I’m sure, you have enjoyed the process.