How to make a video calling app with React Native & EnableX
Communication around us is evolving with technologies such as WebRTC. Nowadays, it has become even more essential for businesses to adopt innovations that keep them ahead of the game. And looking at the kind of fame video calling has gained recently, many apps are integrating it to provide a better experience to their users.
While WebRTC has been drawing accolades for being an open-source technology that provides enough APIs for you to embed it in your app/site, the reality begs to differ a bit. The hassle-free task could turn into a real struggle if you or your team lacks expertise. Not to forget, just like any development project, this too requires efforts, time, money, infrastructure and maintenance. It can also be an obstacle for inexperienced organizations or startups who want to enter the market without investing a lot in building an MVP.
To avoid all the hassle and infrastructure investment, one can turn to CPaaS (Communication Platform as a service) provider to provide you with modular and feature-rich APIs built on WebRTC. The best part- it doesn’t burn a hole in your pocket either! In fact, its pay-as-you-go model allows you to pay as per your usage, which makes it a budget friendly option.
In my recent project, I have used EnableX Video API to build a one-to-one video application using React Native.
What is EnableX & How to make a Video Calling App with it?
EnableX is a cloud-based communications platform for embedding video, voice, SMS and chat messaging into any apps and sites. Built on a carrier-grade platform, it offers developers with full stack of communications APIs and all the necessary toolkits to develop innovative and engaging communication experience.
Following is the list of major EnableX classes containing various methods required to conduct an end-to-end video communication.
- EnxRtc: This Class contains methods to connect to a room and join the room.
- EnxRoom: This Class contains methods to handle operations within a room. e.g. connection of End-Points to EnableX Room, publishing & subscribing streams etc.
- EnxStream: This Class handles all Media Stream related functions. For e.g., initiate, configure and transport streams to and from EnableX Media Servers, receive stream to be played etc.
- EnxPlayerView: This Class is used to display the video stream on a EnxPlayerview.
Learn more about EnableX basics on Enablex official developer documentation.
Create an EnableX Account to make a Video Calling App
Before I start laying out the detailed instructions, please do have a basic to intermediate understanding of React Native and using React Native packages.
You will also need to create an EnableX account. It’s absolutely free and on the top of it you will get 5$ worth free credits in your account! Once done, create a Project and get the necessary credentials and you are ready to start!
- Sign up an Account here
- Create a project
- Get App ID and App Key
Steps to create React Native app using Expo CLI
-
- Start the development server: Run the following commands to create a new React Native project using Expo CLI. Replace the variable ProjectName with the name of your project.
Expo init ProjectName cd projectname Npm start - Launch your app:
- On Android:
- Install the Expo client app and connect to the same wireless network as your computer.
- Use the Expo app to scan the QR code from your terminal to open your project.
- Set up Android Studio or Xcode.
- Launch your app on an Android virtual device or real device using USB by running the
following command: npm run android
- On iOS:
- Install the Expo client app and connect to the same wireless network as your computer.
- Use the built-in QR code scanner of the Camera app to open your project.
- Launch your app on the iOS Simulator (macOS only) by running the following command:
-
npm run ios
- Start the development server: Run the following commands to create a new React Native project using Expo CLI. Replace the variable ProjectName with the name of your project.
After starting the server and installing the client, you can now proceed with integrating EnableX room in your app(client).
Steps to Integrate EnableX with React Native app:
-
- 1. EnableX provides a react-native wrapper called enx-rtc-react-native, which needs to be imported in your code to be able to access various EnableX classes. This ‘enx-rtc-react-native’ plugin is built by integrating native EnableX SDK with Javascript. Please follow the steps mentioned in the Prerequisites for iOS or Android, as per your requirement, to prepare your application for installation of enx-rtc-react-native.
Prerequisites for iOS:
-
-
-
- Install node.js
- Install and update Xcode (you will need a Mac)
- Ensure you have CocoaPods installed on your machine. If already installed, you may need to edit your Podfile and project structure as the installation process has changed.
- Go to the ios directory of your React Native project.
- Create a pod file by running pod init.
- Add following in the podfile:
... pod 'enx-rtc-react-native', :path => '../node_modules/enx-rtc-react- native/ios/RNEnxRtc.podspec' … - Execute the command, pod install
- After installing the EnxRTCiOS SDK, change into the root directory of your project.
- Now run, react-native link enx-rtc-react-native.
- Open .xcworkspace contents in XCode. This file can be found in the ios folder of your React Native project.
- Select File -> New File
- Add an empty swift file to your project. You can name this file anything i.e: EnxInstall.swift. This is done to set some flags in XCode so the Swift code can be used.
- Select Create Bridging Header when you’re prompted with: “Would you like to configure an Objective-C bridging header?”
- Ensure you have enabled both camera and microphone usage by adding the following entries to your Info.plist file:
-
-
                NSCameraUsageDescription
                Your message to the user when the camera is accessed for the first time
                NSMicrophoneUsageDescription
                Your message to the user when the microphone is accessed for the first time
Prerequisites for Android Installation:
-
-
-
- Install node.js
- Install and update Android Studio.
- Open file android/app/src/main/java/[…]/MainActivity.java
- Add import com.rnenxrtc.EnxRtcPackage; to the imports list at the top of the file.
- Add new EnxRtcPackage() to the list returned by the getPackages() method
- Append the following lines to android/settings.gradle:
include ':enx-rtc-react-native project(':enx-rtc-react-native').projectDir = new File(rootProject.projectDir, '../node_modules/enx-rtc-react-native/android')] - Insert the following lines inside the dependencies block in android/app/build.gradle:
ompile project(':enx-rtc-react-native') - Add following permissions in Android Manifest file:
    < uses-permission android:name="android.permission.SYSTEM_ALERT_WINDOW" />
    < uses-permission android:name="android.permission.CAMERA" />
    < uses-permission android:name="android.permission.CHANGE_NETWORK_STATE" />
    < uses-permission android:name="android.permission.MODIFY_AUDIO_SETTINGS" />
    < uses-permission android:name="android.permission.RECORD_AUDIO" />
    < uses-permission android:name="android.permission.INTERNET" />
    < uses-permission android:name="android.permission.WRITE_EXTERNAL_STORAGE" />
    < uses-permission android:name="android.permission.READ_EXTERNAL_STORAGE" />
    <uses-permission android:name="android.permission.ACCESS_NETWORK_STATE" />
    < uses-permission android:name="android.permission.BLUETOOTH" />
    < uses-permission android:name="android.permission.BLUETOOTH_ADMIN" />
2. After having taken care of all the above Prerequisites for both the platforms, you can now install enx-rtc react-native plugin as follows:
npm install enx-rtc-react-native --save//Mostly automatic installation react-native link enx-rtc-react-native3. Start building the mobile app with EnableX SDK
-
- Import enx-rtc-react-native as follows:
import { EnxRoom, Enx, EnxStream, EnxPlayerView, EnxToolBarView } from "enx-rtc-react- native"; - Initialise the Enx bridge to use EnableX React Native API
async componentWillMount() { Enx.initRoom();
- Import enx-rtc-react-native as follows:
4. Generate EnableX token
Every user requires an access token to connect to an EnableX room. A unique token is generated for every user in every meeting room via Rest API call.
Use the following link to create token and room Id
https://openapi.enablex.io/video/v1/api-docs/#/Rooms5. Connect to a RoomTo connect to a room, you need to pass token, local stream information, roominformation, room handlers and stream handlers in the constructor.The roomEventHandlers listen to events in the room and trigger actions like
-
-
- Publish local stream on connecting to the room.
- Subscribe to remote stream on receipt of remote stream in the room.
- Maintain a list of active talkers in the room
-
                                            constructor(props) {
                                            super(props);
                                            localStreamInfo: {
                                            audio: true,
                                            video: true,
                                            data: false,
                                            maxVideoBW: "400",
                                            minVideoBW: "300",
                                            audioMuted: false,
                                            videoMuted: false,
                                            name: "React Native",
                                            minWidth: "720",
                                            minHeight: "480",
                                            maxWidth: "1280",
                                            maxHeight: "720",
                                            audio_only: false
                                            },
                                            enxRoomInfo: {
                                            allow_reconnect: true,
                                            number_of_attempts: "3",
                                            timeout_interval: "15"
                                            },
                                            activeTalkerStreams: [],
                                            this.roomEventHandlers = {
                                            //publish local stream on connecting to the room
                                            roomConnected: event => {
                                            console.log("roomConnected", event);
                                            Enx.getLocalStreamId(status => {
                                            this.setState({
                                            localStreamId: status
                                            });
                                            this.state.localStreamId = status;
                                            console.log("localStreamId", this.state.localStreamId);
                                            });
                                            Enx.publish();
                                            },
                                            //subscribe to remote stream when remote stream added.
                                            streamAdded: event => {
                                            console.log("streamAdded", event);
                                            Enx.subscribe(event.streamId, error => {
                                            console.log("streamAdded", error);
                                            });
                                            },
                                            //maintain list of active talkers in the room
                                            activeTalkerList: event => {
                                            var tempArray = [];
                                            tempArray = event;
                                            if (tempArray.length == 0) {
                                            this.setState({
                                            activeTalkerStreams: tempArray,
                                            });
                                            }
                                            if (tempArray.length > 0) {
                                            this.setState({
                                            activeTalkerStreams: tempArray,
                                            });
                                            } }
                                            };
                                            this.streamEventHandlers = {
                                            };
                                           };
6. Render remote and local stream using EnxPlayerView EnxPlayerView uses the render method to render video streams on the player. One remote player is created for every active talker in the room.
                    render() {
                          return (
                          {this.createActiveTalkerPlayers()}
                        }
                        //Method to create remote players
                        createActiveTalkerPlayers() {
                        return (

                          {this.state.activeTalkerStreams.map(function(element, index) {
                             if (index == 0) {
                              const { height, width } = Dimensions.get("window");
                                return (
                                 <View>
                                  {this.state.activeTalkerStreams.map(function(element, index) {
                                    if (index == 0) {
                                      const { height, width } = Dimensions.get("window");
                                       return (

                                               );
                                              }
                                          })}
                            </View>
                           );
                        }
7. Leverage additional functionalities offered by EnableXEnableX offers many additional features like mute audio video, switch camera etc.
-
-
- To mute local audio stream
Enx.muteSelfAudio(‘localStreamId’,true); - To switch camera of local stream
Enx.switchCamera(‘localStreamId’);You can also refer to advanced features for video applications for more details.
- To mute local audio stream
-
8. Disconnect from the Room
Enx.disconnect();You can find the complete working code in the GitHub repository One-to-One-Video-Calling-Open-Source-React-Native-Application
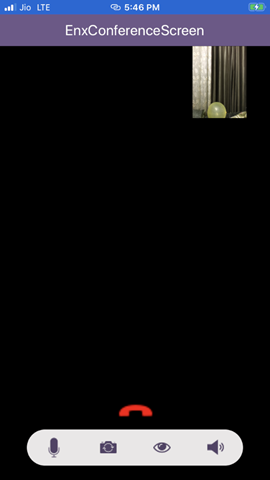
(A video calling app using EnableX and React Native in progress) Developing a cross-platform mobile application is a lot easier with EnableX. The platform offers many rich features that powerfully enhance every user’s video calling experience.
Try their demo applications to get started.
Keep following this space to learn more about the latest developments in WebRTC and other technologies that are making communication seamless.
-
-