SMS is perhaps the oldest communication channel used, after voice, since the advent of modern telecommunication. Every day, billions of messages are sent by individuals and businesses to each other, and despite the emergence of new channels, it remains ubiquitous, especially for business messaging. Popularly called A2P (Application to person) messaging, it helps businesses sent alerts, notifications and promotional messaging to customers, based on both events and triggers.
This SMS User Guide provides comprehensive instructions on how to effectively utilize the SMS features of the platform. Whether you’re a developer integrating SMS functionality into your applications or a business user looking to leverage SMS for customer engagement, this guide offers clear and concise steps to get you started. If you are starting afresh, or looking for alternative to twilio SMS API or other providers, you can start right away!
From setting up your SMS account to sending messages and managing delivery reports, EnableX’s user-friendly guide ensures a smooth and efficient experience, empowering you to harness the power of SMS communication.
In case you want to learn more about our SMS API solutions first, click here.
Welcome to the EnableX SMS User Guide. The primary objective of this guide is to assist users in harnessing the full potential of the EnableX SMS Service. Whether you’re trying out the service for the first time or looking to broadcast a campaign to a larger audience, this guide provides detailed step-by-step instructions to ensure your success.
1.2. Overview of EnableX SMS Service
EnableX SMS Service offers a comprehensive suite of tools and functionalities designed for businesses to send and receive SMS messages seamlessly. Be it for marketing promotions, transactional notifications, or general customer engagement, our service guarantees reliable and timely message delivery. With a user-centric interface available on the EnableX Portal, users can easily set up campaigns, initiate SMS projects, and monitor delivery statuses, making effective communication with their target audience simpler than ever.
1.3. Registration on the EnableX Platform
- Start a free trial account on EnableX here

- For new users:
- Click on Try For free

- Click on Try For free
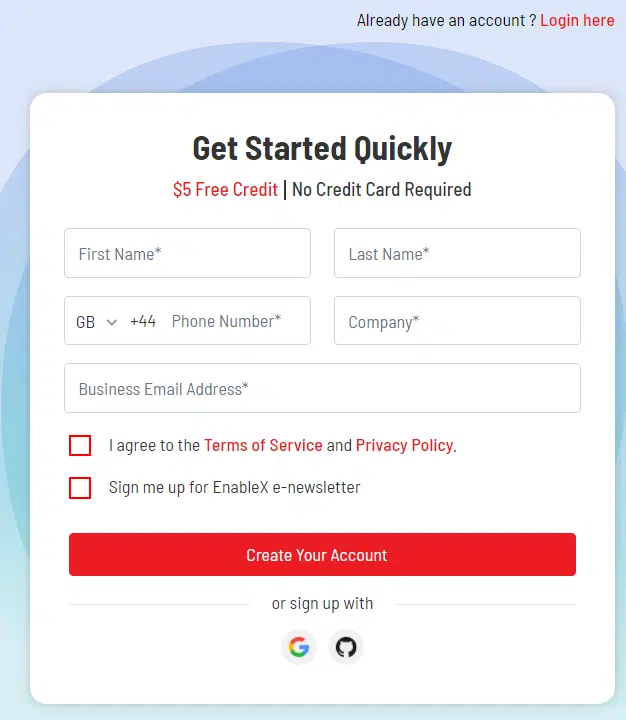
- Fill in the required details: Name, Phone number, Company, email address and check the box for Terms of Service and Privacy Policy.
- Click on Create Your Account.
- A verification email will be sent to the given address. Verify your account by clicking on the link in this email.
- Users can also sign up with Google or GitHub.
- For returning users:
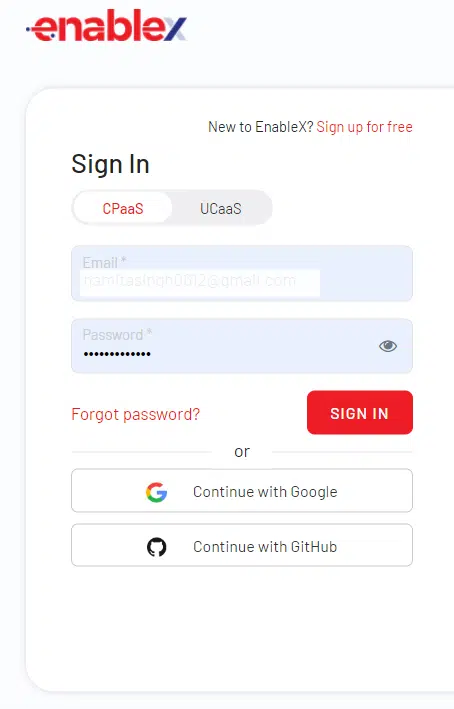
- Navigate to and click on SIGN IN located at the top right corner. On the resulting login page, enter your login credentials and click on SIGN IN.

- Optionally, use Google ID or GitHub ID for login.
- Navigate to and click on SIGN IN located at the top right corner. On the resulting login page, enter your login credentials and click on SIGN IN.
- After logging in, users will be directed to My Dashboard which offers various information options.
1.4. Understanding the Interface
The EnableX platform provides a user-centric dashboard that offers a quick glimpse into the user’s activities, projects, and resource tools. This allows for quick navigation and easy access to the most used features.
My Dashboard Menu Options:
- My Dashboard: The home page of the platform, displays a summary of the user’s activities and vital stats.
- My Projects: A list of all the projects created by the user with management options.
- Analytics: Provides insight into the user’s activity over a specified period.
- My Projects: Lists projects, allows for easy management, and shows associated services.
- Resource Center: Dive into developer documentation, sample codes, and test EnableX’s features via a live demo.
- Video, Voice, SMS, WhatsApp: Different communication channels available for integration. Clicking on each would likely lead to specific settings and configurations for that service.
- Billing: Check your billing details and payment history.
- My Wallet: Overview of your financial details and transactions.
- Support: Direct access to help and customer support.
SMS Dashboard Menu Options
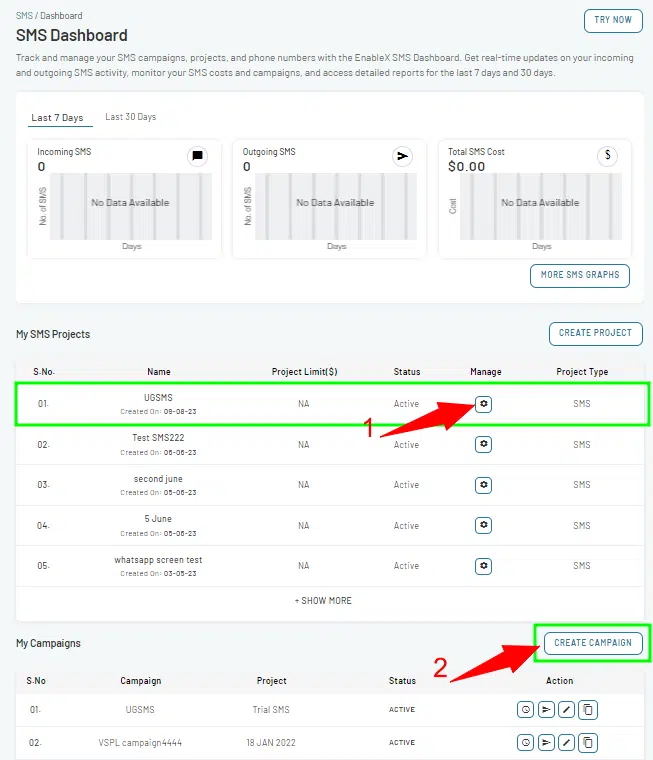
This is the central hub for tracking and managing your SMS activities on the EnableX platform.
Features
- Real-time Updates: Get instant updates on incoming and outgoing SMS activity.
- Monitoring: Oversee your SMS costs and the status of various campaigns.
- Reporting: Access detailed reports for both the past 7 days and the past 30 days.
Performance Metrics:
- Incoming SMS: Displays the number of SMS messages received.
- Outgoing SMS: Displays the number of SMS messages sent.
- Total SMS Cost: Shows the cumulative cost for the SMS messages during this period.
Project Listing:
- My SMS Projects: Lists your SMS-related projects.
- My Campaigns: Lists the various campaigns you have created or are part of.
Phone Number Listings:
- My SMS Phone Number: Lists the phone numbers associated with your SMS projects.
2. Setting up the SMS Service
2.1 Creating SMS Project with EnableX Platform
Before you start using the SMS Service, you need to create an SMS project on the EnableX platform. Follow these steps to create a project:
- Login to the EnableX Portal.
- After successfully logging in, users are redirected to My Dashboard. From there, follow these steps to create a new project:

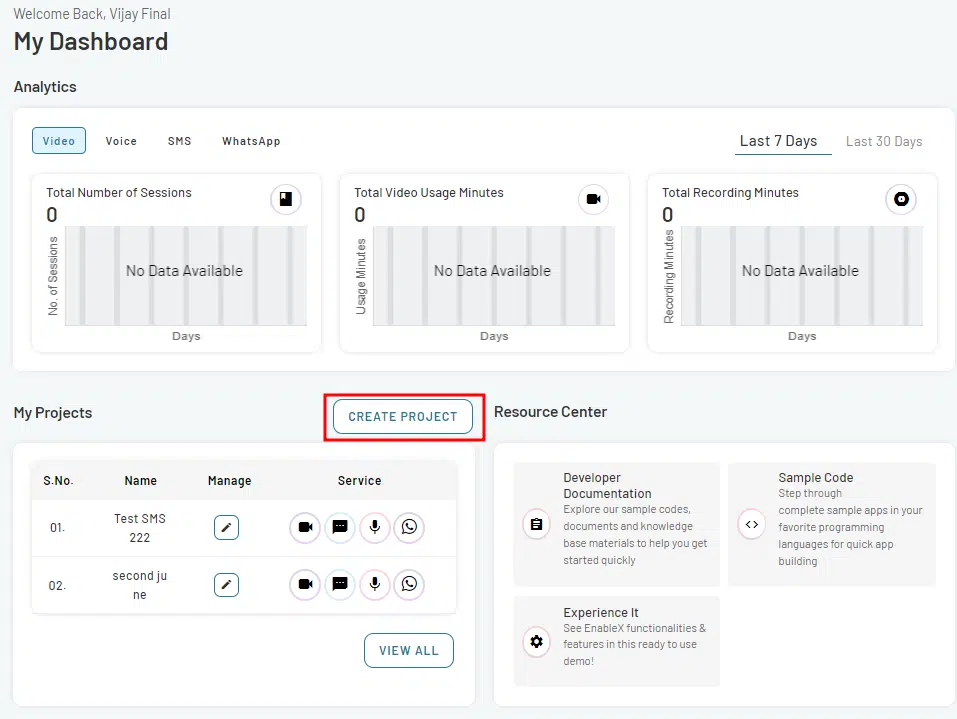
- Navigate My Projects section on the page.
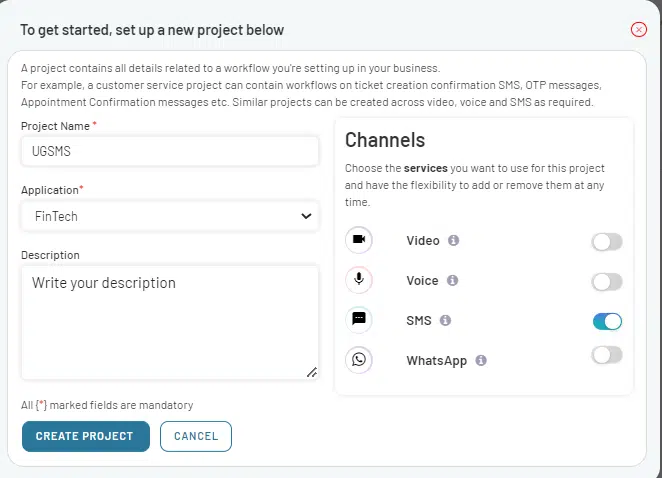
- Click on CREATE PROJECT button. This opens Create Project page.

- On this page, provide the necessary information for your project, including the Project Name, Application, and Project Description.
- Navigate the Channels section on the page. Within this section, you can enable specific services for your project.
- To add SMS service to your project, toggle the SMS option in the Channels section. This ensures that the messaging functionality will be available within your project.
- Click on CREATE PROJECT button to create your project.
- The project has been successfully created and a confirmation popup will appear.

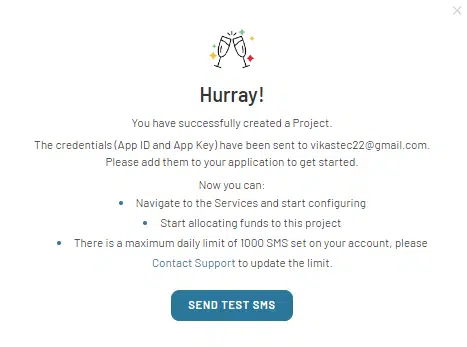
After successfully creating an SMS project on the EnableX platform, a confirmation popup will appear. This popup will provide the following details:
- Confirmation that the project was created successfully.
- Notification that the App ID and App Key have been sent to your registered email address.
- Information about the maximum daily limit set on your account.
- A SEND TEST SMS button, allowing you to test the SMS service immediately.
- In the pop-up dialog box, click on SEND TEST SMS button. This will take you to the next stage where you can select a number to send a default test template SMS from a default number.

- A confirmation pop-up will appear, inquiring whether your message was sent successfully. If not, it will prompt you to resend. Please ensure that the entries you have selected for testing are correct.
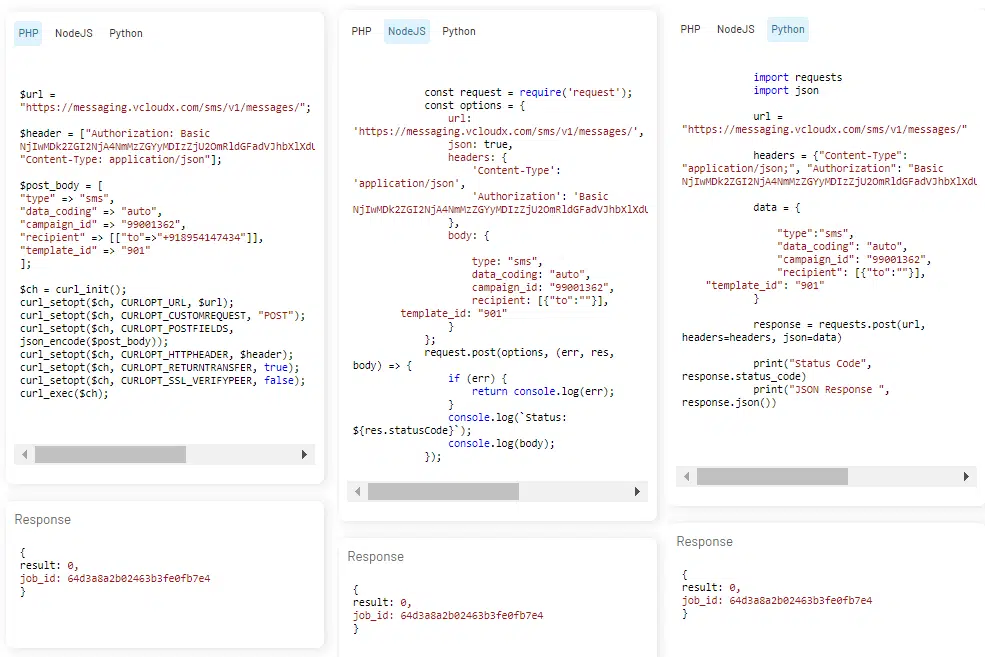
To test the SMS programmatically, use the code snippet in the request block. A sample request is shown below:
2.2 Add Video Service to an Existing Project
This process involves a few simple steps to configure your Video integration within your existing projects, whether it is Voice, SMS or WhatsApp Project. To add video service to an existing project:
- Navigate to My Dashboard
- Go to My Projects section
- To add services to a project, select the project you want to modify and click on the Edit icon. This will open the project summary page.
- On the Project Summary page, click on EDIT Tab.

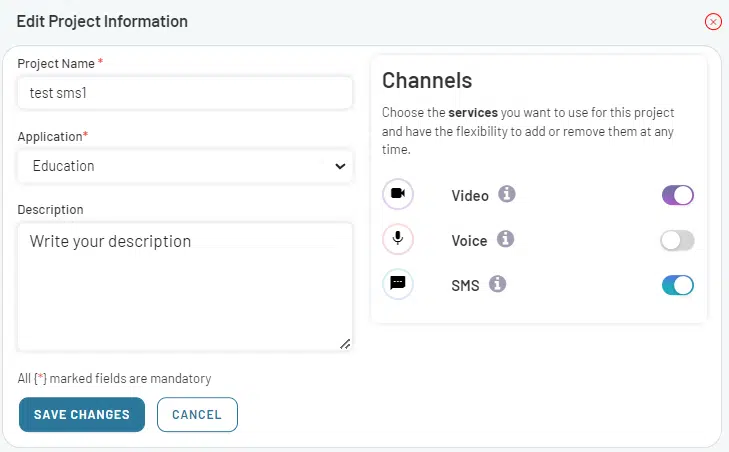
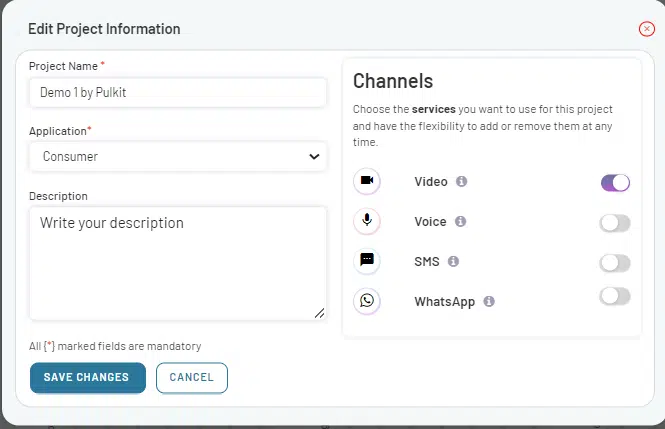
- A Edit Project Information form will open, using which you can add new services to the Project or remove any existing service.
- Enable SMS option in the Channels section.

- Click on SAVE CHANGES.
- A new SMS service has been integrated into your existing project.
- The updates will be immediately reflected on the Dashboard.
3 Campaign Management
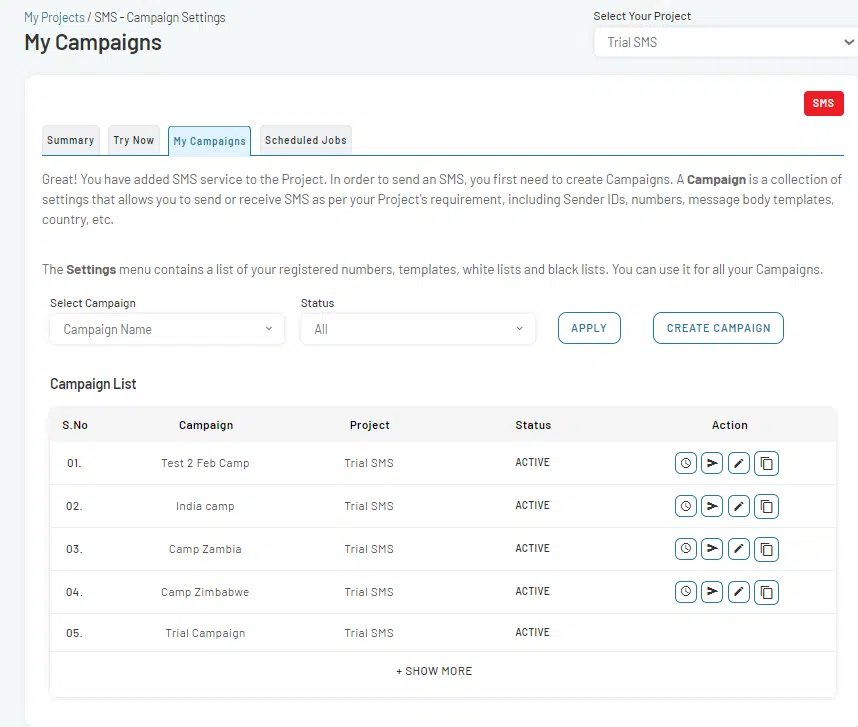
In the EnableX SMS platform, a campaign is a set of SMS messages designed for a specific goal. Instead of just sending one message, a campaign lets you plan a series of messages. A Campaign is a collection of settings that allows you to send or receive SMS as per your Project’s requirement, including Sender IDs, numbers, message body templates, country, etc.
To create a new campaign:
- In the My Projects sidebar, select SMS.
- Select Dashboard from the dropdown menu options.
- On the SMS Dashboard, Do one of the following:
Path#1
- Navigate to the My SMS Projects section and select the <Project Name> against which you wish to create SMS Campaign.
- This action will take you to the My Campaigns page.
Path#2
- Navigate to the My Campaigns section and select CREATE CAMPAIGN tab.
- This action will take you to the My Campaigns page.
- In the Select your Project search bar, choose the <Project Name> for which you wish to create an SMS campaign.
-

- Click on Create Campaign Tab.

- This action will take you to the Create SMS Campaign page
-

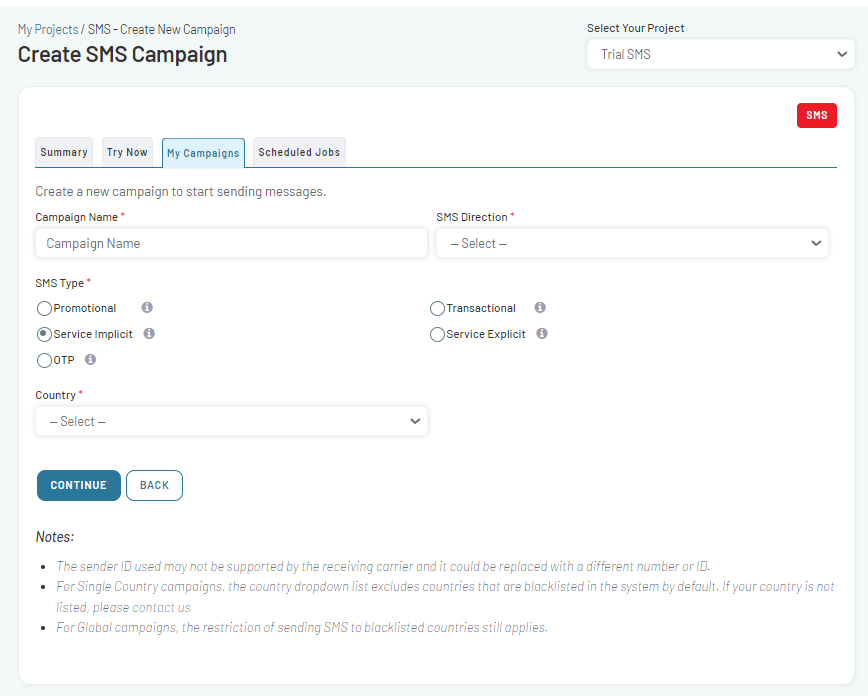
Campaign settings provide flexibility in managing how you send and receive SMS. Whether you aim for a one-way announcement or two-way communication, setting up your campaign ensures your messages reach their intended recipients in the desired manner.
To set up your SMS Campaign:
- On the Create SMS Campaign page, define Campaign Name.
- Choose the Country of Operation.
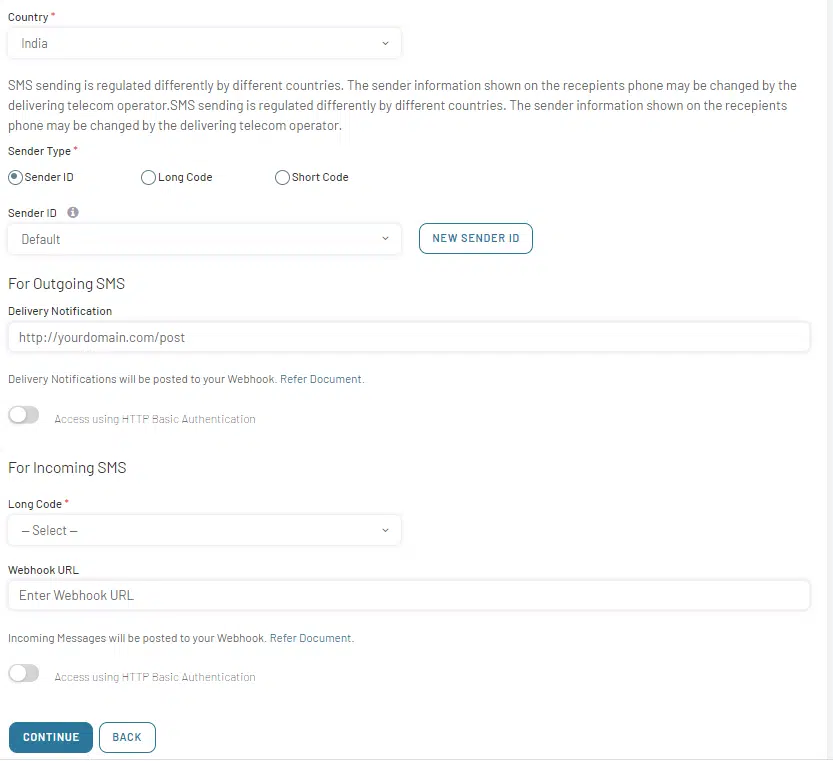
SMS Direction: Choose an SMS direction for your campaign. You have three options:
- SMS Out Only: For outgoing messages.
- SMS In Only: For incoming messages.
- Both Ways (SMS Out & SMS In): Enables two-way communication.
- SMS In Only: For incoming messages.
SMS Type: Select the SMS Type based on the nature and intent of your messages:
- Promotional: Ideal for sharing special offers, discounts, or promotions with a broader audience.
- Transactional: Designed for institutions, especially banks, to send one-time passwords (OTPs) and crucial alerts to users.
- Service Implicit: Use this to convey OTPs, booking confirmations, order updates, and other essential info to registered customers. These should not be intended for marketing.
- Service Explicit: Service Explicit SMS is used to send offers, discounts, or updates regarding services to existing customers.
Keep in mind that SMS regulations differ across countries, and telecom operators might alter sender details.
Note: For sending SMS to Indian phone numbers, the DLT process is mandatory, which requires a registered Principal ID, Template ID, and Sender ID.
Sender-ID: Sender IDs are used to brand your outgoing SMSes instead of displaying your Phone Number. This is optional. [Read More…]
Template-ID: An SMS template is a type of message template that contains content that you can define, save, and reuse to send messages. [Read More…]
Long Code / Short Code: You may choose either of these. Choose any Phone Number/Short Code that you have purchased. In case you don’t have any, you might like to place an order to buy a Long Code or Short Code.
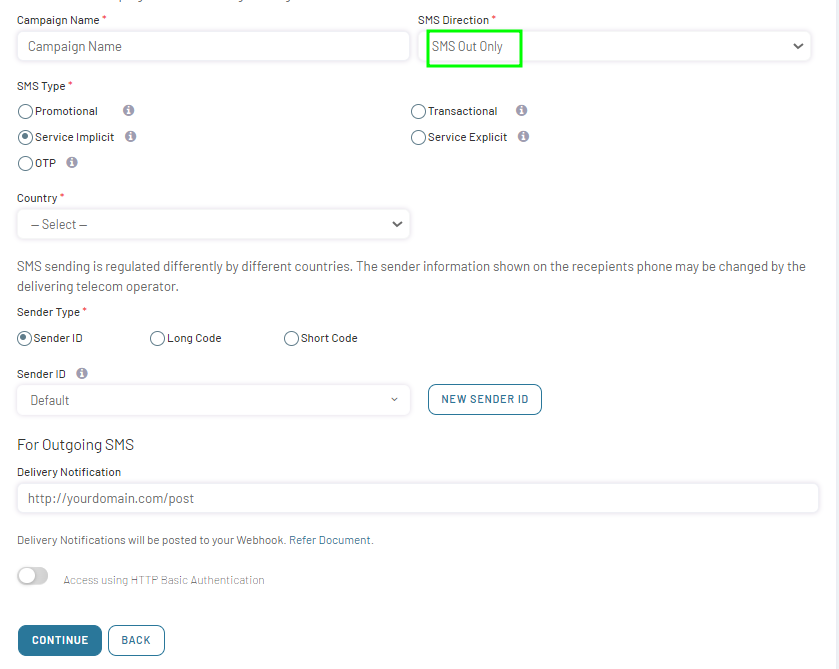
- Select Sender ID. If you do not have Sender ID, click on NEW SENDER ID tab. [Read More…]
- Enter a Webhook URL to get notifications of outgoing message delivery.
- Enable HTTP Basic Authentication.
Note: Ensure that the URL supports HTTPS and is capable of handling JSON payloads via HTTP POST requests.
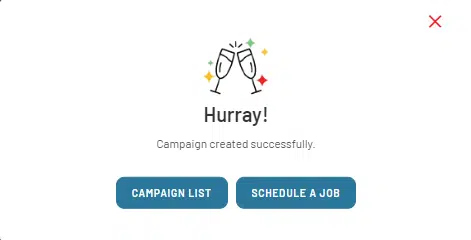
- Once all parameters are set, click the Continue button to set your campaign settings. A confirmation popup will appear to verify your campaign settings.

If you choose the SMS In Only campaign, ensure you provide a number to receive the SMS.
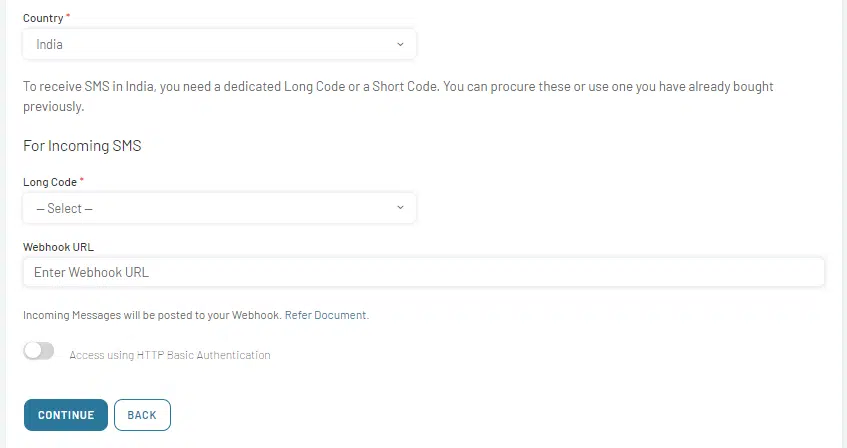
- Long Code: Pick any Phone Number/Short Code you own, or consider purchasing one.
- Webhook URL: Enter a Webhook URL to get instant notifications of incoming message delivery.
- Enable HTTP Basic Authentication.
Note: Ensure that the URL supports HTTPS and is capable of handling JSON payloads via HTTP POST requests.
- Once all parameters are set, click the Continue button to set your campaign settings. A confirmation popup will appear to verify your campaign settings.

3.2.3 Both Ways- SMS Out and SMS In
For Both ways- SMS out and SMS in settings, refer to the sections on Incoming and Outgoing SMS.
- Once all parameters are set, click the Continue button to set your campaign settings. A confirmation popup will appear to verify your campaign settings.
- Campaign List: After creation, the new campaign will appear in the Campaign List on the My Campaigns page.
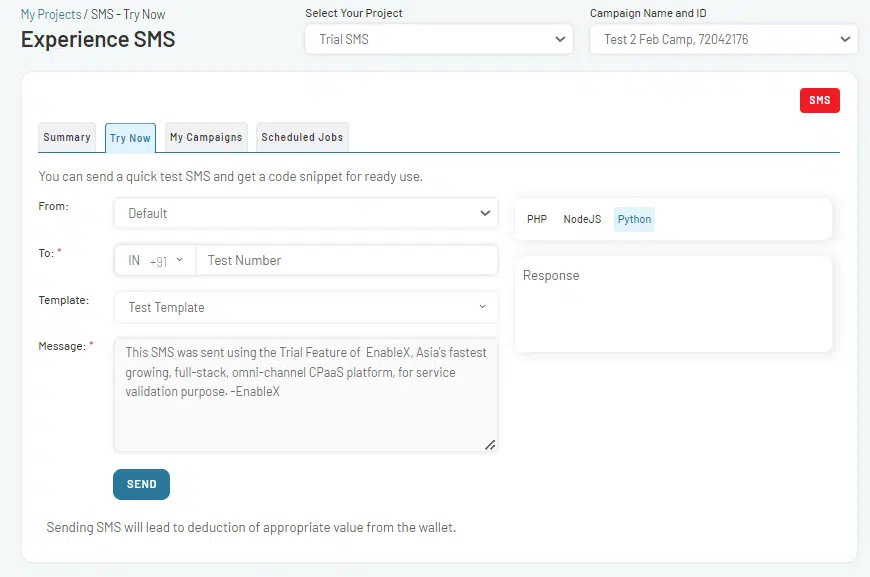
The Try Now option lets you send a quick test SMS and get a code snippet for ready use. This service is free for trial accounts, and you can send up to 10 Trial SMS. To send more SMS, top up the wallet and upgrade your account.
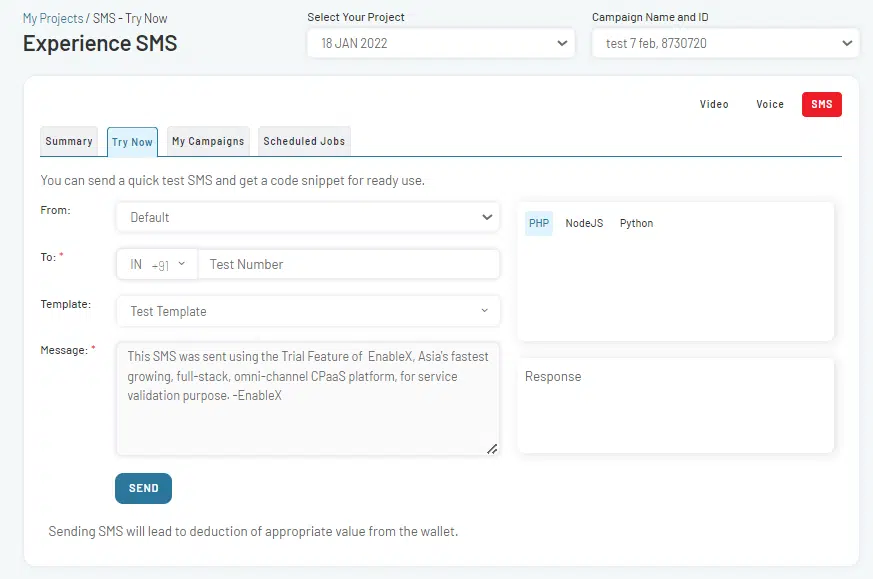
As a Trial Account user, you can send an SMS to your registered numbers. You can also ‘Add New Number’ to send an SMS to the trial account. Add a new number and enter the OTP that you receive to proceed with the number registration.
Note: For the trial account users, the default Sender ID is ‘ENABLX’ and the SMS Template is ‘Test Template’.
For the paid account, the SMS sending charges will be deducted from your EnableX Wallet. You can select a Sender and Template ID from the approved list and further add the message body and recipient(s).
To schedule a campaign,
- Go to the My Campaigns page and navigate the Campaign List.
- Choose the <Project Name> and click on Send/Schedule Campaign icon.

- This action opens the Schedule Campaign page.


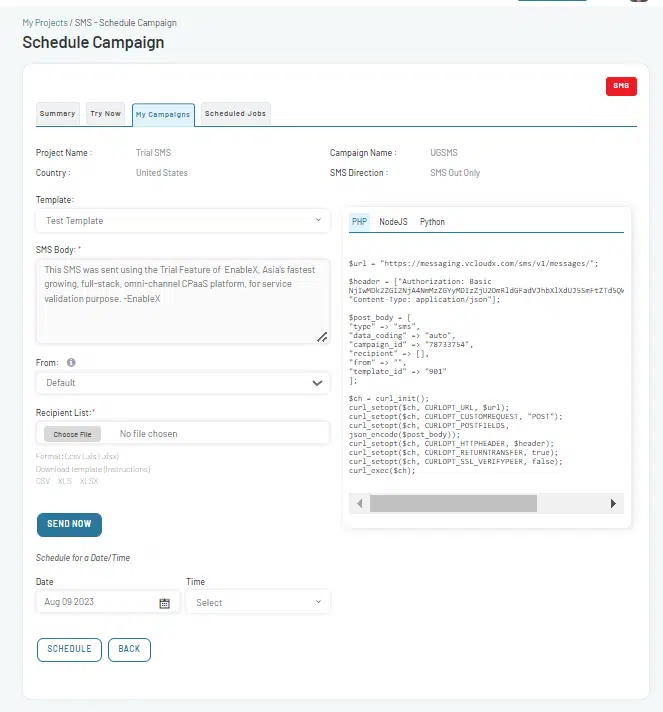
Define Your SMS:
- Select Message Template from the dropdown list. The templates you have created so far will appear in the drop-down list.
Note: Read How to Create SMS Template.
- Review the message in the SMS Body entry field. Make sure it reflects your intent.
- In the From entry field, select the Sender ID. If no Sender ID is selected for the campaign, a default ID will be assigned to the project.
Add Recipient List
- Choose your Recipient File. Ensure it is in .csv, .xls, or .xlsx format.
- Download the sample template and upload the Recipient List in CSV format.
Send the Campaign Now
- Click on SEND NOW button,if you want to run the campaign now.
Set the SMS Schedule:
- Choose the desired Date and Time when you want to start the campaign.
Developers: Utilize the Code Snippet:
If you are integrating this into your application, a sample script is provided. Ensure you update the placeholder data in the code with your campaign specifics before using it.
- Ensure all the details provided are correct and click on SCHEDULE.
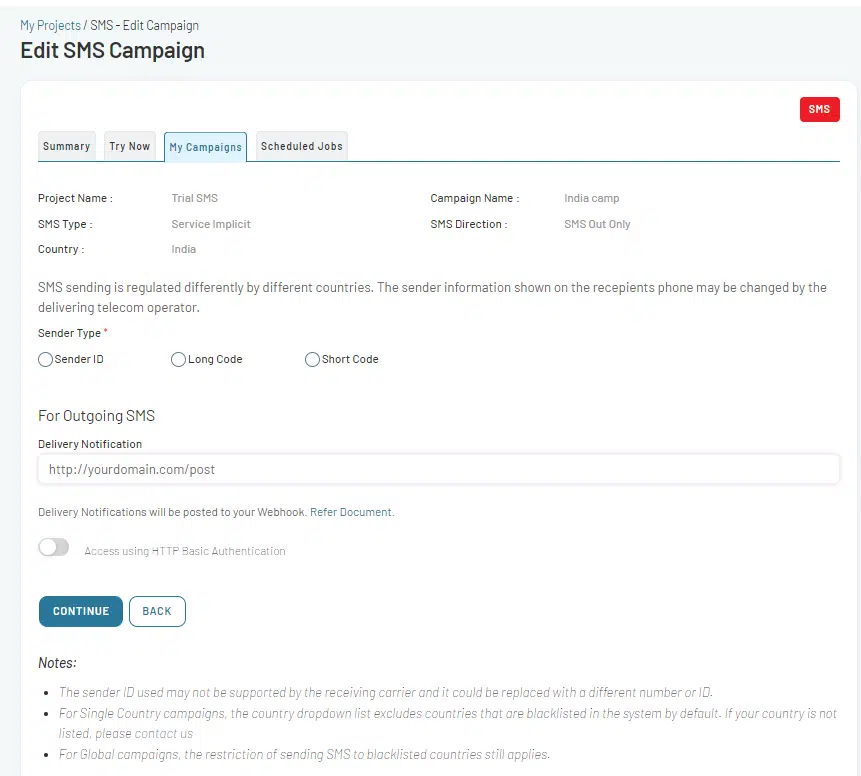
To edit a campaign,
- Go to the My Campaigns page and navigate the Campaign List.
- Choose the <Project Name> and click on Edit Campaign icon.
- This action opens the Edit SMS Campaign page.

- Make the required changes and click on CONTINUE.
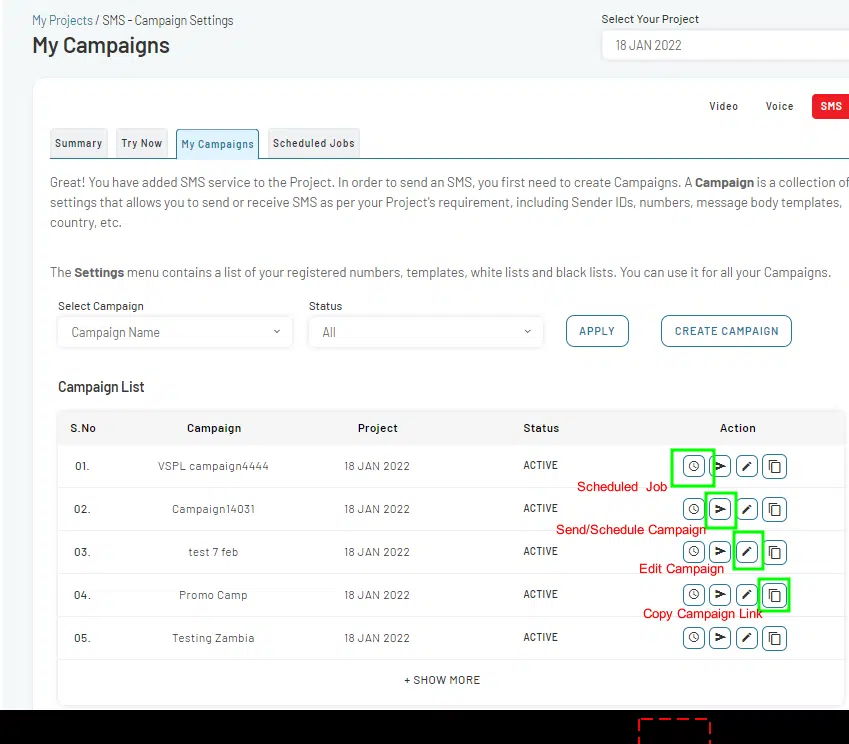
3.6 Copy Campaign ID for API Use

4 Managing SMS Resources
With reference to the above section, you know that different types of resources you need to subscribe to by placing an order or request to get for free to receive and send SMS. Follow the sections given below to be explained on ordering and requesting processes:
An SMS template is a type of message template that contains content that you can define, save, and reuse to send messages.
For Trial Users: ENABLEX Test Template is auto-assigned as the template during the trial. Once the account is upgraded, you can make New Template Request to get your own dedicated SMS template.
To place your request for an SMS template, follow this:
- In the My Projects sidebar, select SMS.
- Select Resource from the dropdown menu options.
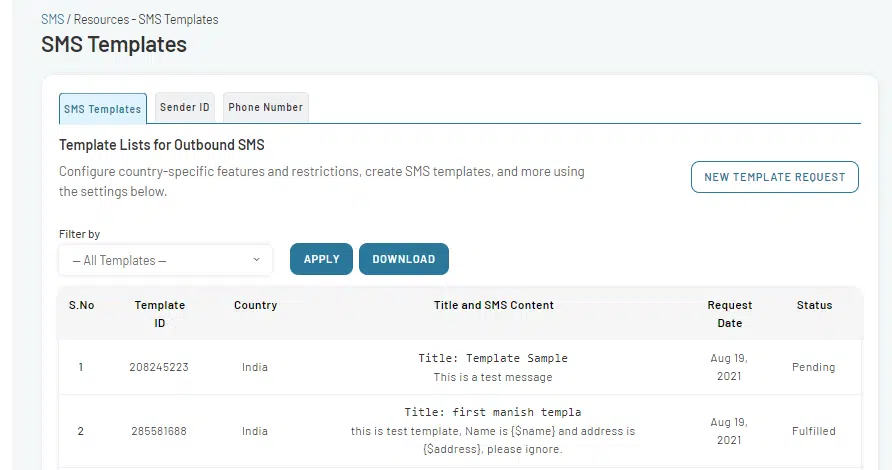
- This action opens the Template List for Outbound Messages page.
Note: This page displays a list of all applied, approved SMS Templates.
- On the Template List for Outbound Messages page, click on NEW TEMPLATE REQUEST Tab.

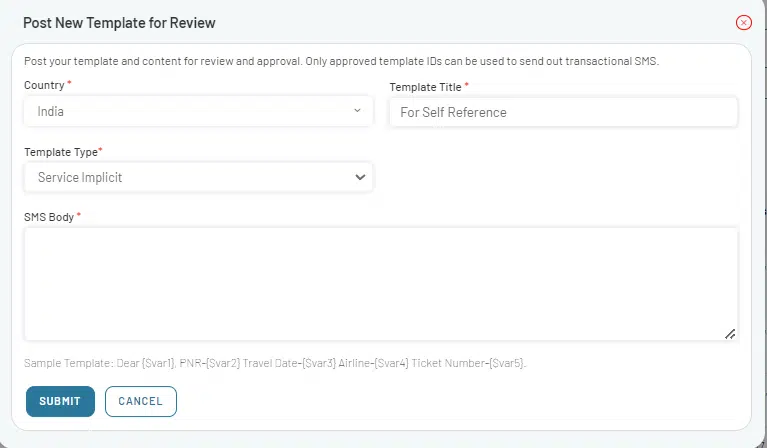
- This action will open Post New Template for Review page.

- Select your Country of operation.
- Enter Template Title for reference.
- Select the Template Type from the drop-down menu options.
- Enter the SMS Body. A sample SMS body is given for your reference.
- Click on SUBMIT Button.
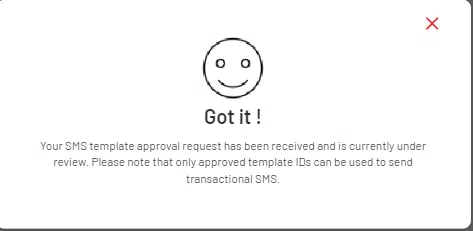
- The request for SMS template approval sends to the admin. Once approved, the template is displayed in the template list with the status fulfilled.
A Sender ID is an alphanumeric string that appears as the sender’s name in an SMS. For an in-depth understanding of the Sender ID and its significance, refer to the SMS FAQs.
For Trial Users: ENABLX is set as your default Sender ID. After upgrading your account, you can request your personalized Sender ID.
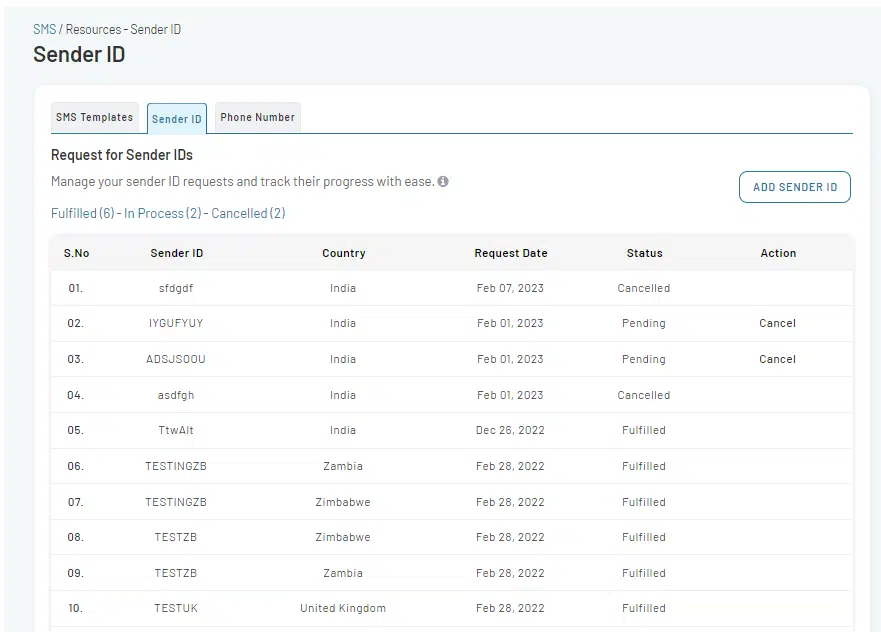
To place your request for Sender ID, follow this:
- In the My Projects sidebar, select SMS.
- Select Resource from the dropdown menu options.
- Select Sender ID tab. This action will open Request for Sender IDs page.

- On the Request for Sender IDs page, Click on ADD SENDER ID tab.

- Select Country of operation.
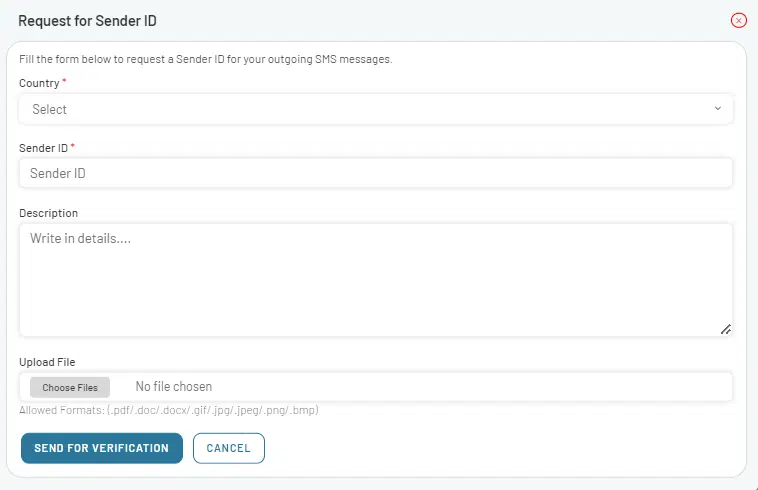
Note: If you select India as a country of operation, you will ask to enter DLT Principal Entity ID.
For more information about DLT Principal Entity ID, refer to the SMS FAQs.
- Enter your Sender ID – An Alphanumeric Code used as Sender for SMS.
- Add Sample SMS. Sender ID approval requires a Sample SMS.
- Upload the file of the documents required for DLT Registration.
Please Read: DLT Registration Process
- Click on SEND FOR VERIFICATION Button.
- The Sender ID request will be sent for approval to the admin. Once approved, the Sender ID is displayed in the Sender ID list.
Note: When you submit a Sender ID request, it enters Pending state for verification. After verification, approved requests change to Fulfilled, while rejected ones are labelled as Cancelled.
To Use both Incoming and Outgoing SMS Services, you need to get a Phone Number configured against your Campaign. You have two options:
- Select a phone number (Short Code or Long Code) from the EnableX Phone Inventory.
- Buy a new phone number.
To Order a phone number, do the following:
- In the My Projects sidebar, select SMS.
- Select Resource from the dropdown menu options.
- Select Phone Number tab. This action will open My Virtual Number page.
- On the My Virtual Number page, click on BUY A NUMBER tab.
- This action will open Buy Phone Number form.
- Buy numbers from EnableX’s inventory or in case, the number of your choice is not available you can always place a request for a new number.

- Choose Country for which you need a number.
- Choose Type of Number you require (Long code, Short code).
- SEARCH and BUY the number from EnableX inventory.
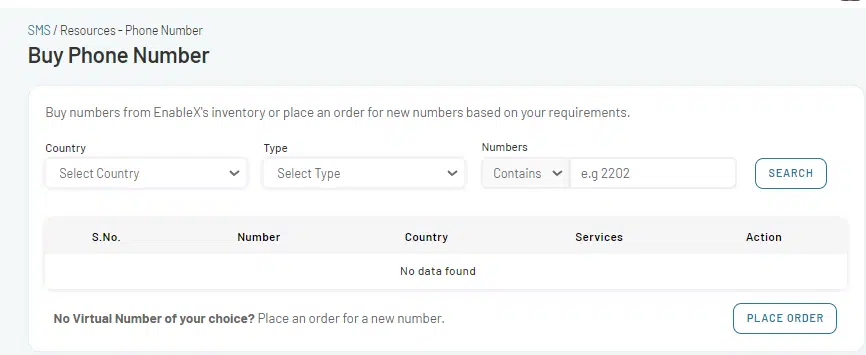
- In case of non-availability of number of your choice, you can Place Order for a new Number.

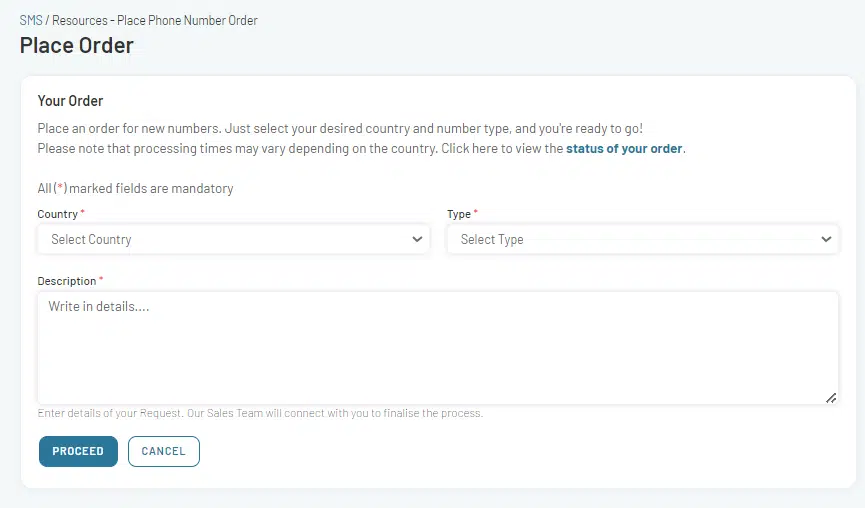
- Select the Country and Type of the Phone Number You want to buy. Write the details about your request and click on PROCEED.
Explanation of the Form Elements:
Given below explanation of different options to choose in the form:
Country – Choose the country from where you like to get the phone number
Services – Choose the service SMS for which you need to get the phone number
Type of Phone – Choose among the following:
- Long Code
- Short Code
Service Direction – In the case of Long Code, choose among the following support on the phone number:
- Incoming Only
- Outgoing Only
- Both Incoming & Outgoing
Description – Enter details of your request.
Our Sales Team will connect with you to finalize the process. You will be presented with a list of available Phone Numbers from EnableX Phone Inventory with a Price to pay for the subscription. You are free to choose one from the given list or place an order for a new phone number.
5 Configuring Your SMS Service Settings
5.1 Managing Whitelisted Countries for Outbound SMS
To Managing Whitelisted Countries for Outbound SMS:
- Navigate to the Whitelisted Countries for Outbound SMS.
Here you can view a list of countries that have been approved for outbound SMS. These are countries that you previously blacklisted and then subsequently whitelisted.
Request to Add a Country for Whitelisting:
- Navigate to the Service Requests to Whitelist Country for SMS.
You can view the status of your whitelisting requests. Use the tabs to filter by status: Fulfilled, In Process, or Cancelled.
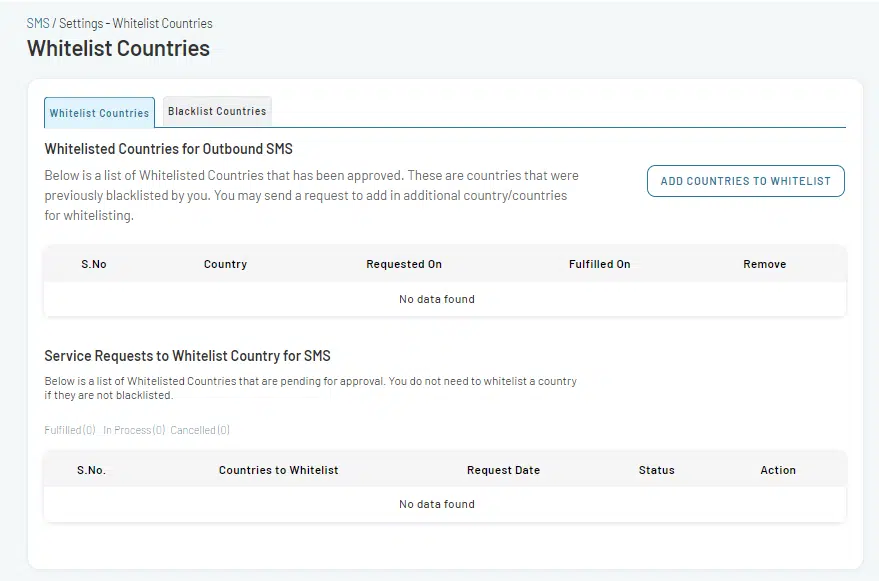
Add Countries to Whitelist
- To Whitelist a blacklisted country, click on ADD COUNTRIES TO WHITELIST.
- This action will open a Post Service Request to Whitelist Countries for SMS form.

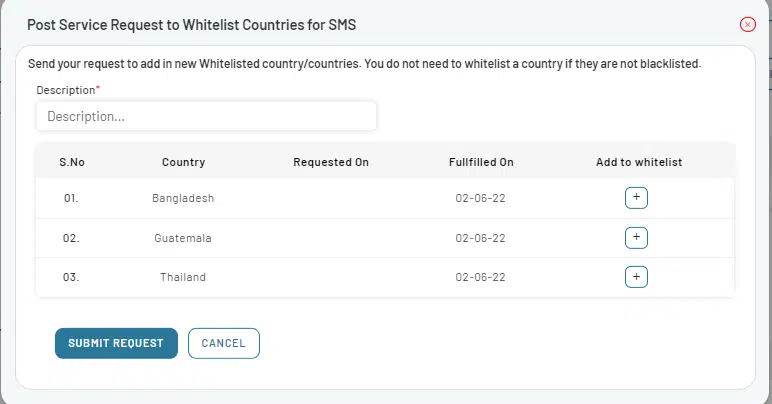
Add a Description:
In the Description field, provide a brief reason or context for your request. For instance, “Requesting to whitelist these countries for our upcoming global marketing campaign.”
Select Countries to Whitelist:
- Browse the list of countries provided.
- Click the add button next to each country for each country you want to whitelist.
Note: If a country is already available for SMS, it does not need to be whitelisted again.
- Click the SUBMIT REQUEST to send your request for approval.
Note: Always ensure that you are only whitelisting countries that you intend to send SMS to and there is no need to whitelist countries that are not blacklisted.
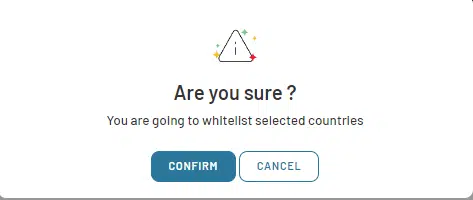
- Click the CONFIRM button in the confirmation popup to verify that you wish to whitelist a previously blacklisted country.
5.2 Managing Blacklisted Countries for Outbound SMS
To Managing Blacklisted Countries for Outbound SMS:
- Navigate to the Blacklisted Countries for Outbound SMS section.
This section displays countries that have been approved for blacklisting, which means you cannot send SMS to these locations.
- To reverse a blacklisted country, you can unblock it by moving it to the list of Whitelisted Countries.

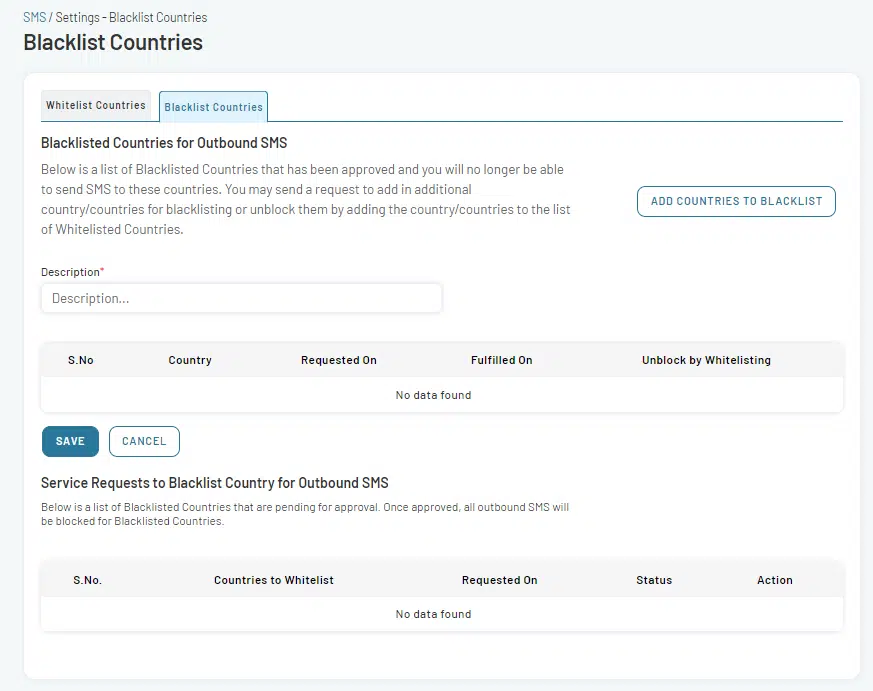
Service Requests to Blacklist Country for Outbound SMS
Here, you will find a list of countries that are pending approval for blacklisting. Once approved, you will not be able to send SMS to these locations.
- If you wish to cancel a blacklisting request, select the country, and click on the Cancel action.
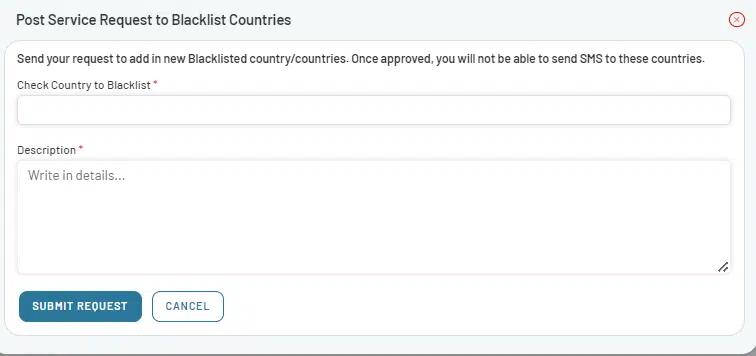
Add Country to Blacklist
- Click on Add Country to Blacklist. This will open Post Service Request to Blacklist Countries form.
- In the Check Country to Blacklist section, select the countries you wish to blacklist.
- In the Description field, provide detailed reasons or notes regarding your blacklisting request.

- click the SUBMIT REQUEST button to send the request.

- Click the CONFIRM button in the confirmation popup to verify that you wish to blacklist a country.
6 Project Management
All projects can be further managed using the manage icon next to each project name. To manage your existing Low-Code video projects, do the following:
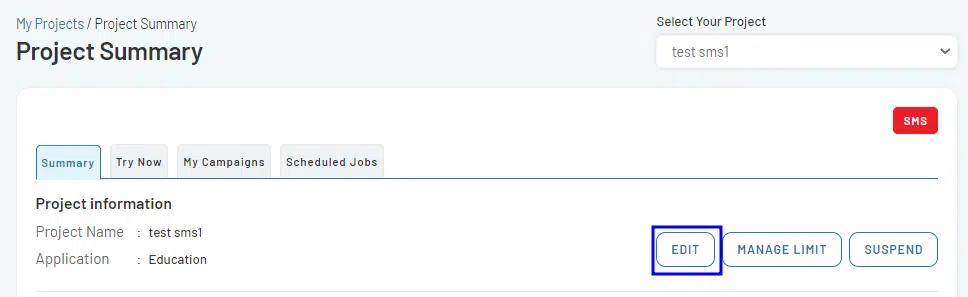
On the Dashboard, navigate to the My Project section and identify the specific project you wish to manage. Click on the Manage icon next to the <Project>. This will direct to the Project Summary page.
The Summary page displays essential project details and offers advanced management options.

In this section, basic information about the project is given.
- Project Name: Contains the name given during project creation.
- Application: Specifies the industry mentioned during project creation (e.g., Banking, Healthcare, Telecommunication).
When you create a project, the API Access Credentials are sent to you via email. However, you may need to reset API Key or resend API Credentials. If needed, user can request Project Credentials and Reset App Key from the Summary page.
Send Credentials: This allows you to request project credentials to be sent to your registered email.
Reset App Key: This option resets the App Key (App ID & App Key).
6.1.3 Project Usage
This section provides graphical displays for the following over the last 7 or 30 days:
- Total Number of Sessions
- Total Video Usage Minutes
- Total Recording Minutes
6.2 Advanced Manage Options
- This option enables you to edit the Project Name, Application, Application description, and Project Description.
- You can also add other channels (Voice, SMS and WhatsApp) to your existing project.

To edit the project Information, follow these steps:
- Navigate and click on EDIT tab on the Summary page.
- Make the necessary adjustments.
- Click on SAVE CHANGES.
- The updates will be immediately reflected on the Dashboard.
6.2.2 MANAGE LIMITS Option
The Manage Option is used to Manage the Wallet and the corresponding limits. Under Manage Limits Option, there are further various options which are as follows:
- Top Up
- Top Up History
- Manage Project Limit
- Allocation History
Top UP
The Top Up window provides options for managing the wallet balance. Users can either:
- Choose to add funds manually with a one-time top-up.
- Set an automated system to top up the wallet when the balance falls below a specific threshold.

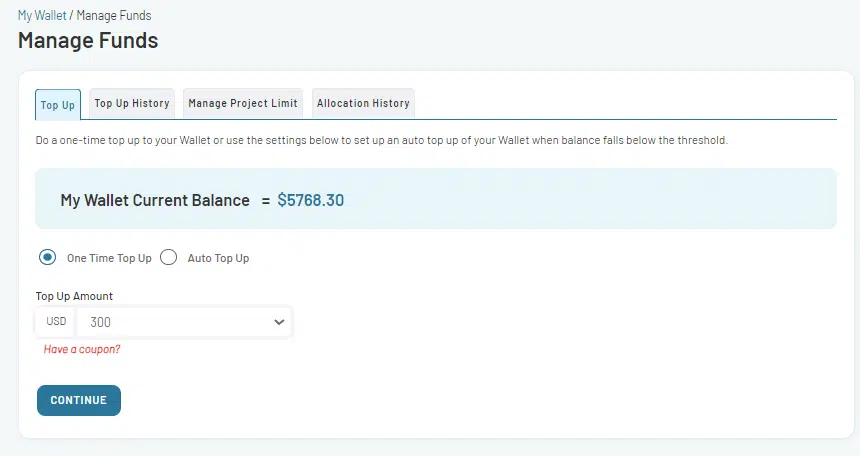
Additionally, there’s an option to apply a coupon, possibly for discounts or promotions, during the top-up process. The current balance of the wallet is also displayed for the user’s reference.
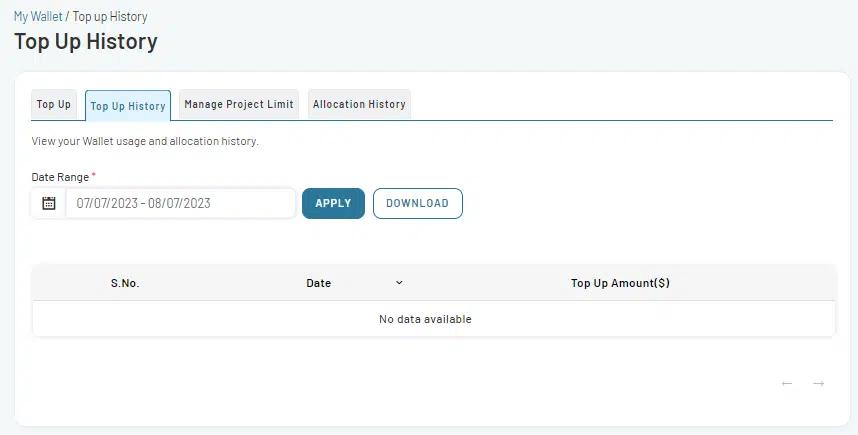
Top Up History
The Top Up History window allows users to review and track their wallet’s transaction history over a specified date range. It also provides a list of top-up amounts made to the wallet, organized by date. The user can adjust the date range to view transactions from different periods.
Manage Project Limit
The Manage Project Limit window provides tools for users to manage and adjust financial limits associated with a specific project. It allows users to allocate or release funds to/from the project from their main EnableX Wallet. All the financial values are presented in USD.
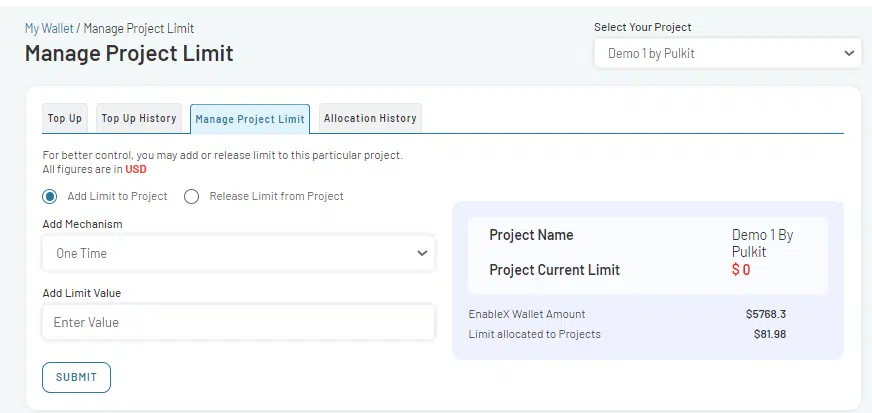
The interface offers:
- Options to either add funds to the project’s limit or release them back to the main wallet.
- A mechanism for one-time adjustments.
- Fields to specify the amount of funds to be adjusted.
- Display of the project’s name and its current financial limit.
- A view of the overall balance available in the EnableX Wallet.
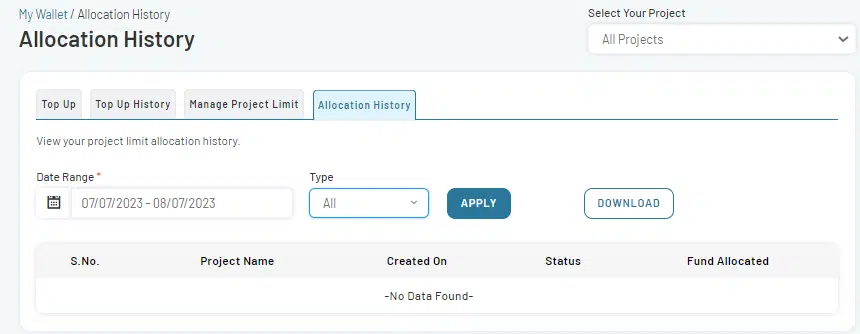
Allocation History
The Allocation History window provides an overview of the project limit allocation history, allowing users to track and manage the funds allocated to different projects within a specified date range.
Note: Options are available to load the wallet using an Auto Mechanism or when the balance falls below the minimum threshold.
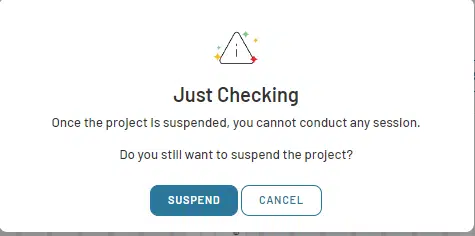
This option suspends an account temporarily. Suspending a project stops all ongoing sessions.
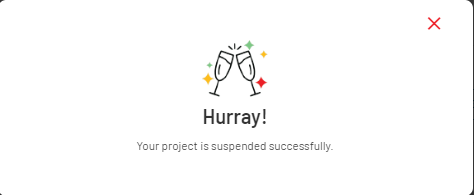
- Click on SUSPEND.

- A pop-up appears for confirmation, and the account is suspended.
- For suspended accounts, the SUSPAND tab will change to ACTIVATE reactivation.
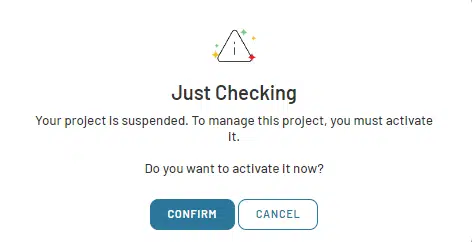
- To activate the suspended project, click on ACTIVATE tab.

- A pop-up appears for confirmation, and the account is activated.

7 User Management
User management encompasses the systematic administration of user accounts, ensuring proper access rights within the software environment. This entails the construction, modification, and removal of user profiles, coupled with the precise delegation of permissions to various system components.
Accessing this section requires:
- From the main login interface, select the user icon located at the upper right corner.


The key functionalities provided within this section include:
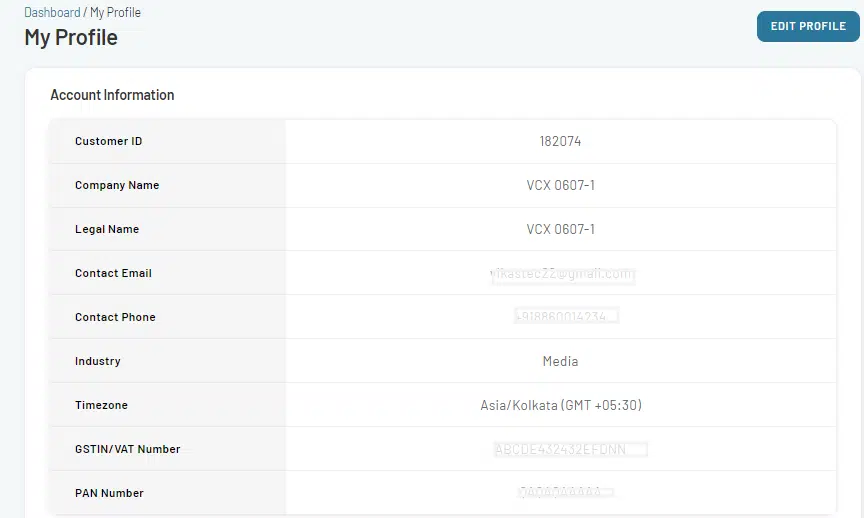
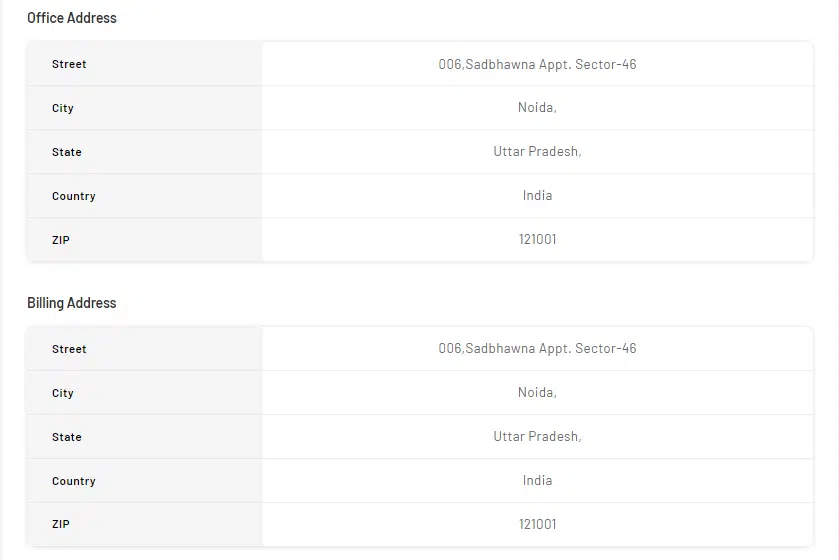
This section presents comprehensive details related to the primary account with capabilities to modify them, ensuring the most up-to-date information is maintained. Key attributes within the profile:
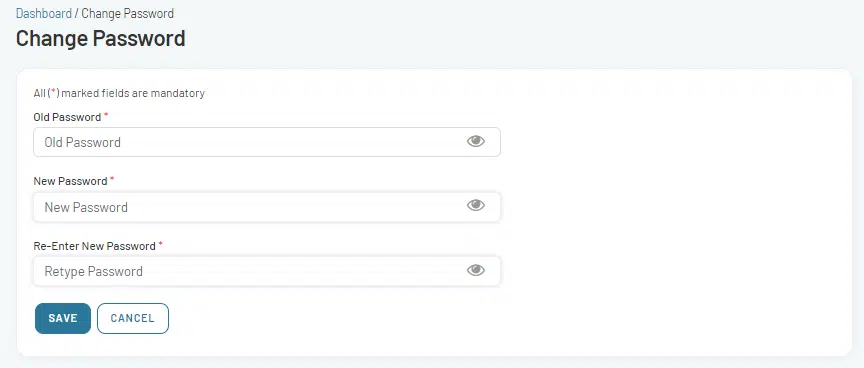
This function facilitates a security measure where users can modify their existing password. The procedure:
1.1 User Management
For maintaining robust system security, data protection, and adherence to regulations, proficient user management is indispensable. It provides a mechanism to supervise user access, deter unauthorized activities, and optimize administrative tasks.

User Management serves to:
- Assign access based on specific roles and permissions.
- View a list of all created accounts with functionalities to either activate or suspend them.
This function allows for the creation of a new user profile and the assignment of corresponding permissions.
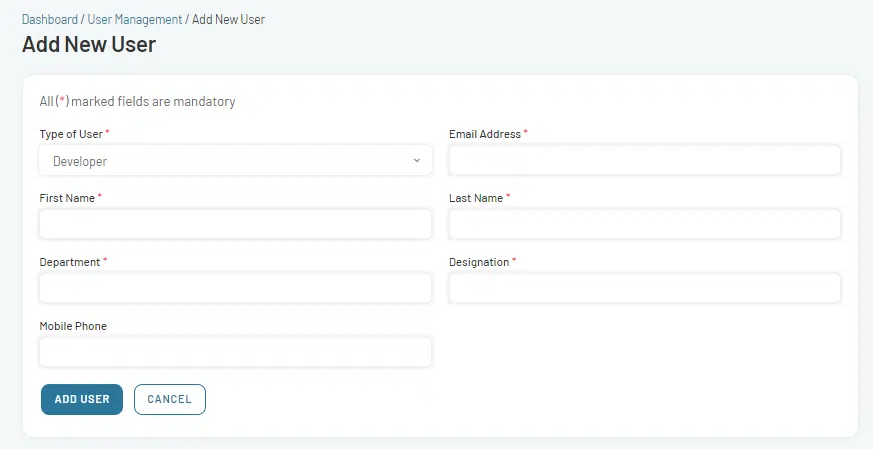
User Type
Administrators can determine the access level of a user based on their role:
Developer: For users involved in API-related development for video conferencing.
Billing: Designed for users overseeing billing and financial procedures.
Project Report: Grants users’ access to one or multiple accounts, specifically for reporting. An essential feature for an Admin Portal managing several clients. Selecting this option activates the Projects field, presenting a list of all projects for selection.
In case you face any issues, please contact us here, or view our comprehensive developer documentation here.
Table Of Figures
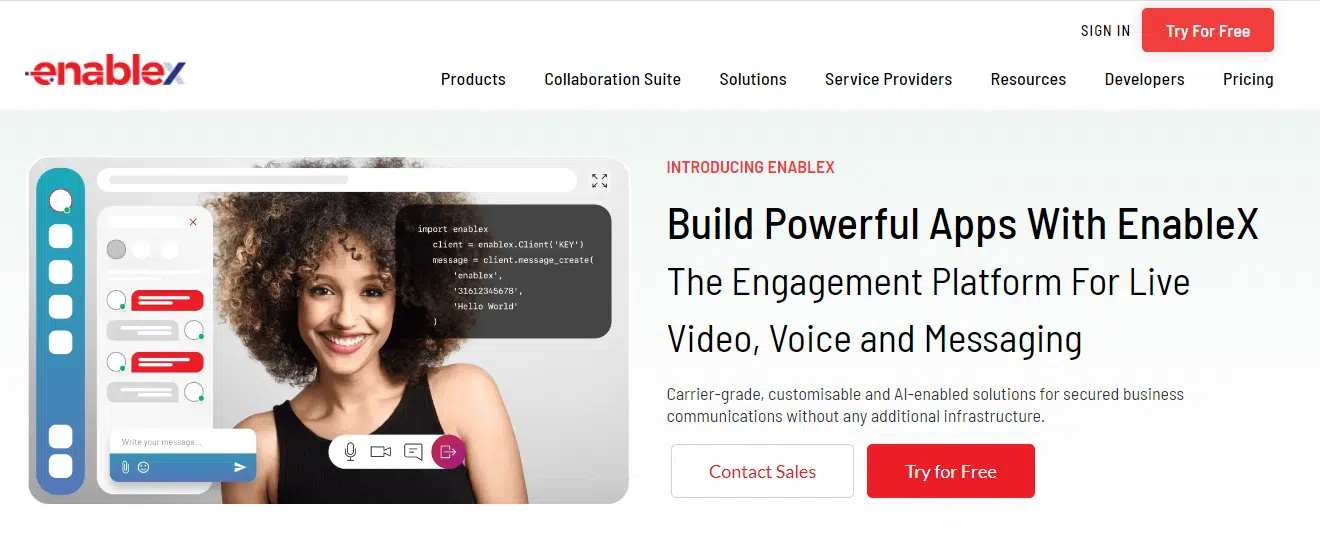
Figure 1- EnableX Landing Page. 4
Figure 2- EnableX Signup page. 5
Figure 3- EnableX Sign In page. 6
Figure 4- EnableX My Dashboard. 8
Figure 5- EnableX Create New Project 9
Figure 6 – Project creation Confirmation. 9
Figure 8- Test SMS Programmatically. 11
Figure 9 – Project Summary. 11
Figure 10- Edit Project Information. 12
Figure 12- SMS My Campaigns. 14
Figure 13- Create SMS Campaign. 14
Figure 14- Out Only SMS Campaigns. 16
Figure 15- SMS Out Only Campaign Confirmation. 16
Figure 16- In Only SMS Campaigns. 17
Figure 17- SMS In Only Campaign Confirmation. 17
Figure 18- Both Way SMS Campaign. 18
Figure 19- Try Campaign Now.. 19
Figure 20- Send or Schedule Campaign. 20
Figure 21- Schedule Campaign. 20
Figure 23- Edit SMS Campaign. 22
Figure 24- Copy Campaign ID. 22
Figure 25- SMS Template List 23
Figure 26- Request New Template. 24
Figure 27- Template Request submission confirmation. 24
Figure 28- Requests for Sender ID. 25
Figure 30- Virtual Phone Number 27
Figure 31- Buy Phone Number 27
Figure 32- Place Order for Phone Number 28
Figure 33- Whitelist Countries. 29
Figure 34- Request to Whitelist a Blacklisted Country. 30
Figure 35- Whitelist Request Confirmation. 30
Figure 36- Blacklisted Countries. 31
Figure 37- Request to Backlist a Country. 32
Figure 38- Blacklist country Request confirmation. 32
Figure 39-Video Project Summary. 33
Figure 40-Edit Project Information. 34
Figure 41- Manage Fund Top Up. 35
Figure 43- Manage Project Limit 36
Figure 44-Project Allocation History. 37
Figure 45-Project Suspension. 37
Figure 46- Project Suspension Confirmation. 38
Figure 47- Activate Suspended Project-1. 38
Figure 48- Activate Suspended Project-2. 38
Figure 49- Activate Suspended Project Confirmation. 38
Figure 51- User Management My Profile-1. 39
Figure 52- User Management My Profile-2. 40
Figure 53- User Management Change Password. 40
Figure 54- User Management Users Summary. 41
Figure 55- User Management Add New Users. 41