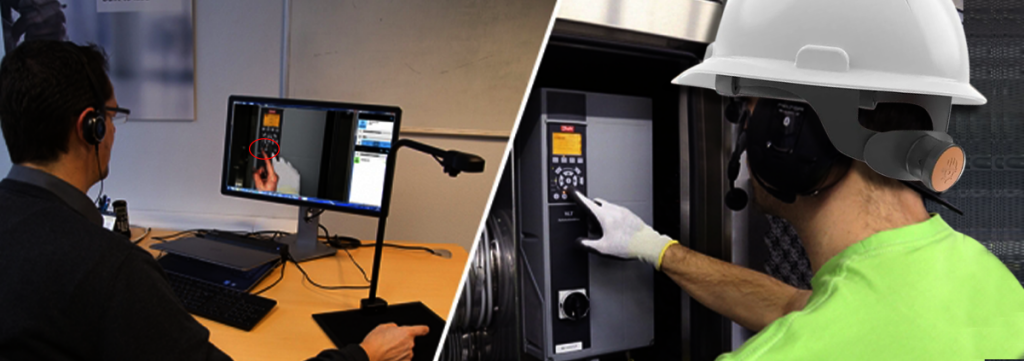
In a world that’s fast inclining towards live video communication, one of the high-demand use cases is the technical support for field service agents. When a field service agent is seeking guidance from a domain expert, a visual aid comes in handy. The tool can be used to pinpoint the issue or demonstrate the error, and this is where Annotations fit in. Annotations allow you to graphically point out and provide inputs over a live video stream.
In this tutorial, let us learn how to build a live video conferencing application with annotation capability. We will be making use of EnableX – a cloud-based communications platform that provides all the necessary toolkits/APIs – to implement video calling capability with annotations in your Android application.
The EnableX Annotation features allow you to conduct the following:
- Annotates over a shared video stream
- Screen capture
- Predefined drawing tools and custom shapes
- On-the-fly customisation of the Annotations e.g. thickness and colour
Now, let me show you how to implement video conferencing with annotations in an Android application using EnableX video SDK for Android.
Implement one-to-one video conferencing using EnableX
Before we jump on the Annotations part, we should have an Android application with video conferencing capability. Please follow our blog “How to build a video conference app in android with EnableX” on how to implement video conferencing in your Android application.
Add Annotations in a one-to-one video-conferencing application
Now that we have an Android application with video calling, let’s Annotate!
Add annotation toolbar
To initiate Annotation Toolbar, use the following code snippet in XML:
        <enx_rtc_android.annotations.EnxAnnotationsToolbar

        android:id="@+id/annotations_bar"

        android:layout_width="match_parent"

        android:layout_height="wrap_content"/>
Start Annotations
1. Set AnnotationObserver after getting connected to a Room.
            // Called when room is connected successfully
            @Override
                public void onRoomConnected(EnxRoom enxRoom, JSONObject roomMetaData) {
                    enxRoom.setAnnotationObserver(annotation-observer-instance);
                }
2. Pick the media Stream
GetActiveTalkers() would return you a list of media Streams connected to the Room. You can pick the EnxStream out of this list to annotate. It is almost customary to pick from the first index in the list which implies the most recently active media Stream. Annotations are typically implemented on a one-to-one basis in the conference to avoid any alignment or scaling issues.
3. Start Annotations by calling the enxRoom.startAnnotation() on the picked video Stream.
// To Start annotations
            enxRoom.startAnnotation(enxStream);
4. Handle Events
After EnxRoom.startAnnotation() is successfully executed, it sends the following event notifications:
OnStartAnnotationAck: Notifies the Annotator (the user who started the annotations) that she can now start annotating. You can start the process by making the toolbar visible.
@Override
                public void onStartAnnotationAck(JSONObject jsonObject) {
                  enxAnnotationsToolbar.setVisibility(View.VISIBLE);
                }
OnAnnotationStarted: Notifies the other users connected to the Room that the Annotator shall now start annotating.
To support the visibility of annotations in the Room, the annotation’s view must be added to the frame layout.
mAnnotationViewContainer – Frame layout view initialized in XML.
enxStream.mEnxPlayerView – Annotation’s view added in the frame layout
                @Override
                public void onAnnotationStarted(EnxStream enxStream) {
                    // frame layout view initialized
                    mAnnotationViewContainer.setVisibility(View.VISIBLE);

                mAnnotationViewContainer.removeAllViews();
                    // Annotations view added in the frame layout
                    mAnnotationViewContainer.addView(enxStream.mEnxPlayerView);
                }
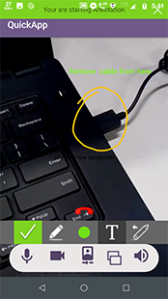
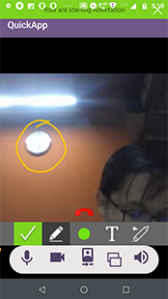
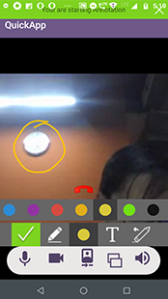
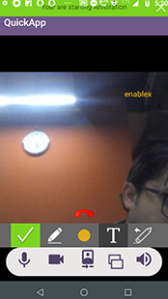
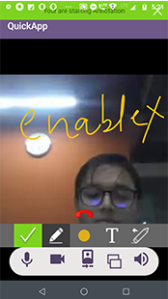
This is how the Annotation screen will look like:
Stop Annotations
You can Stop Annotations by calling the EnxRoom.stopAnnotations() method.
// To stop annotations
            enxRoom.stopAnnotations();
The successful execution of stopAnnotations() would trigger the following event notifications:
OnStoppedAnnotationAck: Notifies the Annotator that the annotations have been stopped. The annotator can now hide the toolbar.
             @Override
            public void onStoppedAnnotationAck(JSONObject jsonObject) {
              enxAnnotationsToolbar.setVisibility(View.GONE);
            }
OnAnnotationStopped: Notifies other users connected to the Room that the annotations have been stopped. The annotation view can now be removed from the frame layout.
            @Override
            public void onAnnotationStopped(EnxStream enxStream) {
              mAnnotationViewContainer.setVisibility(View.GONE);
          ((ViewGroup) mAnnotationViewContainer).removeView(enxStream.EnxPlayerView);
              mAnnotationViewContainer.removeAllViews();
            }
Build and Test on Device
Go to Android Studio, plug in your Android device, and click on Run to build the application on your device. Remember to build the application on two devices so you can initiate a video call between the two devices.
Congratulations! You just built a video conferencing application with annotations.
Refer to the complete sample application code for video calling on Android with Annotations.
If you are excited to try out more of these interesting, then do check out the EnableX Android Toolkit.