
EnableX Video Embed is an easy-to-use Video Call App loaded with powerful conferencing, collaborative, and reporting features. You can build one-to-one or multiparty video meetings for any application or browser within minutes using its simple yet powerful REST API.
You do not need client-side SDKs to develop an engaging UI layout for a video meeting application. Just select a pre-defined Template that suits your Business Application, edit features and UI Scheme through Visual Builder, and you can go live within minutes with your fully-functional video meeting application.
Table of Contents
- Basic Setup Process
- Do more…
This Video Embed Developer Guide attempts to present a step-by-step process to create a video embed in a lucid way. Let’s start the journey.
Getting Started in 4 Simple Steps:
Using our Low Code Video Embed, you can easily host Video Meetings on your web page or mobile app in the following simple steps:
Step#1: Create a Project with Video Service
Set up an Account with EnableX and create a Project with Video Service through the portal.
Step#2: Get Started with Low Code Video Embed
Get into a Wizard flow by selecting a suitable Template, setup Sub-Domain to host, edit Template through Visual Builder to get your Code.
Step#3: Follow 5-Step Wizard
Get into a Wizard flow by selecting a suitable Template, setup Sub-Domain to host, edit Template through Visual Builder to get your Code.
Step#4: Embed Video Meeting Into Your App or Site
Get the Meeting Room URL and embed it to your website using the <IFRAME> code or into your Mobile App using WebView or SafariView.
1. Create a Project with Video Service
1.1 Create a Project
To begin with, create a Project in the EnableX portal.
- Log in to the EnableX portal. If you do not have an account, signup here.
- Now move to “Create Projects” and then enter the relevant information. Select “Video” in the “Service” section.
- Submit the form to get your Project created. From Acknowledgement Screen, click “Get Started” to move to next step.
- Alternately, follow the “Video / Get Started” from left menu bar. In this case, you need to select your newly created Project from the dropdown and click “Apply” to move to next step.
2. Get Started with Low Code Embed Option
In the “Get Started” form, you have option to “Experience” Sample Video App to see EnableX in action. Along with it, you have option to choose Low Code Embed to setup with the Project. Choose this option and click “Start Building”
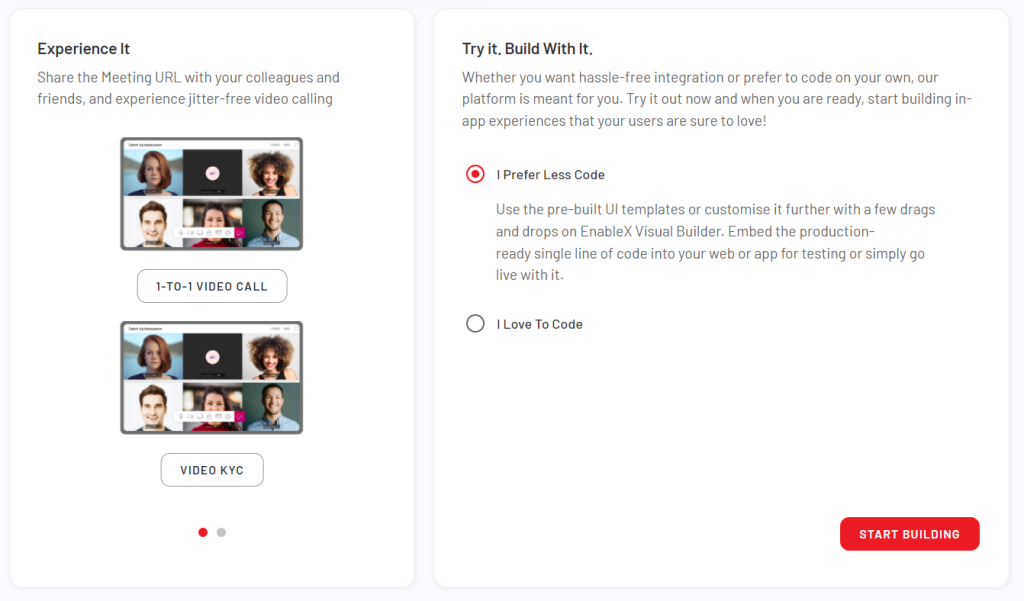
This will lead you to a Wizard to guide you through Low Code Embed setup effectively.
3. Follow 5 Step-Wizard
This 5-Step Wizard guides you through Low Code Embed Setup process. Follow these steps:
3.1 Choose Template
EnableX offers different Templates for Embed configured with different Features. These pre-configured templates are best suitable for specific type of application by default. Once selected, you are free to edit/update features if you wish to.
Select the Template that best suits your application need and click on the Template name itself to move to the next Step.
3.2 Review Template
You get information about the Template you have chosen and list of features that are pre-configured with it. If you want to try another Template, click “Back” and restart with 3.1.
You are satisfied with the Template, click “Next” to use the chosen template and moving to next step.
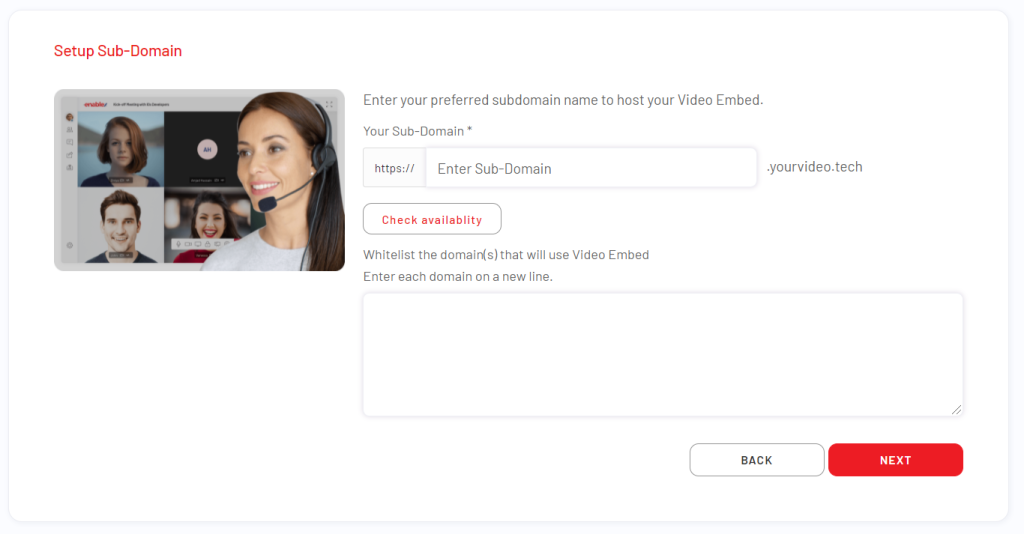
3.3 Setup Sub-Domain
Setup a Sub-domain of your choice to host your Embed with us. Your Embed URLs will be qualified with this URL. In this Step, you do the following:
- Choose Sub-Domain for Host: Choose your Sub-Domain to host the Embed App. You need to check Sub-domains availability first before owning it.
- Domain Whitelisting for IFRAME Embed: For Video meetings in an IFRAME to work, its domain must be whitelisted. As such, you would need to list down all the allowed domain(s). The URL’s must be prefixed with “https://”, eg. https://your-domain.com and you can also list all the subdomains under a permitted domain using wildcards such as https://*.your-domain.com.
3.4 Edit Template
The Template is previewed in a Visual Editor and you are free to edit the Template’s Features or UI Element’s visual parameters as you wish.
The Visual Builder has multiple tabs to group tools for editing. Once you are done, click “Build App”. After the built is successful, you get a button to “Get Code”. Click it to move to next step.
3.5 Get Code
You get Video Embed codes for Moderators and Participants entry to the Session. Use the Embed Code Snippet to put into any Webpage to get connected to Video Session.
Example#1 IFRAME Embed Code for Participant Entry
<IFRAME
	allow="camera; microphone; fullscreen; speaker; display-capture"
	src="https://your-subdomain.host-domain/#ROOM_ID#">
</IFRAME>
Example#2 IFRAME Embed Code for Moderator Entry
<IFRAME
	allow="camera; microphone; fullscreen; speaker; display-capture"
	src="https://your-subdomain.host-domain/host/#HASH#">
</IFRAME>
Note: At this Stage, your Embed is setup. All you need to know how to embed it in Web Page and in Mobile Apps.
4. Embed the Meeting URL in your Application
The Meeting URLs can be now added into the IFRAME (see Example 3) for embedding into a web application or used in Webview for embedding into Mobile Apps.
Note: It is advisable to further qualify Meeting URLs with Query String Parameters (see Customise with Query String Parameters) to pass the feature list and other data to the video meeting.
4.1 Embed in a Web Page
For Web applications, embed the Meeting URL in IFRAME as shown below:
Example#3 IFRAME Embed Code
<IFRAME
	allow="camera; microphone; fullscreen; speaker; display-capture"
	src="MEETING-URL">
</IFRAME>
Note: The Page where you embed IFRAME must be hosted on HTTPS and should be a responsive page to ensure the app’s responsiveness. In case, your page is not a responsive one, add the following META Tag within <HEAD></HEAD>
<META name="viewport" content="width=device-width, initial-scale=1, minimum-scale=1, maximum-scale=1"/>
A simplest responsive HTML Page to embed responsive IFRAME is show below:
<!DOCTYPE html>
<html lang="en">
 <head>
	<meta charset="UTF-8"/>
	<meta name="viewport" content="width=device-width, initial-scale=1, minimum-scale=1, maximum-scale=1"/>

	<style type="text/css">
	<!--
	body {
     height: 100vh;
	}
	@-ms-viewport{
	  width: device-width;
	}
	//-->

	</style>
 </head>
 <body>
	<iframe
		width="100%" height="100%" border="0"
		allow="camera; microphone; fullscreen; speaker; display-capture"
		src="ADD-YOUR-MEETING-URL-HERE">
	</iframe>
 </body>
</html>
4.2 Embed in an Android App
Embedding in an Android App requires the use of the WebView class. To allow EnableX to access the camera, follow the steps given below:
- Override
WebChromeClient.onPermissionRequestmethod in theWebViewclass. - Add
?skipMediaPermissionPromptQuery String parameter to allow the camera access.
Read further to get helped issues with WebView:
4.3 Embed in an iOS App
WKWebView supports embedded pages that use WebRTC on iOS 14.5+. SFSafariViewController supports embedded pages that use WebRTC on iOS 14.3+. To support older iOS versions, follow the steps given below:
- Redirect to Mobile Safari.
- Use
SFSafariViewControllerto open a website, comprising an IFRAME with specifiedsrcattribute in the Meeting URL, along with the custom user interface.
How to Media Permission: You need to add both NSMicrophoneUsageDescription and NSCameraUsageDescription keys to the app’s Info.plist
4.4 Embed in a React Native App
Follow detailed instruction here to integrate Low Code Embed with your React Native App.
4.5 Embed in a Flutter App
Follow detailed instruction here to integrate Low Code Embed with your Flutter App.
Congratulations! You have successfully integrated Video Calling into your application/browser. Now you can configure it further by including Add-On Video Services such as Recording, Room Setting, and Notifications.
5. Create Meeting Room Using Rest API
Video Embed URL has embedded Room-ID for Virtual Sessions. Your Application’s business logic and workflow might need many rooms to meet your requirement. Know how you create more rooms of different kind and how to embed them into your EMBED URL to get connected to different Virtual Rooms.
6. Customize with Query String Parameters
The Meeting URLs can be further qualified with Query String Parameters, to pass the feature list and other data to the Video Meetings as per the requirement.
7. Communicating with Video Embed
EnableX provides a communication channel between IFRAME Embed and Parent Window. This will enable Application Developers with a tool of engagement with Embed in-session to create UI/UX. This will help them to execute predefined action-execution in Embed from Parent and get notified about status and events happening in Embed.
8. Extend Video Embed
EnableX includes a framework to extend Low Code functionality. This framework allows you to code yourself either using third party library or EnableX SDKs, Tools to introduce new feature or update.
9. Workflow Automation
Workflow Automation is the key to deploy Business Application. To achieve this, there are many add-on services you need to use as per your business requirement.